
Scalp Micropigmentation Before & After Images
These scalp micropigmentation before and after images show real Foli Sim clients across three kinds of work: the clean-shaven buzz-cut look, added density for thinning hair, and camouflage of scalp scarring. Reading them properly means looking past the headline transformation at hairline shape, how the pigment blends into remaining hair, and how each result holds up at normal viewing distance.
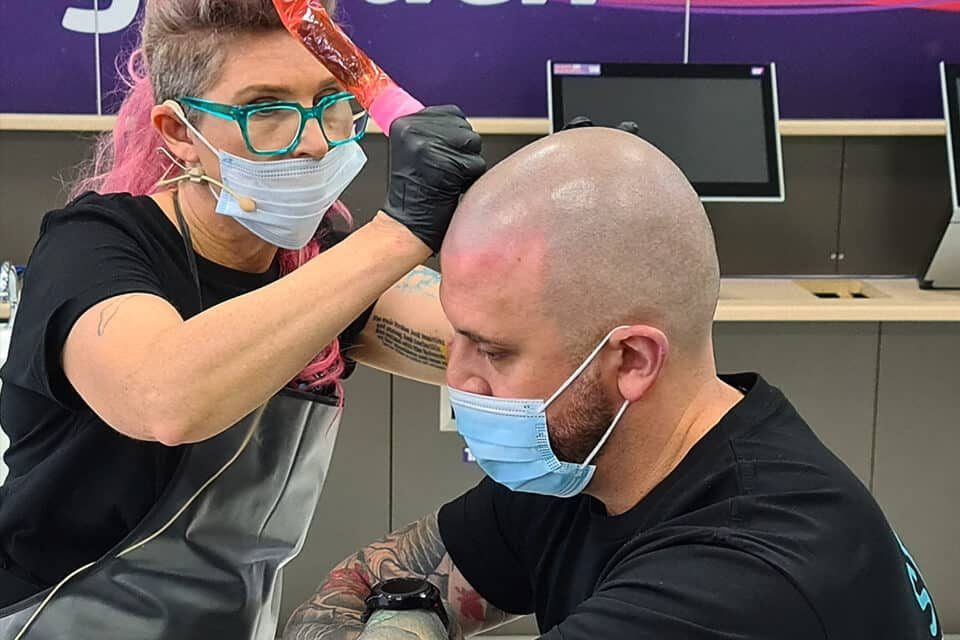
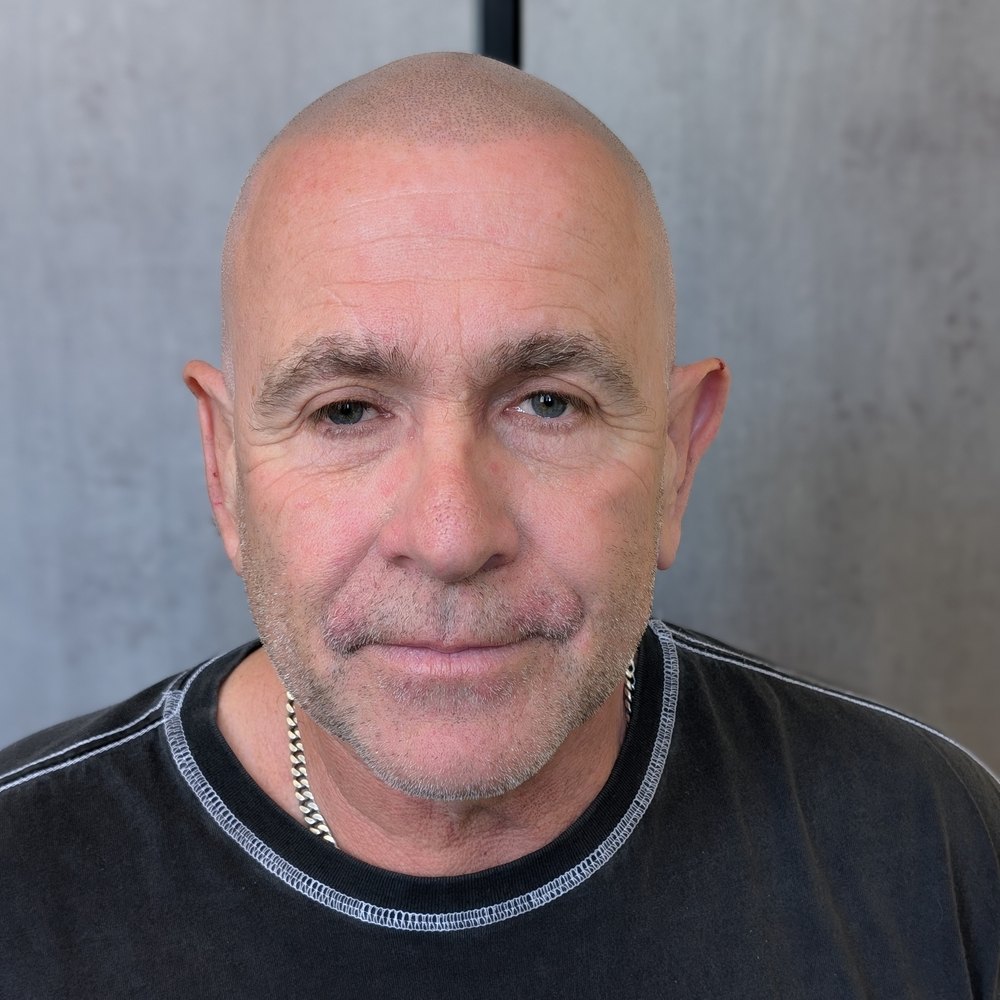
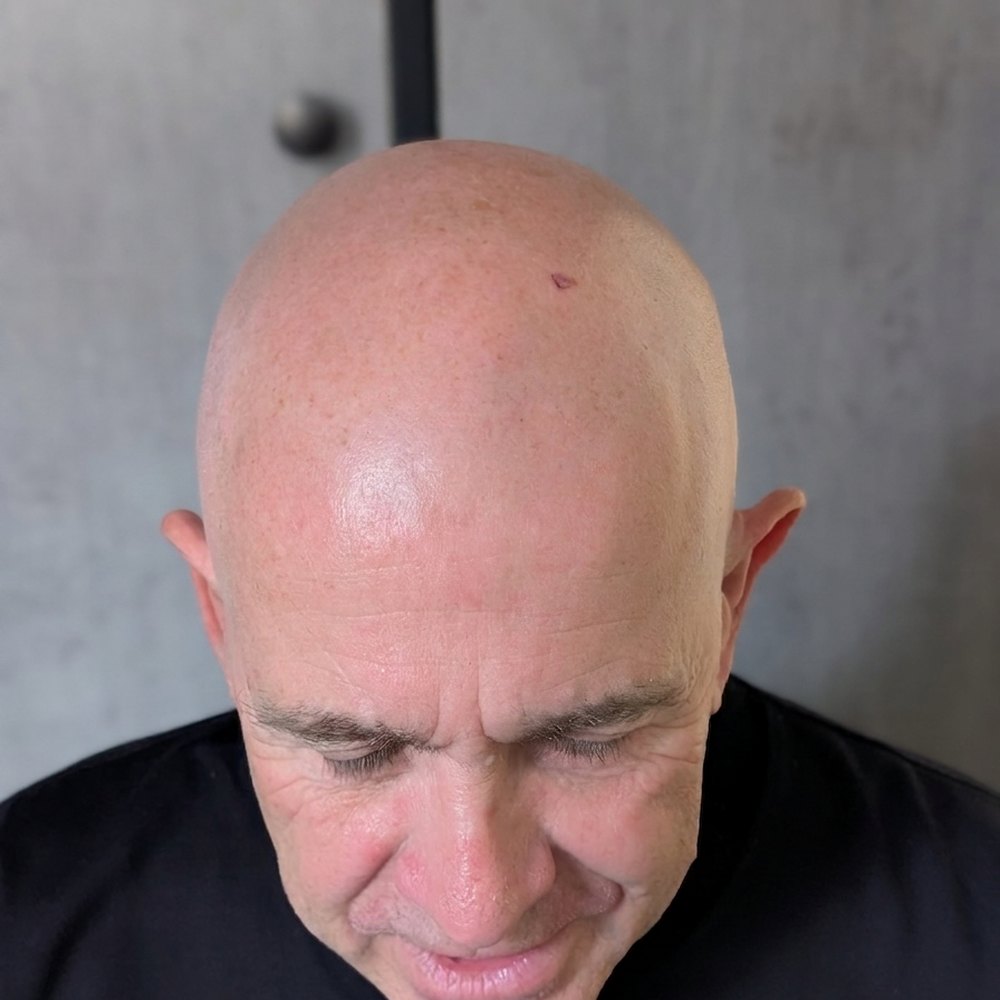
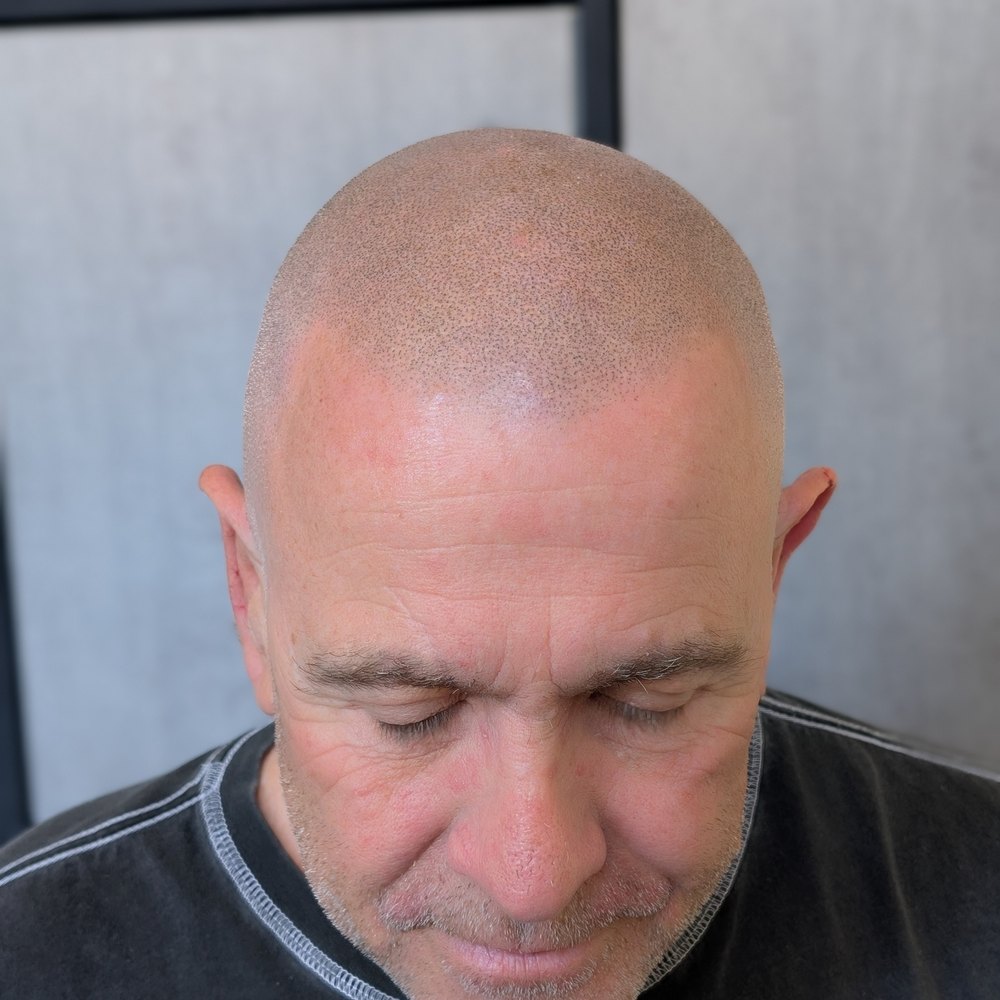
SMP for Buzz-Cut Before and After
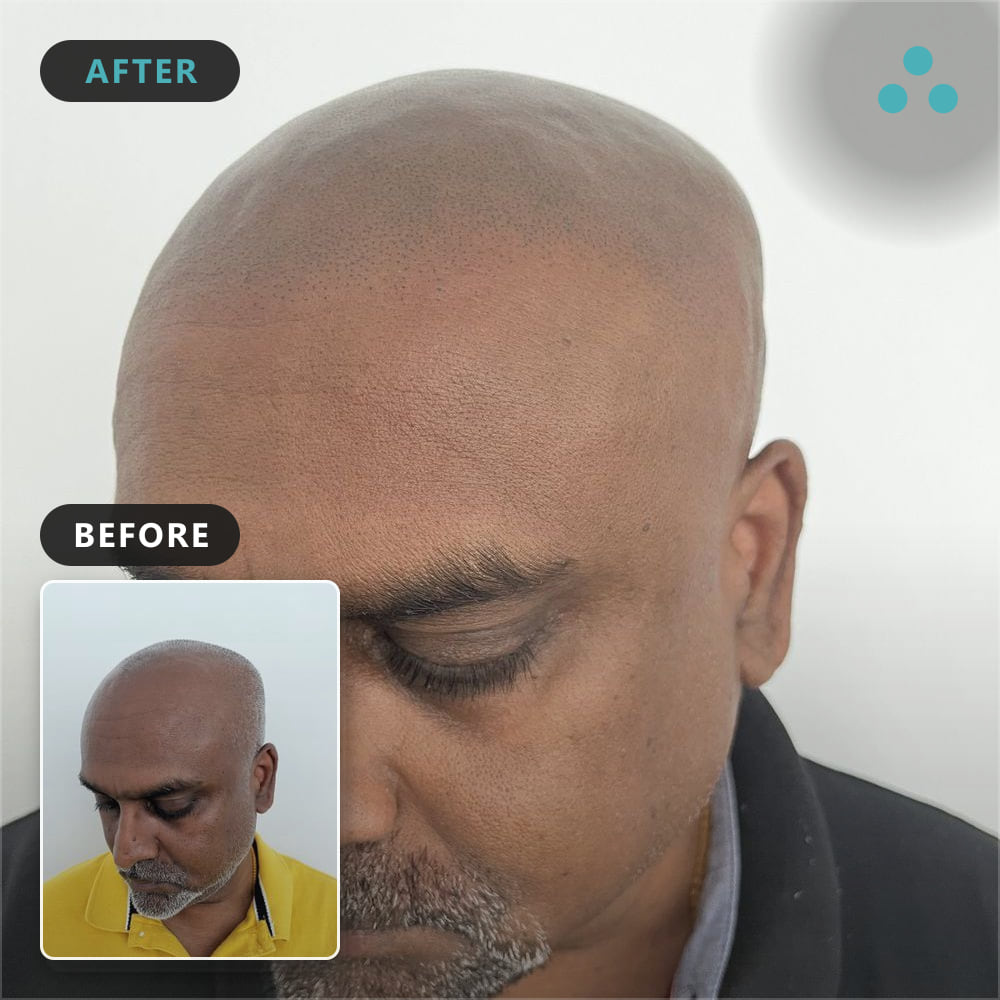
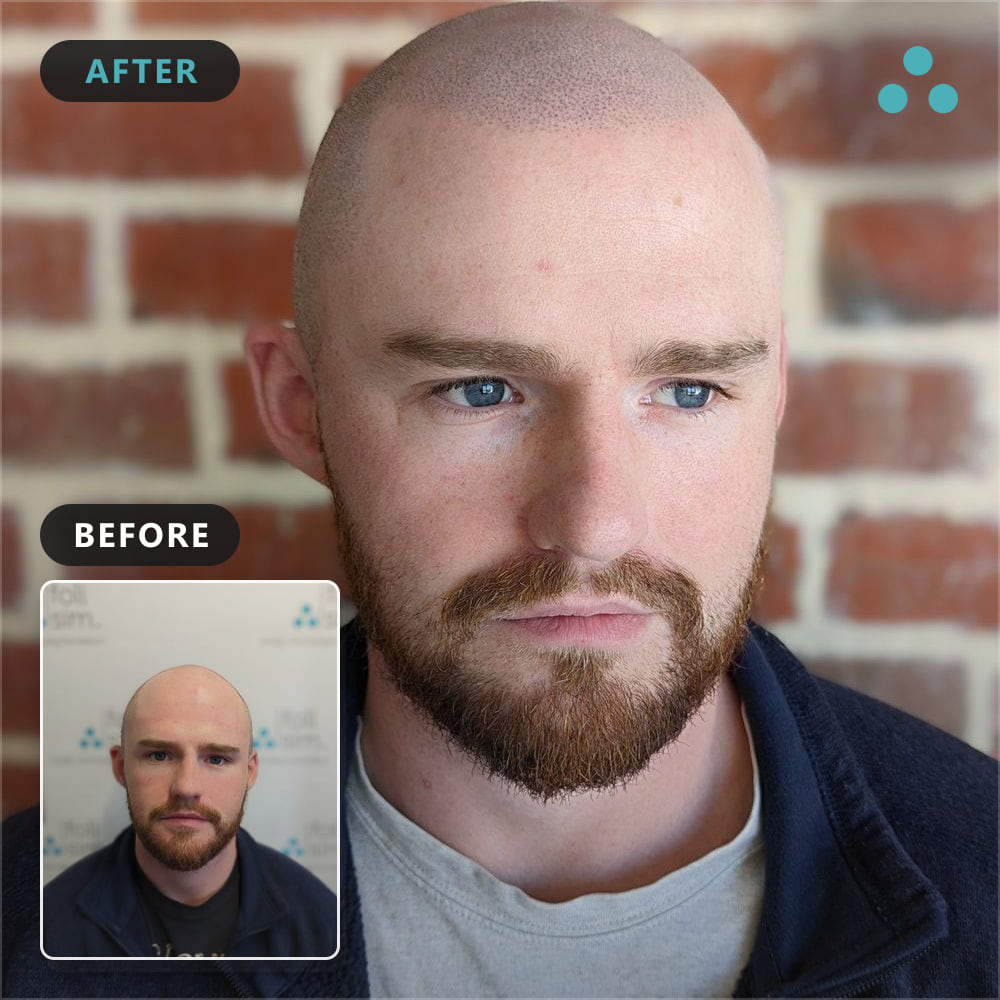
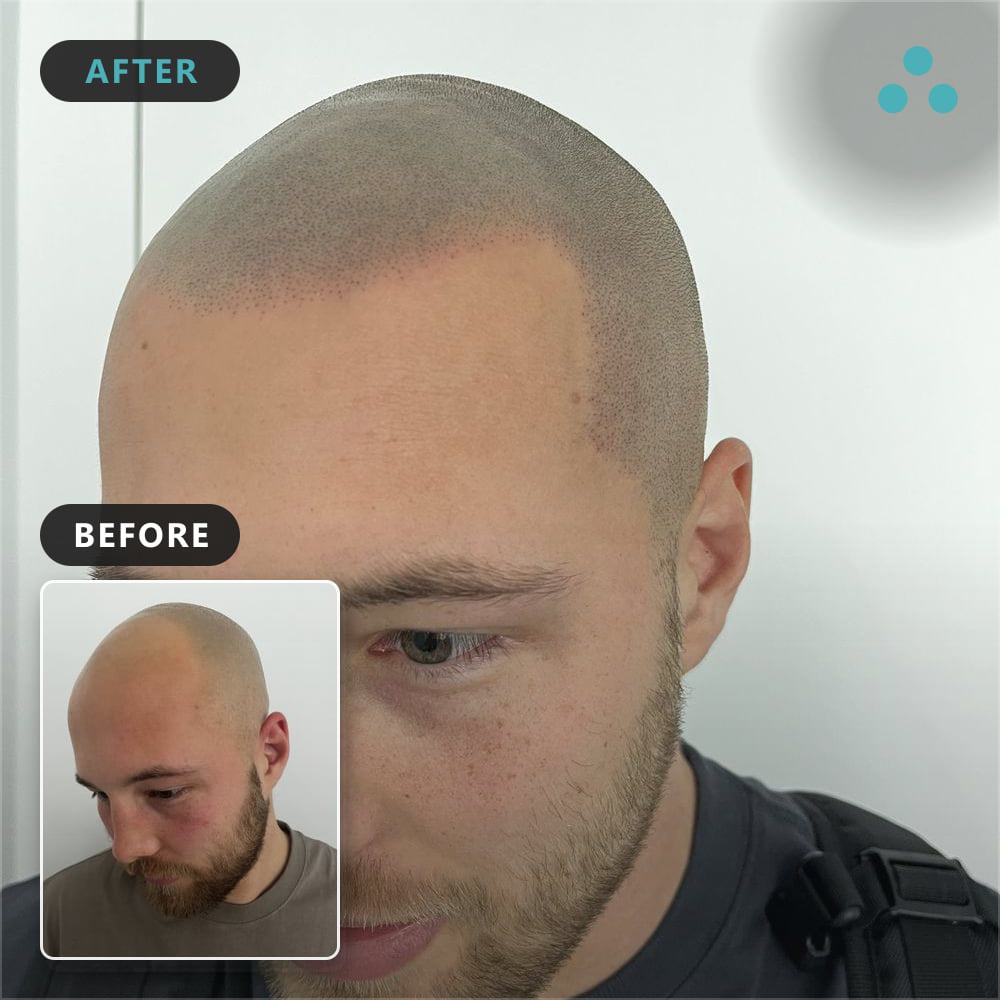
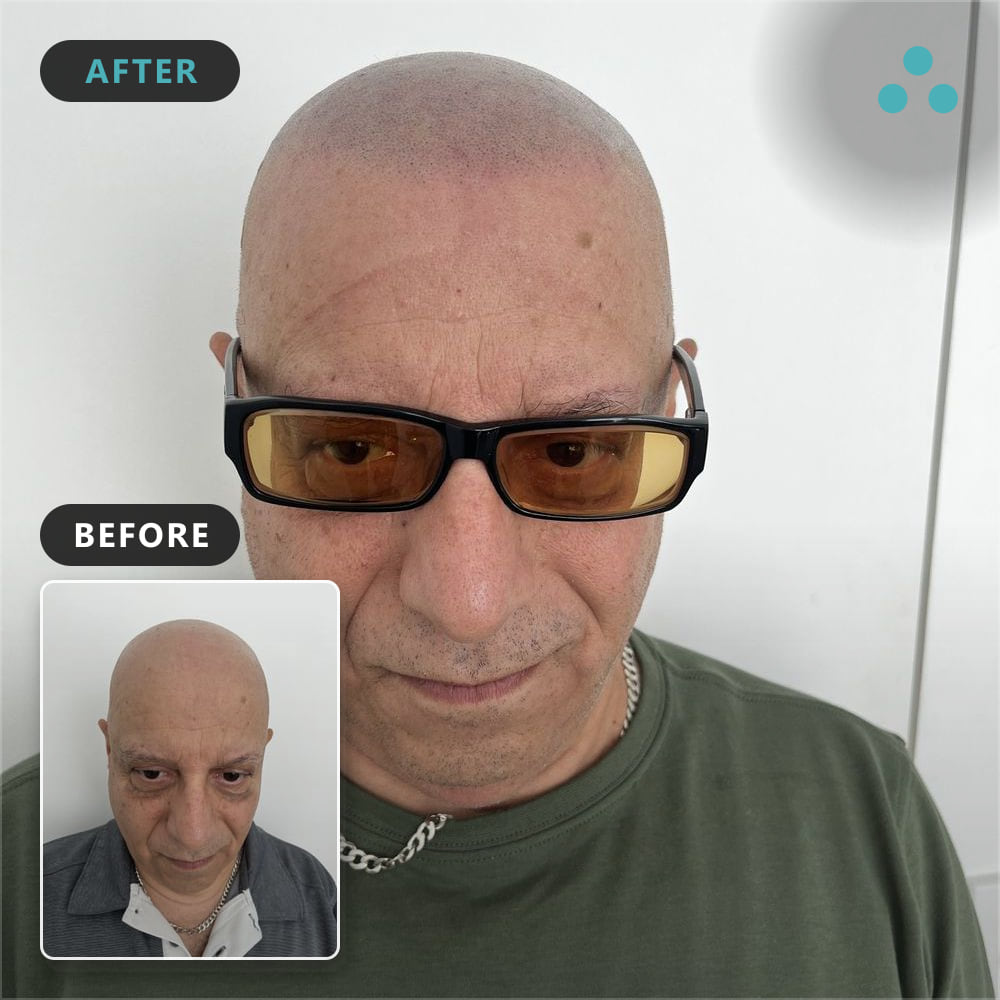
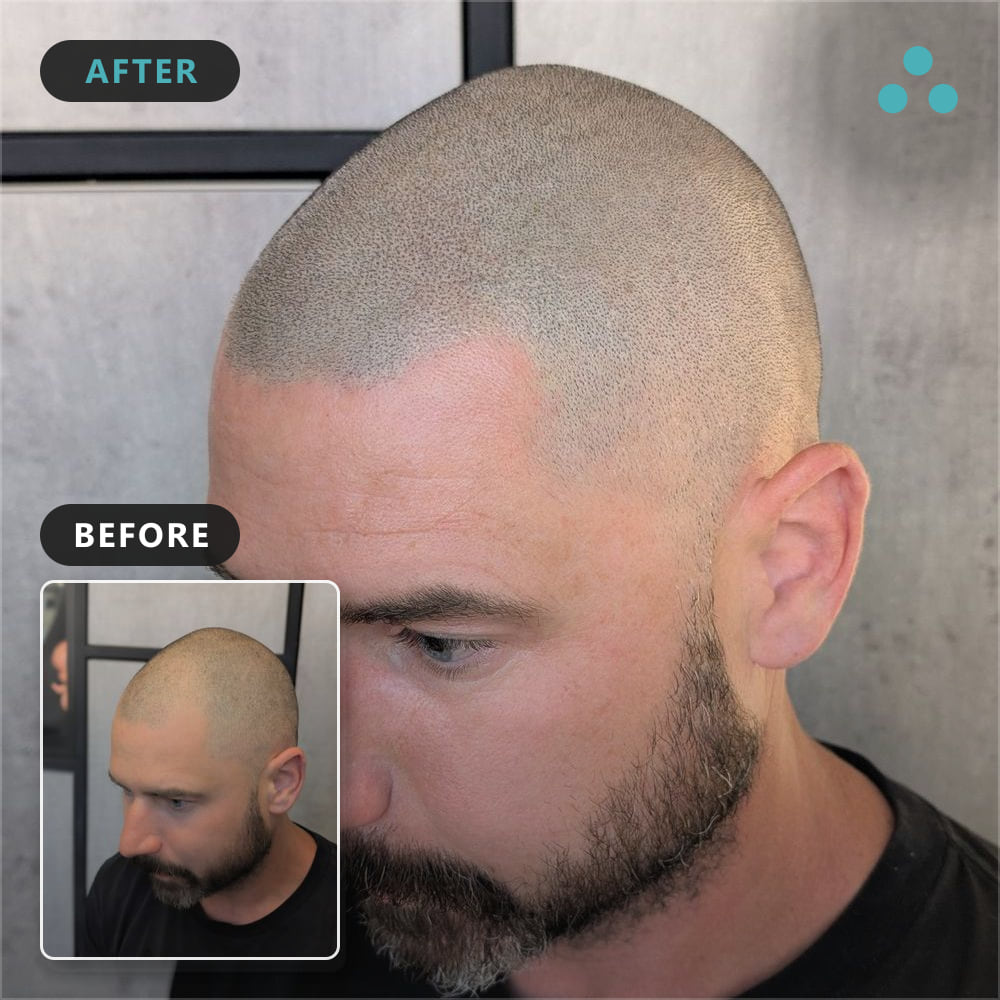
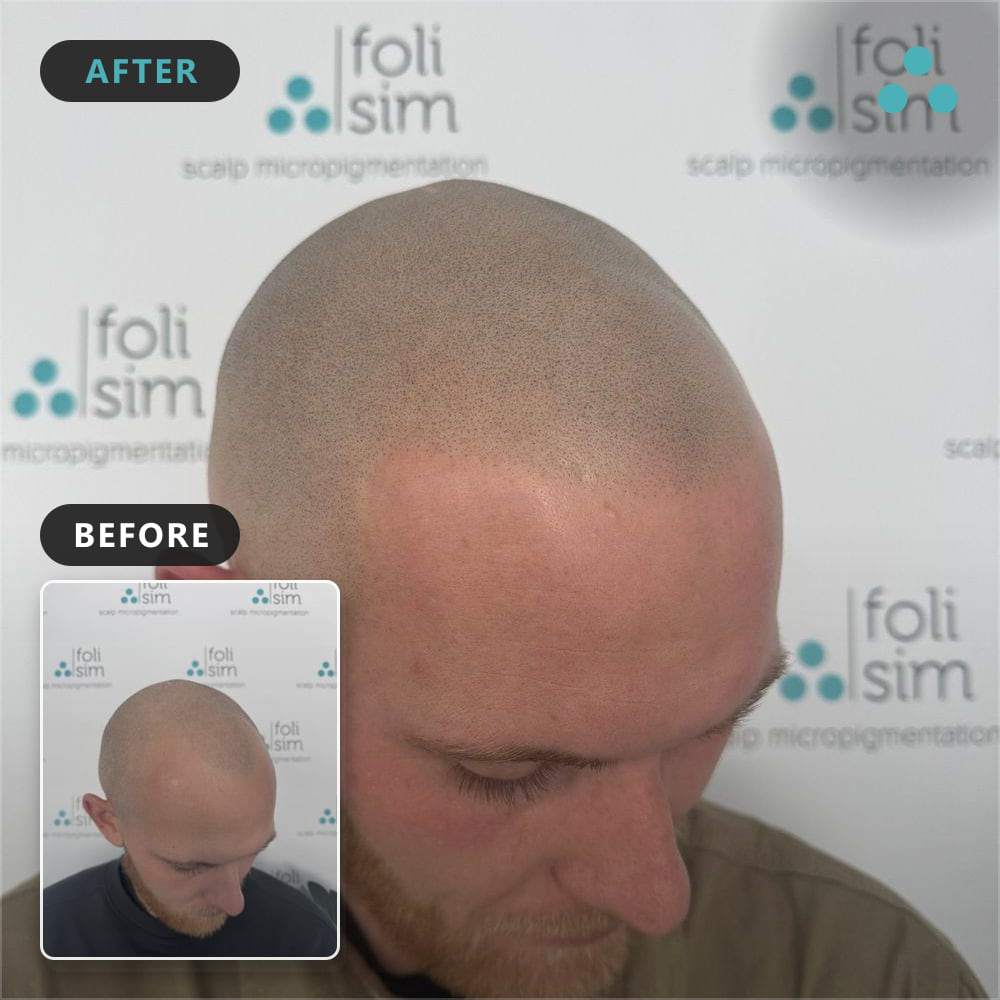
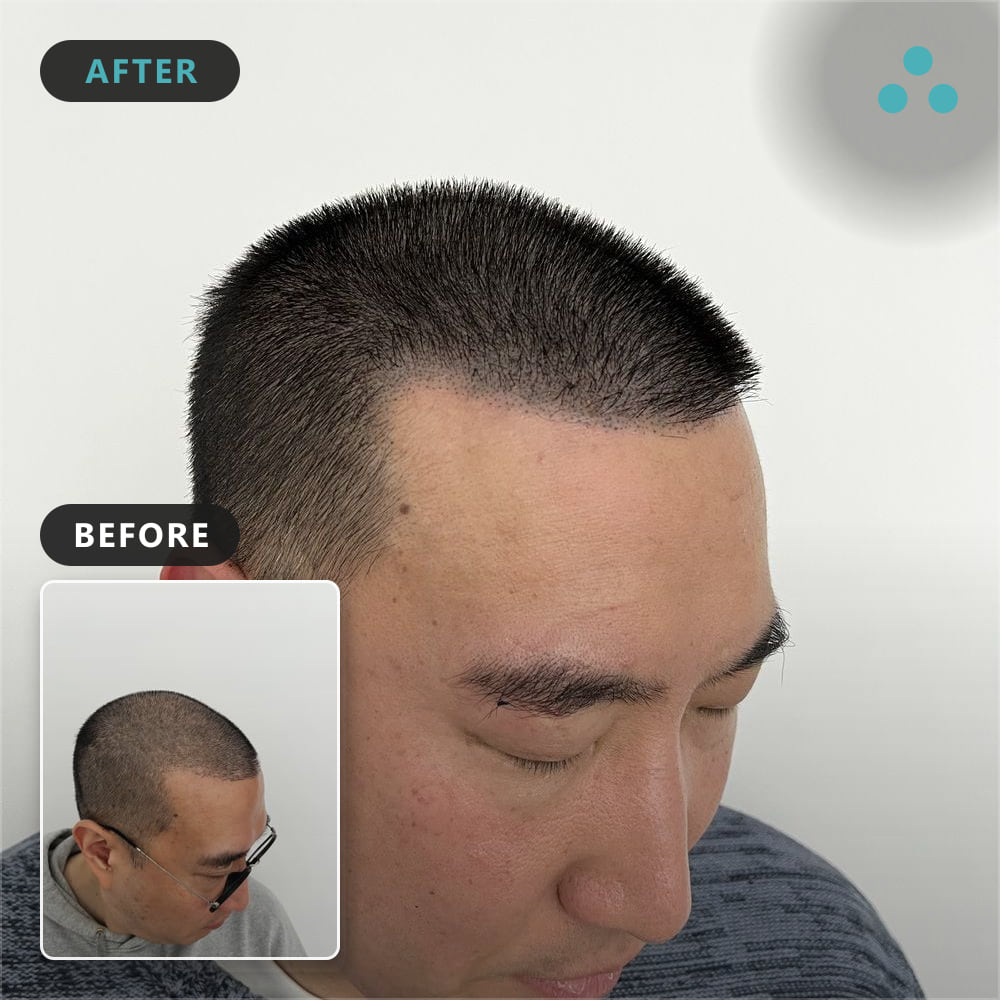
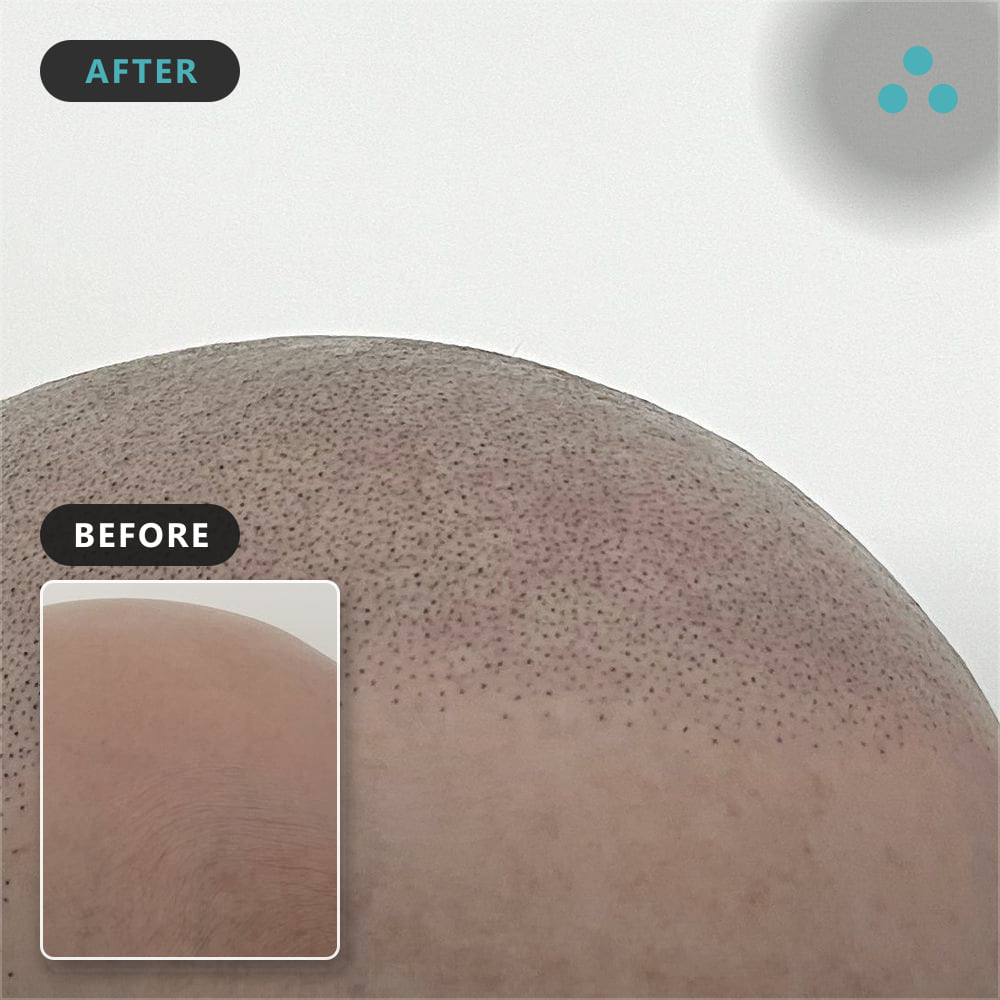
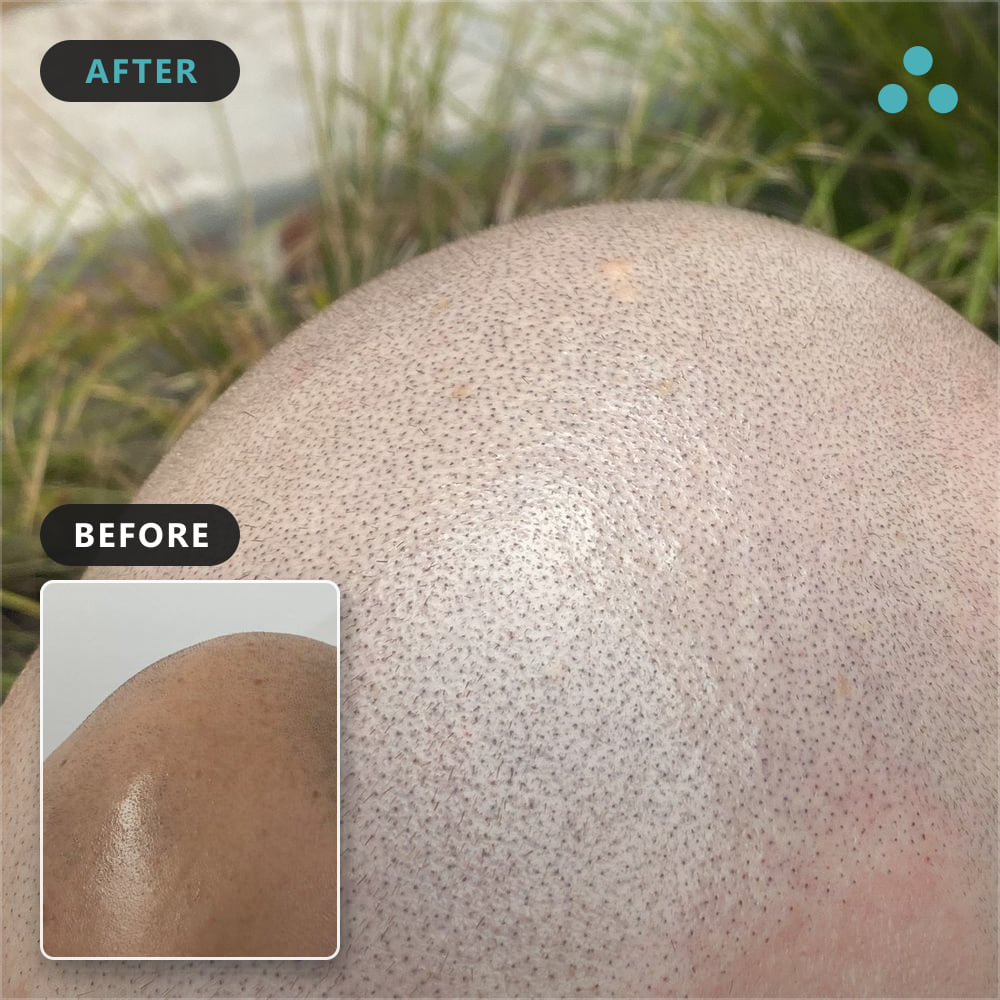
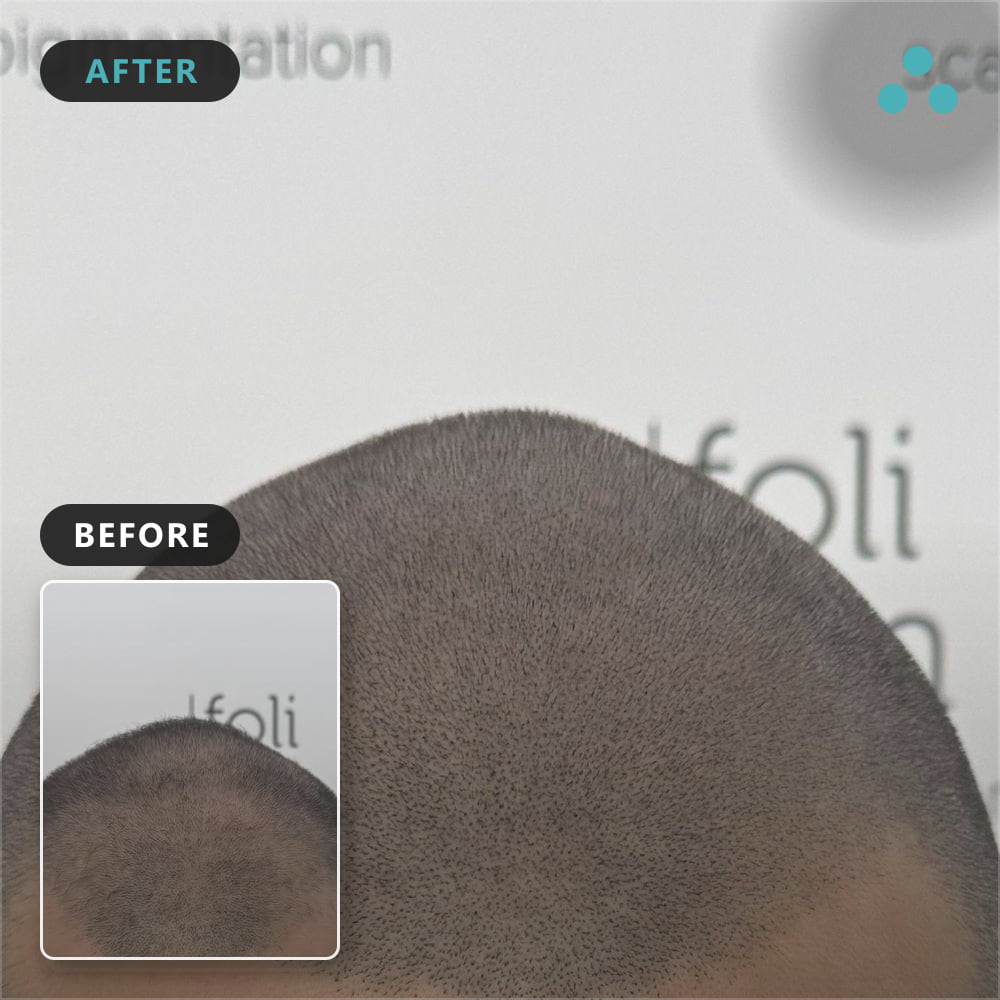
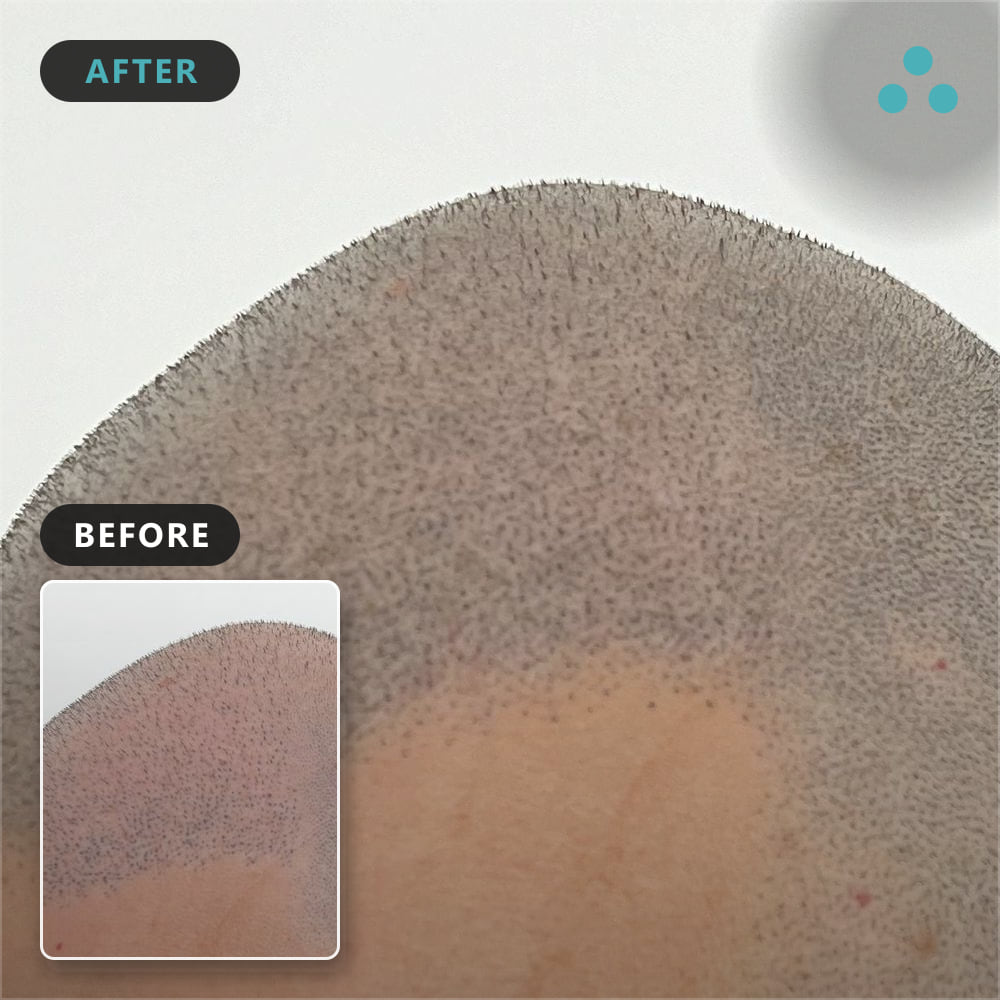
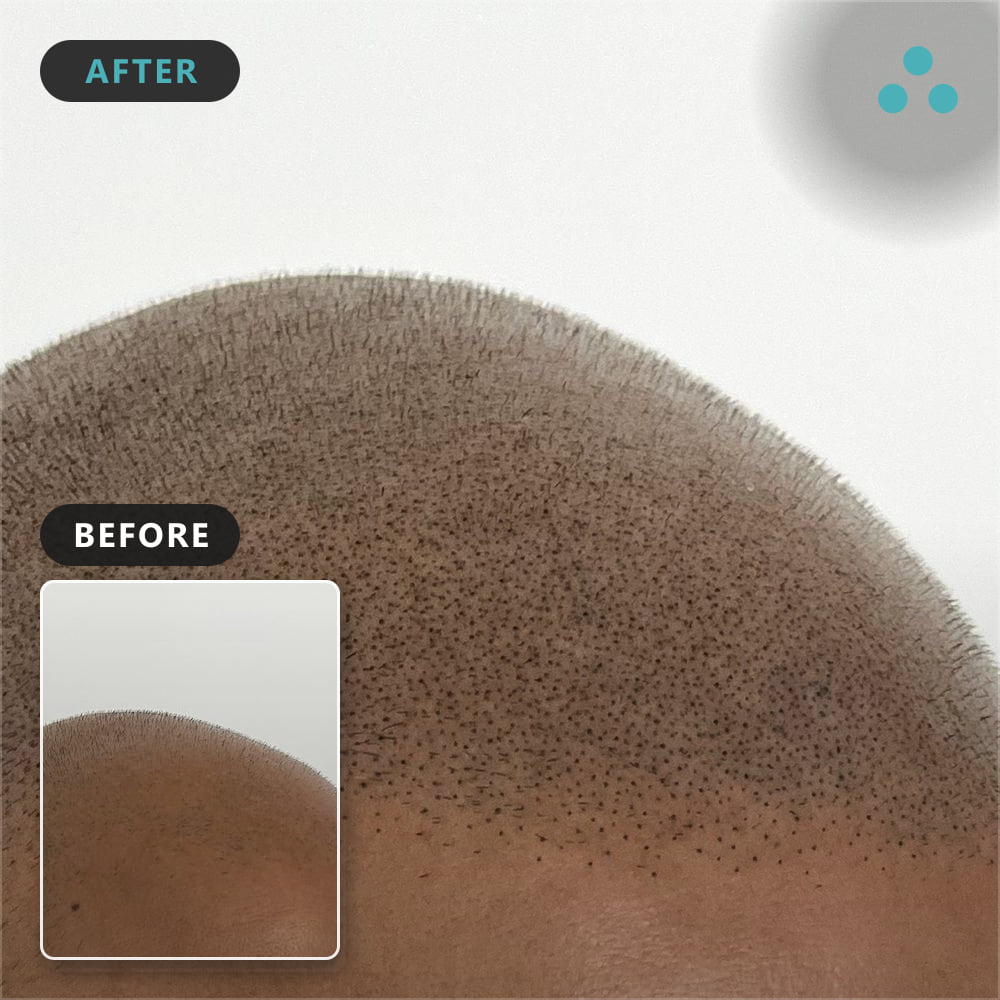
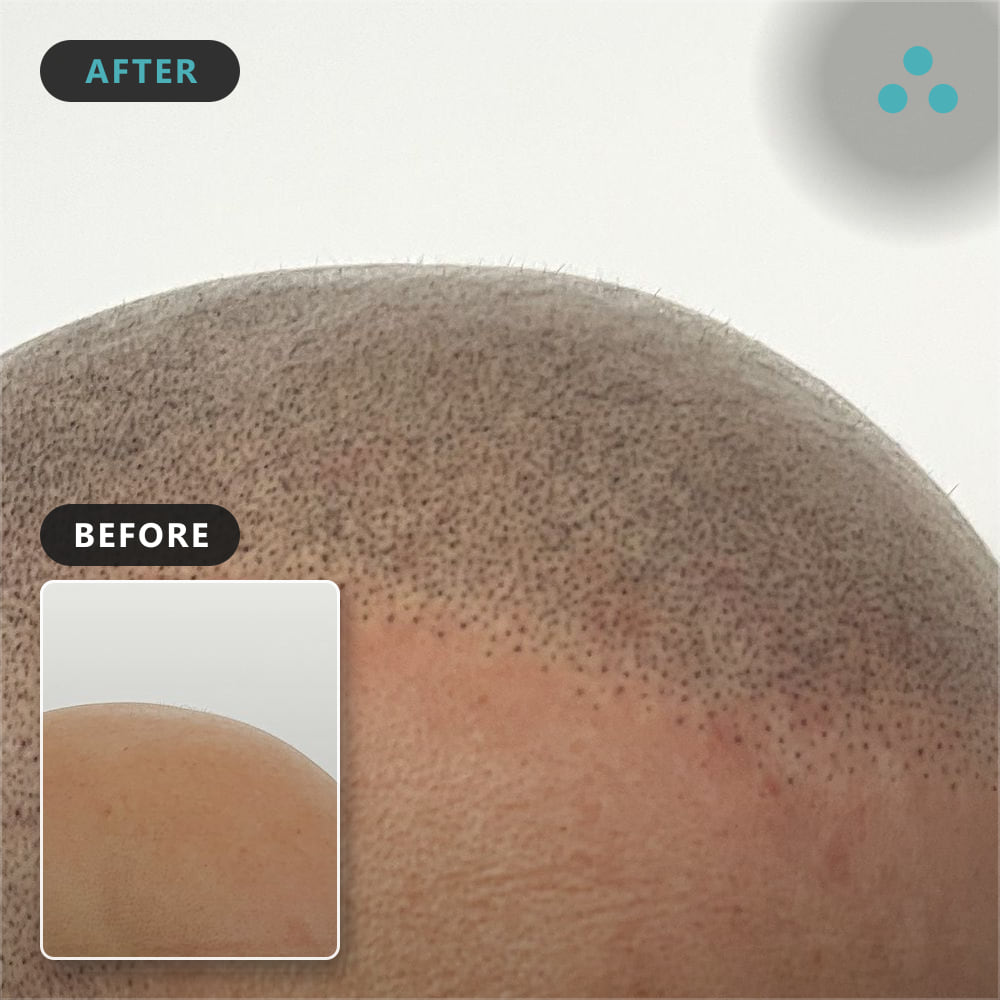
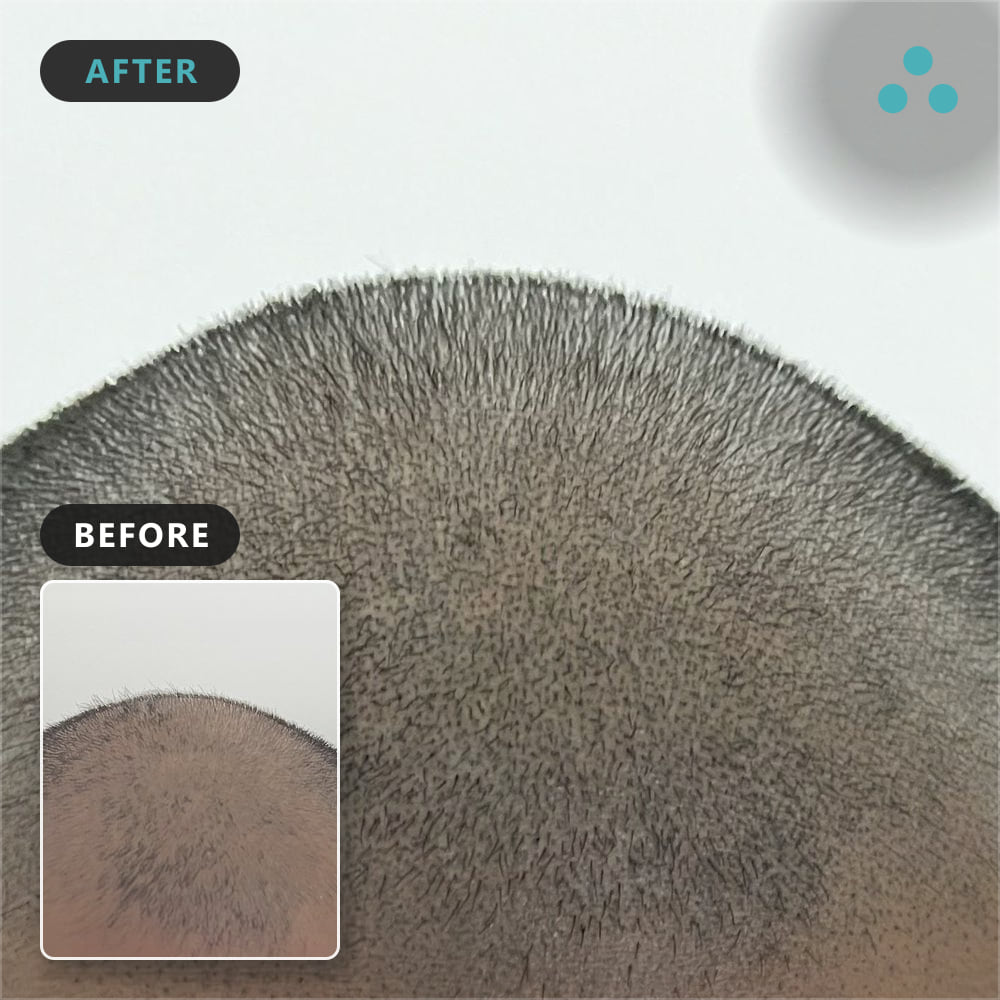
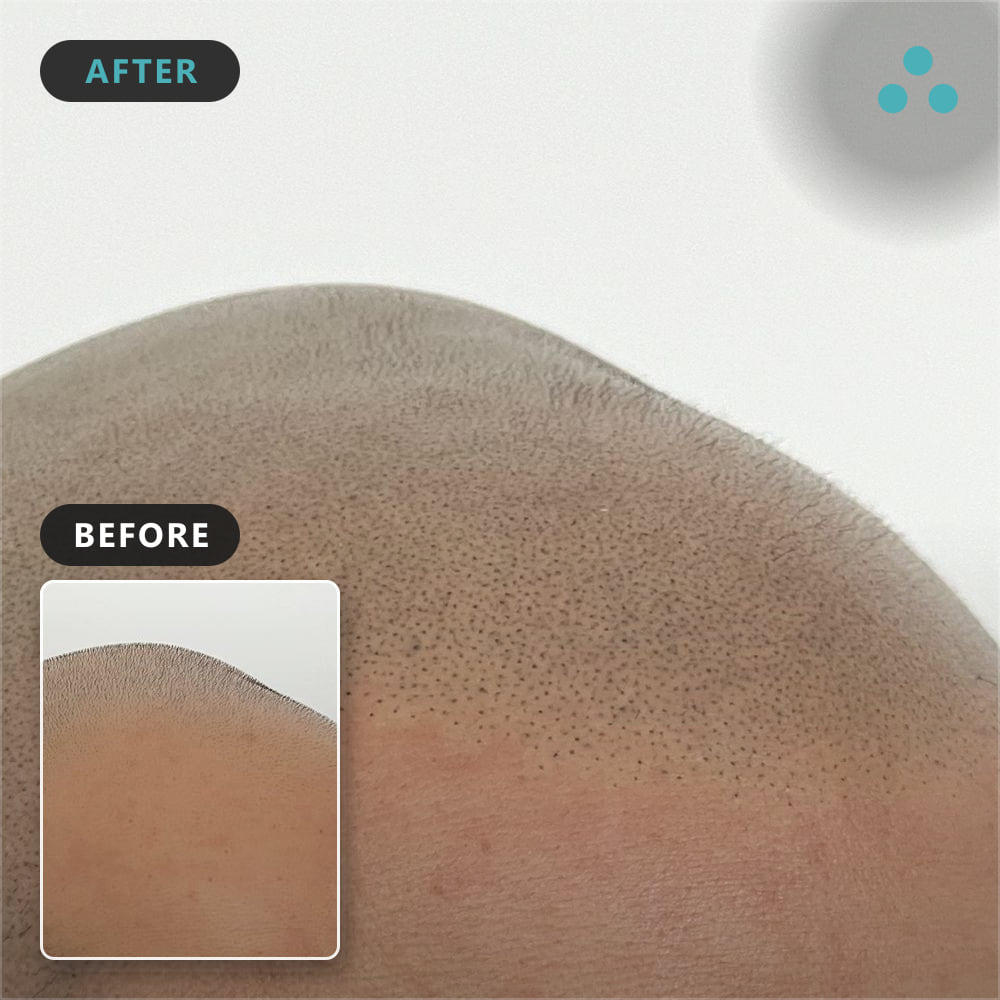
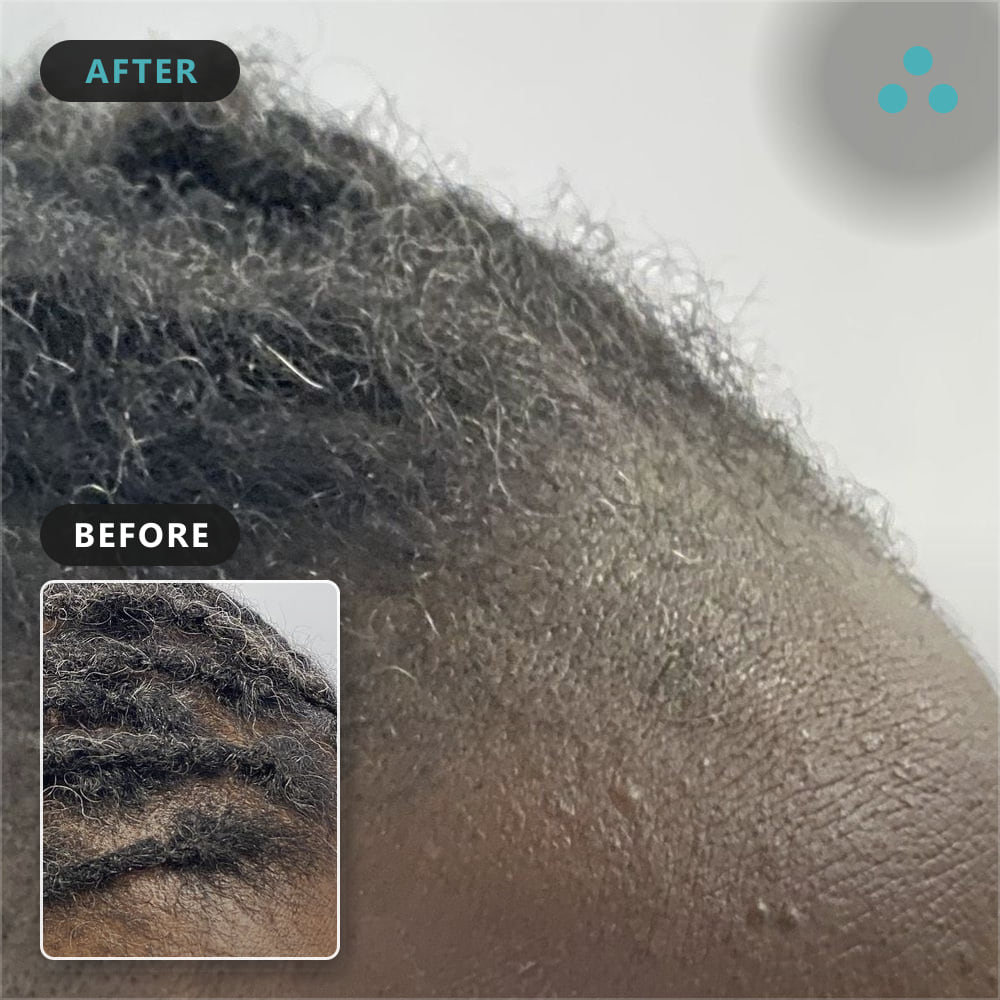
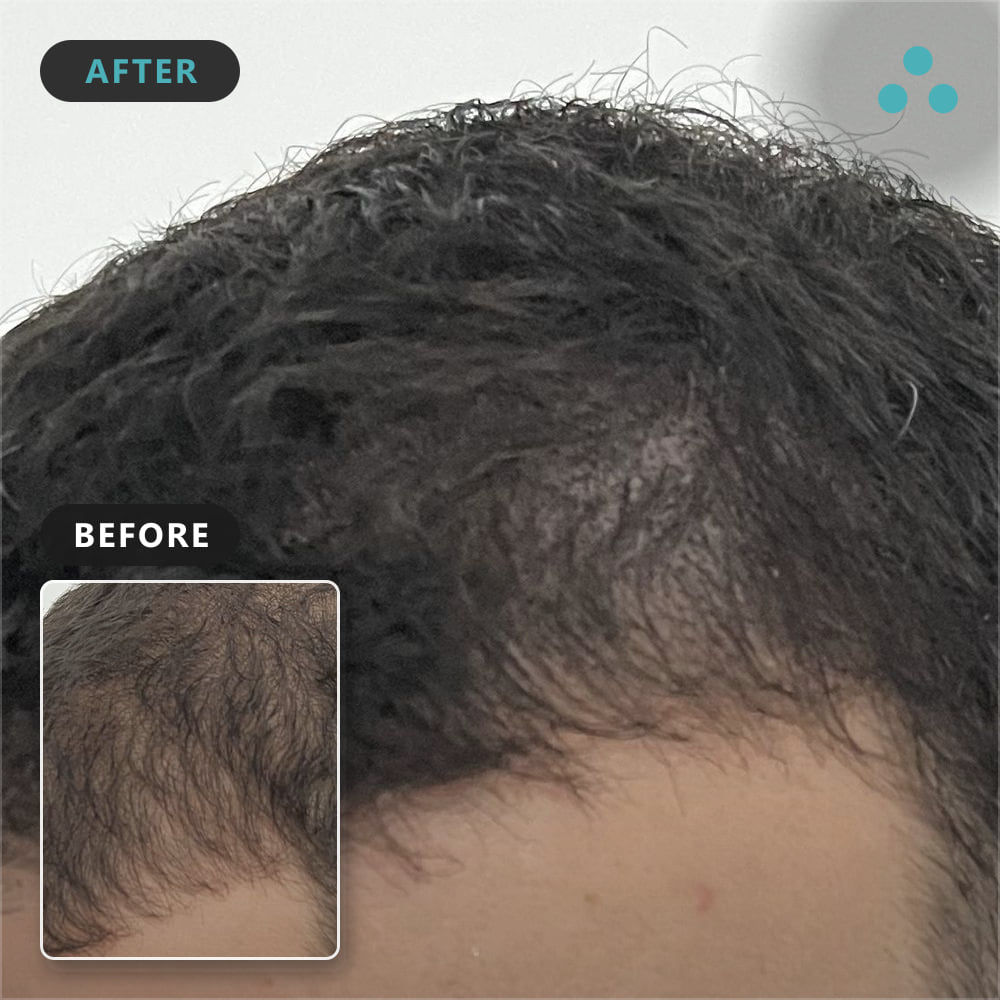
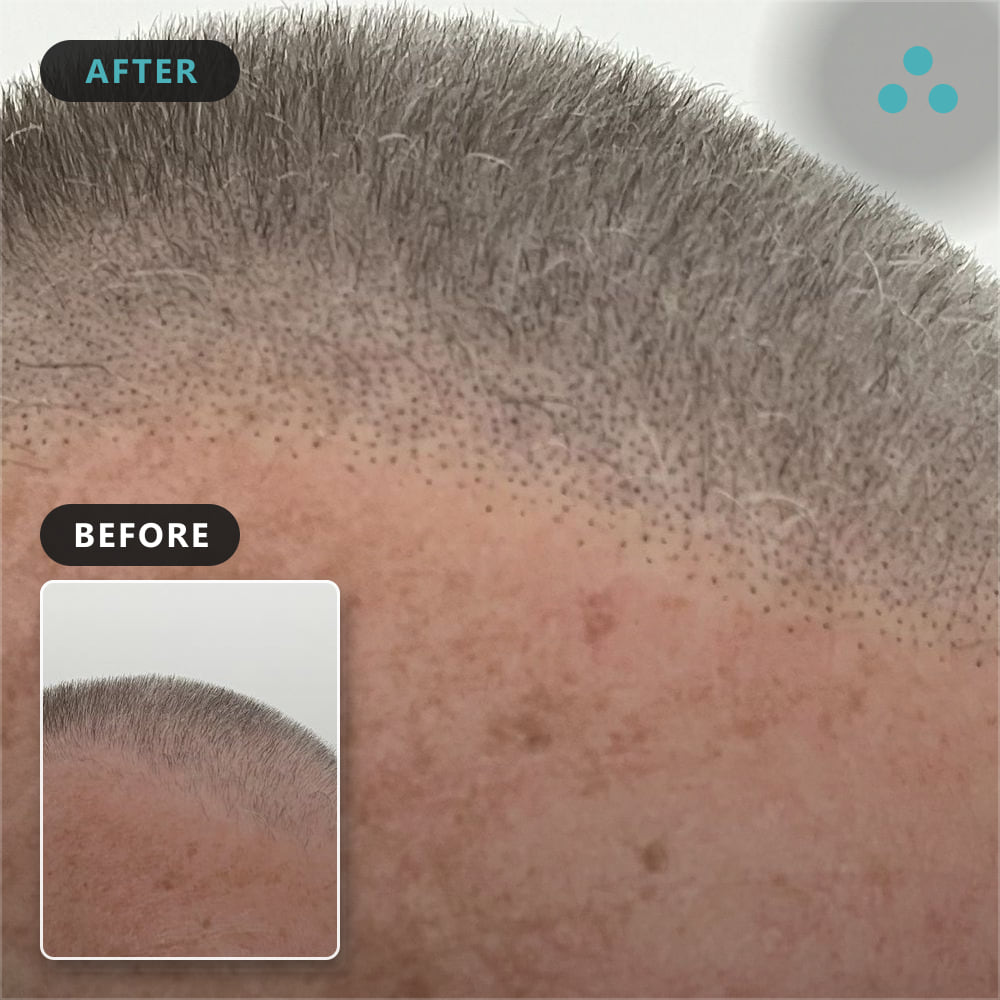
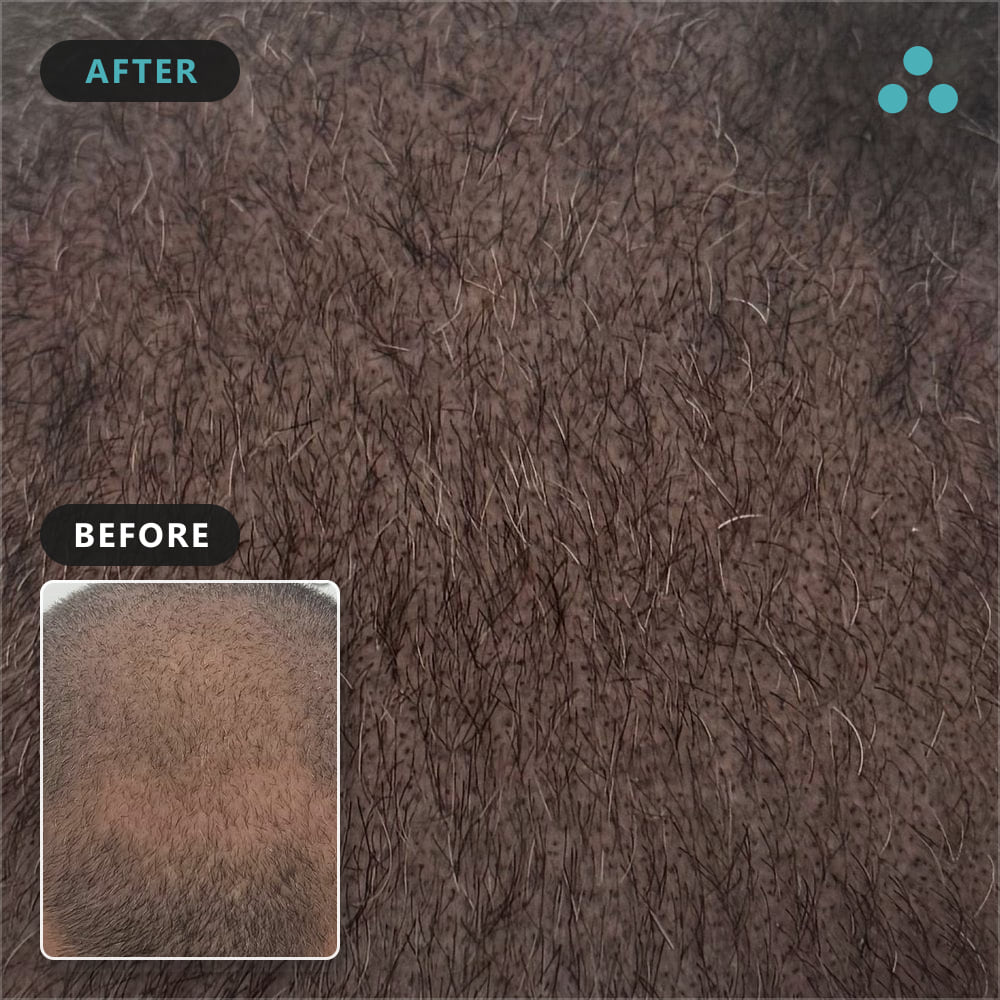
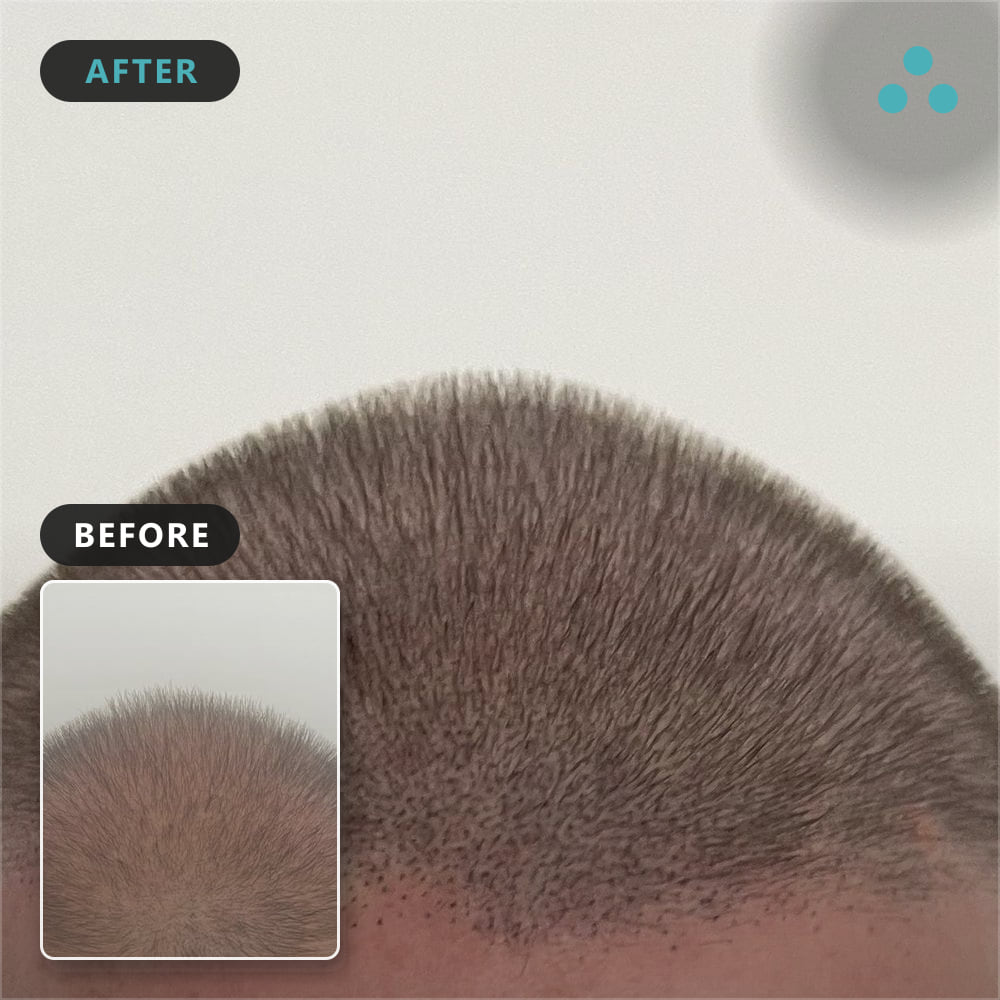
The Foli Sim SMP / Hair Tattoo method can create an undetectable illusion of an all over clean-shaven / buzz-cut look, perfect for combating thinned out, receding hairlines, or for those suffering with various types of alopecia. This solution can help you to regain the confidence lost with hair loss.
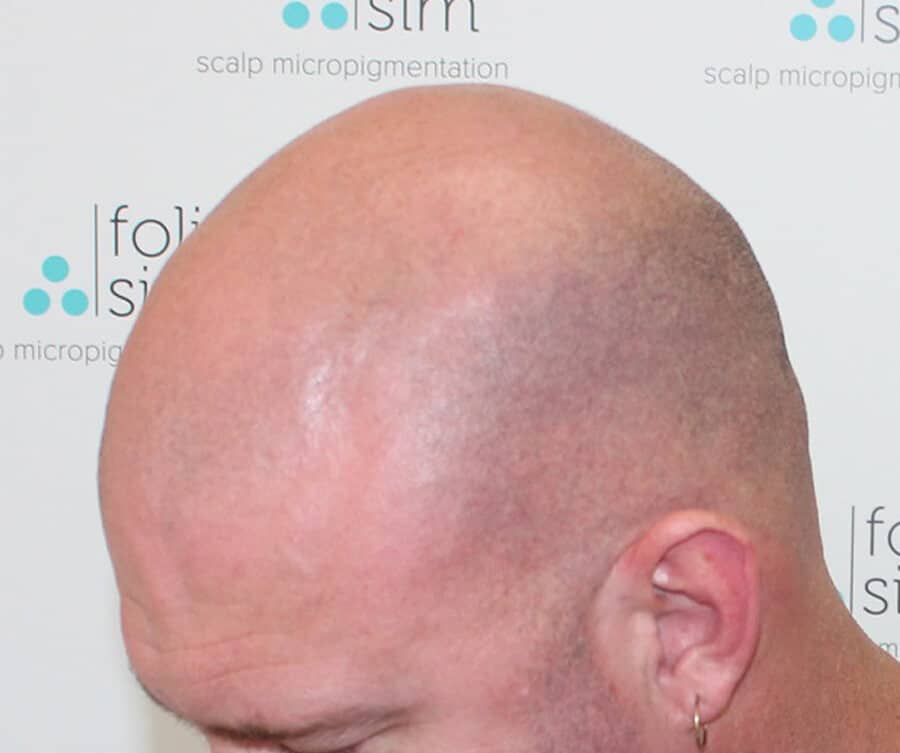
Before
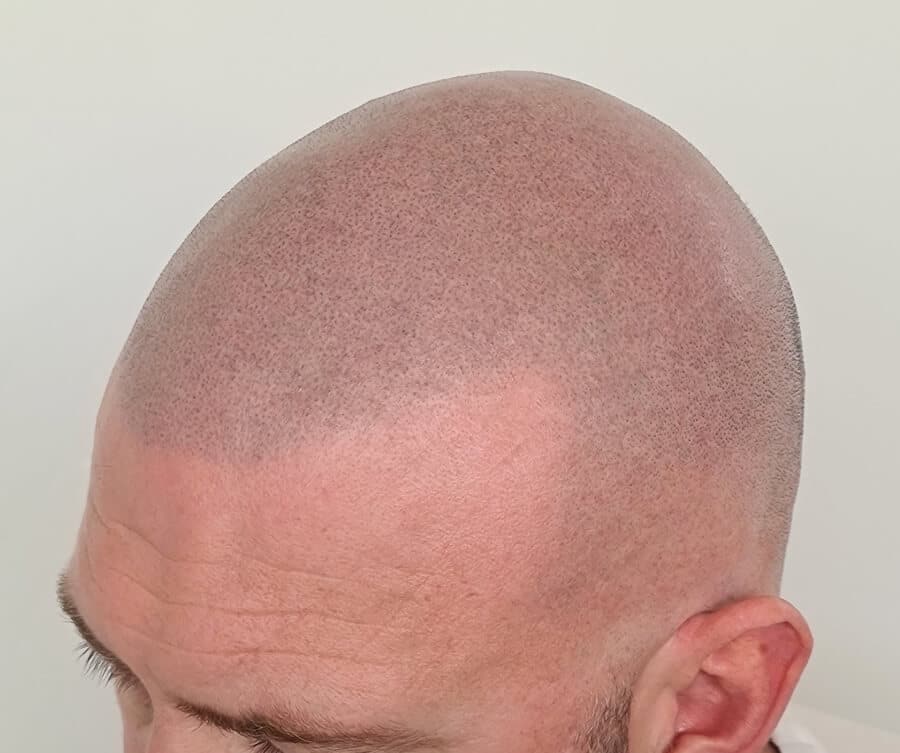
After
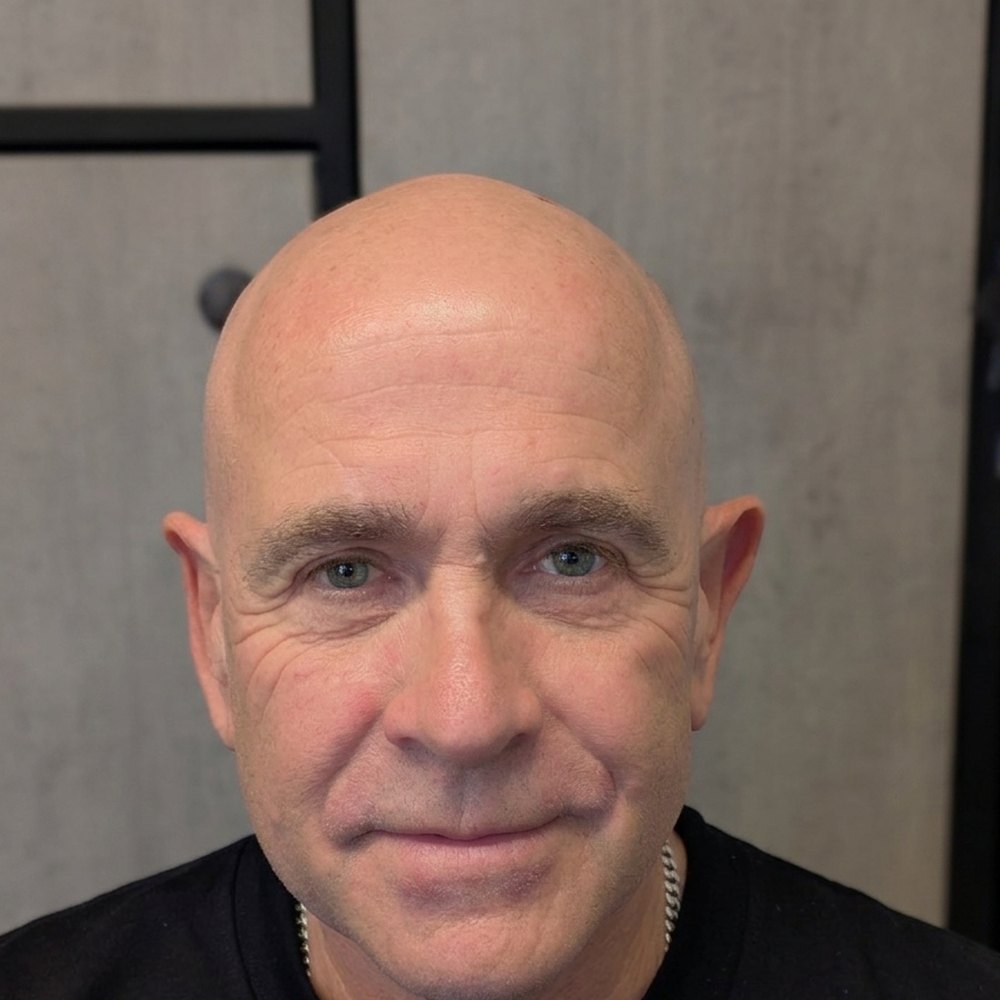
Before
After
Before
After
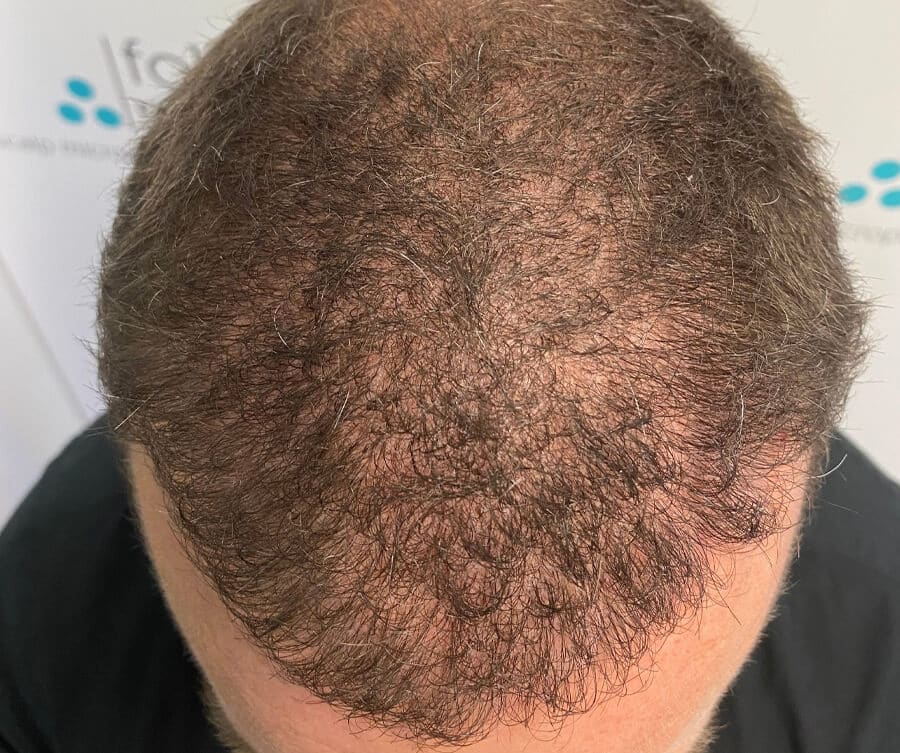
SMP for Thinning Hair Before and After
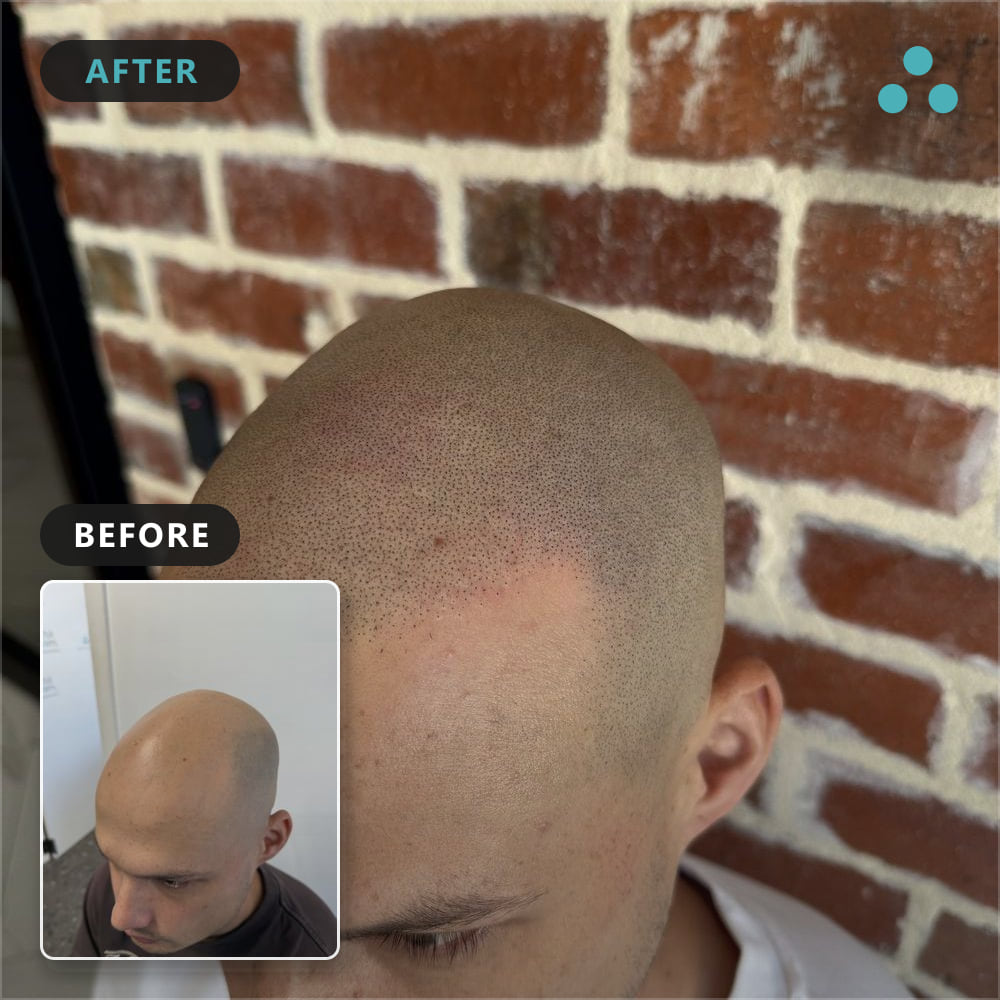
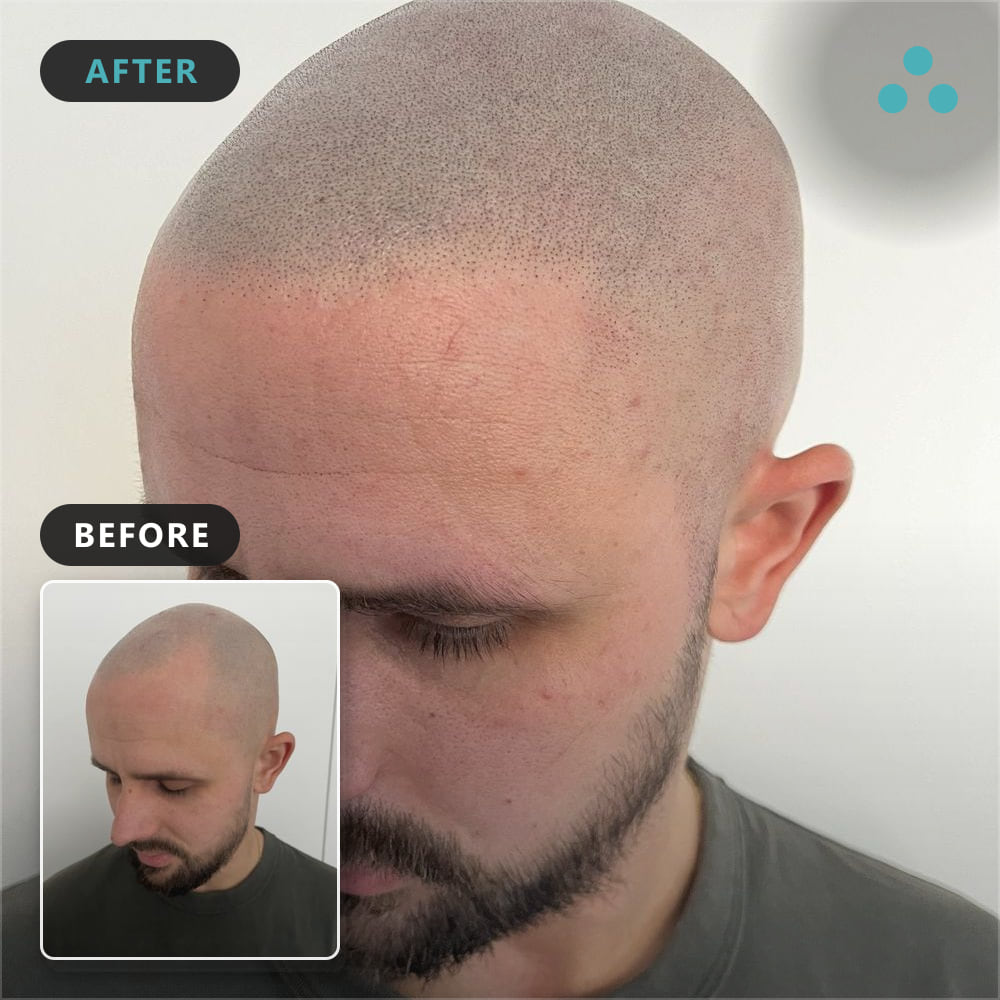
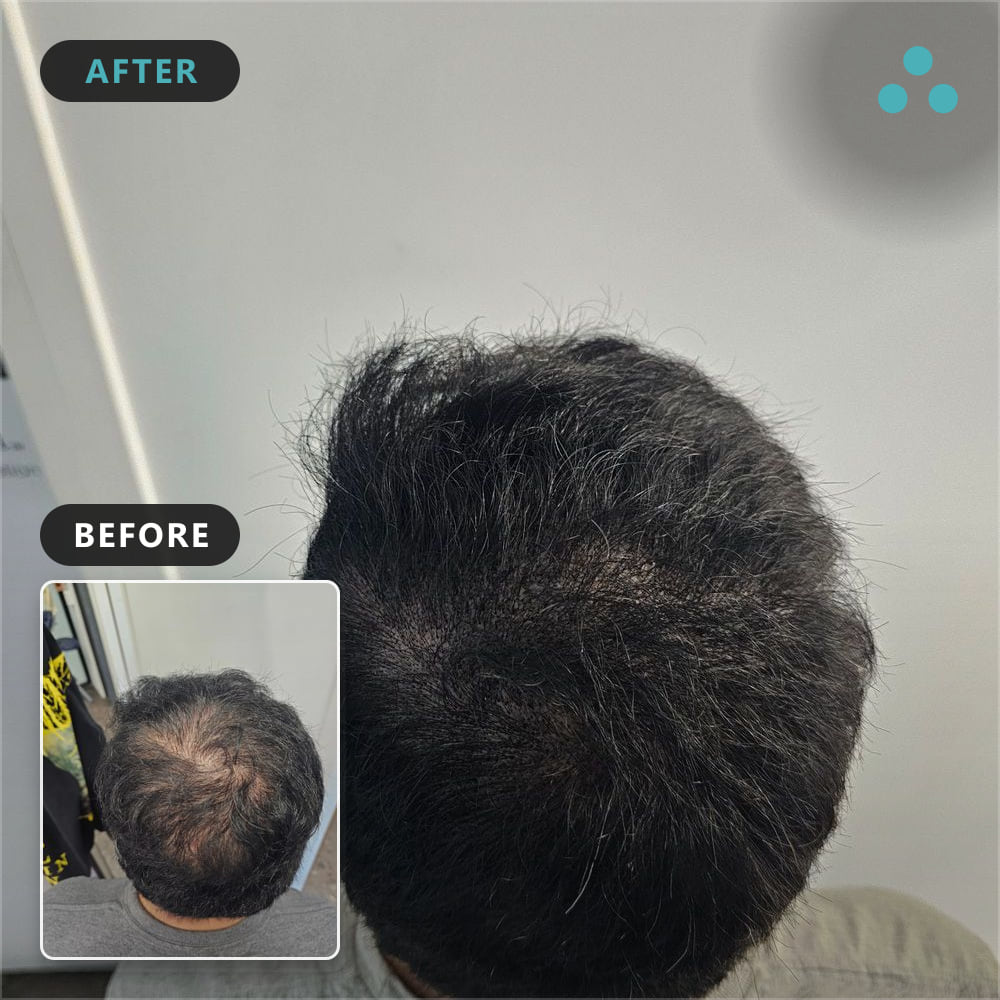
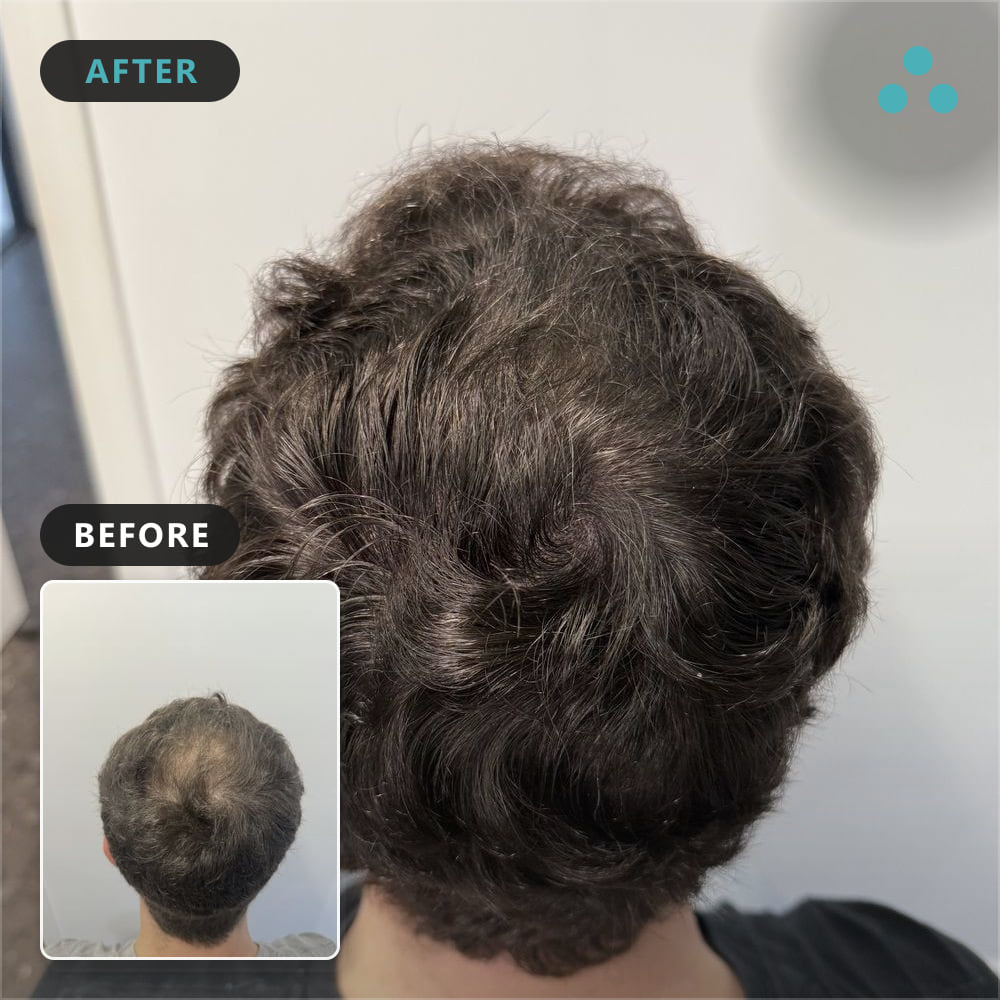
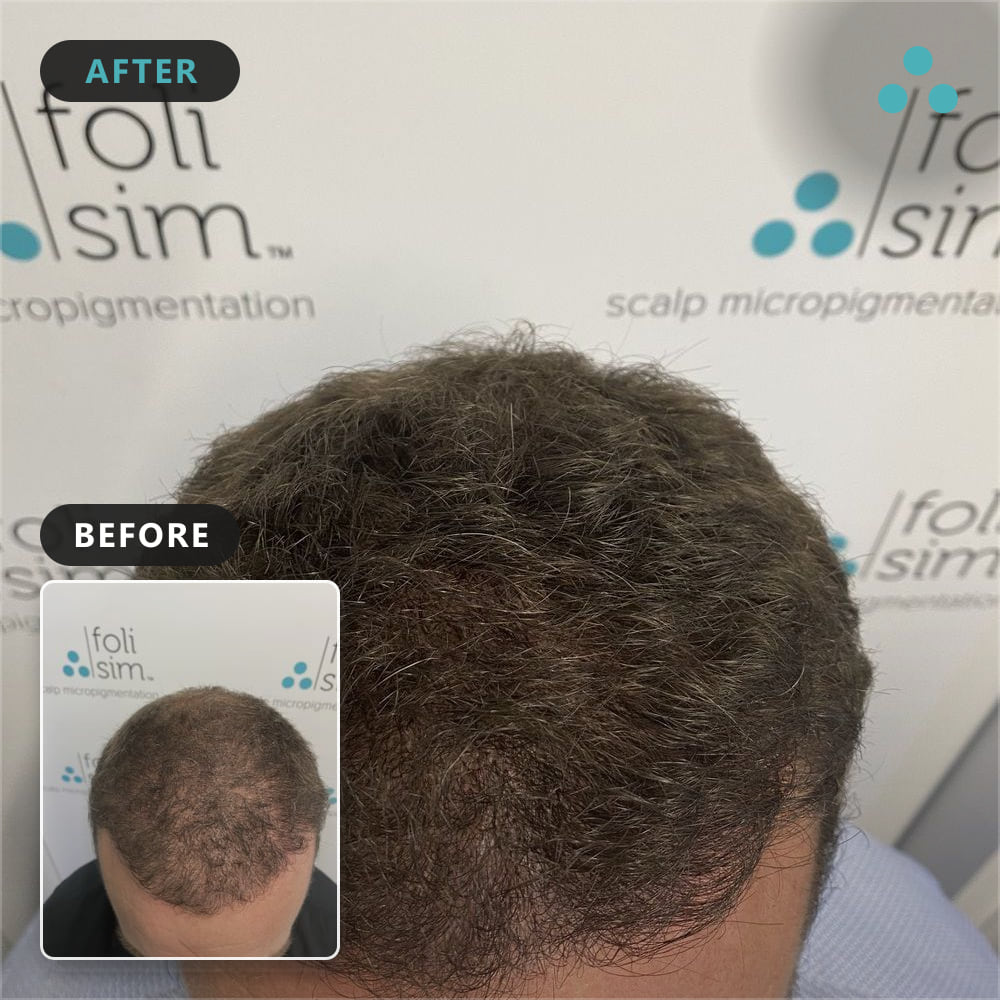
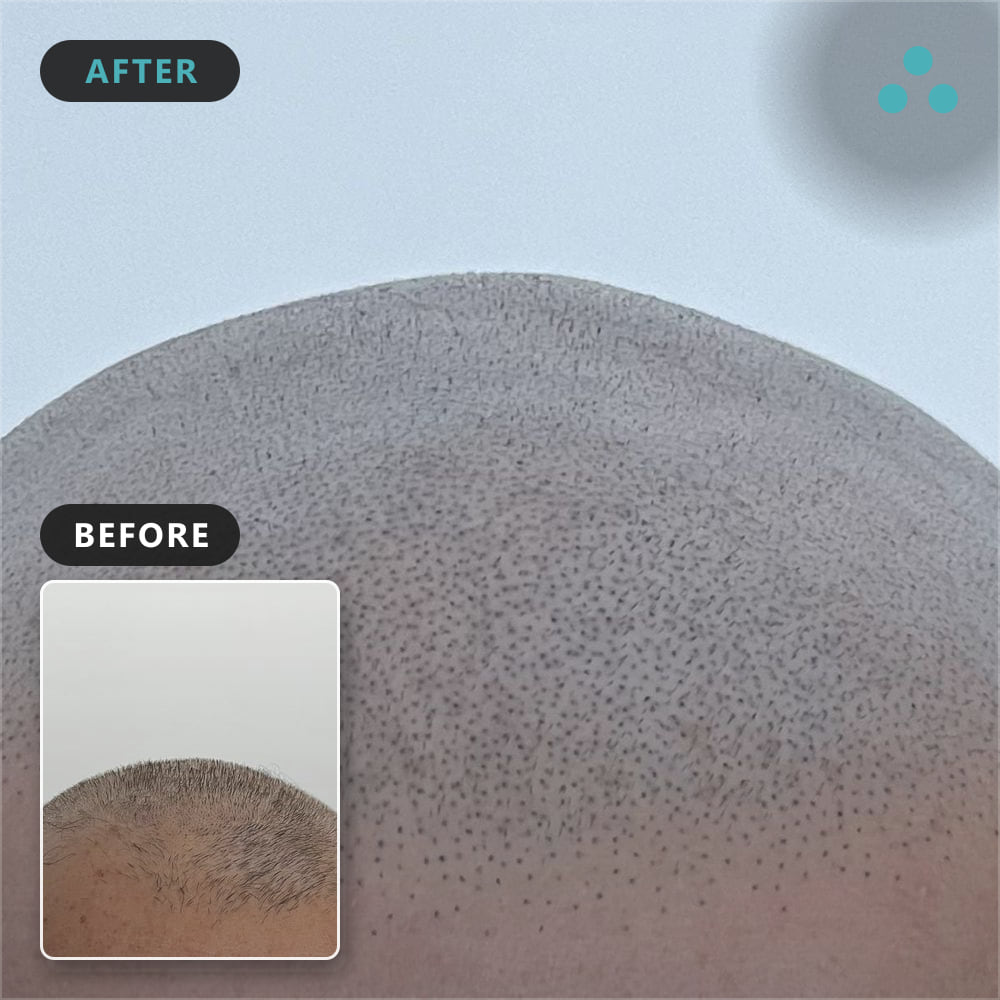
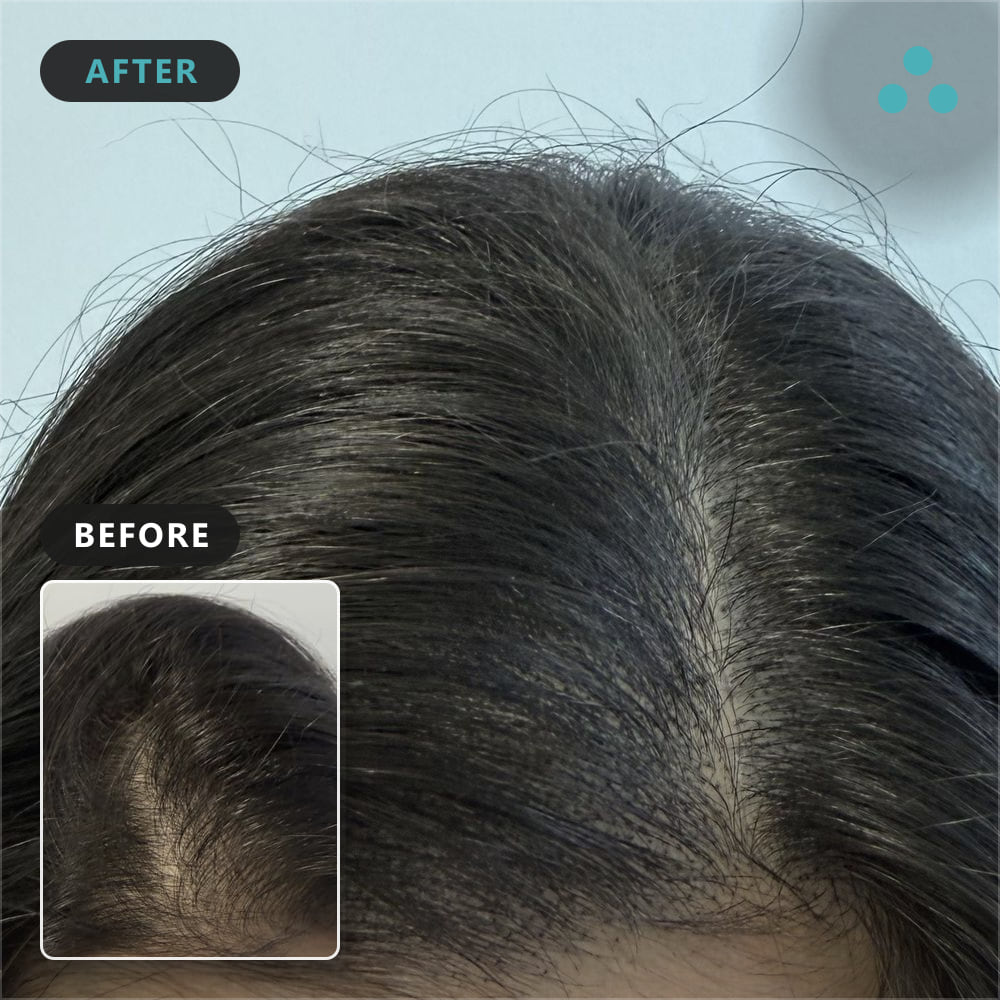
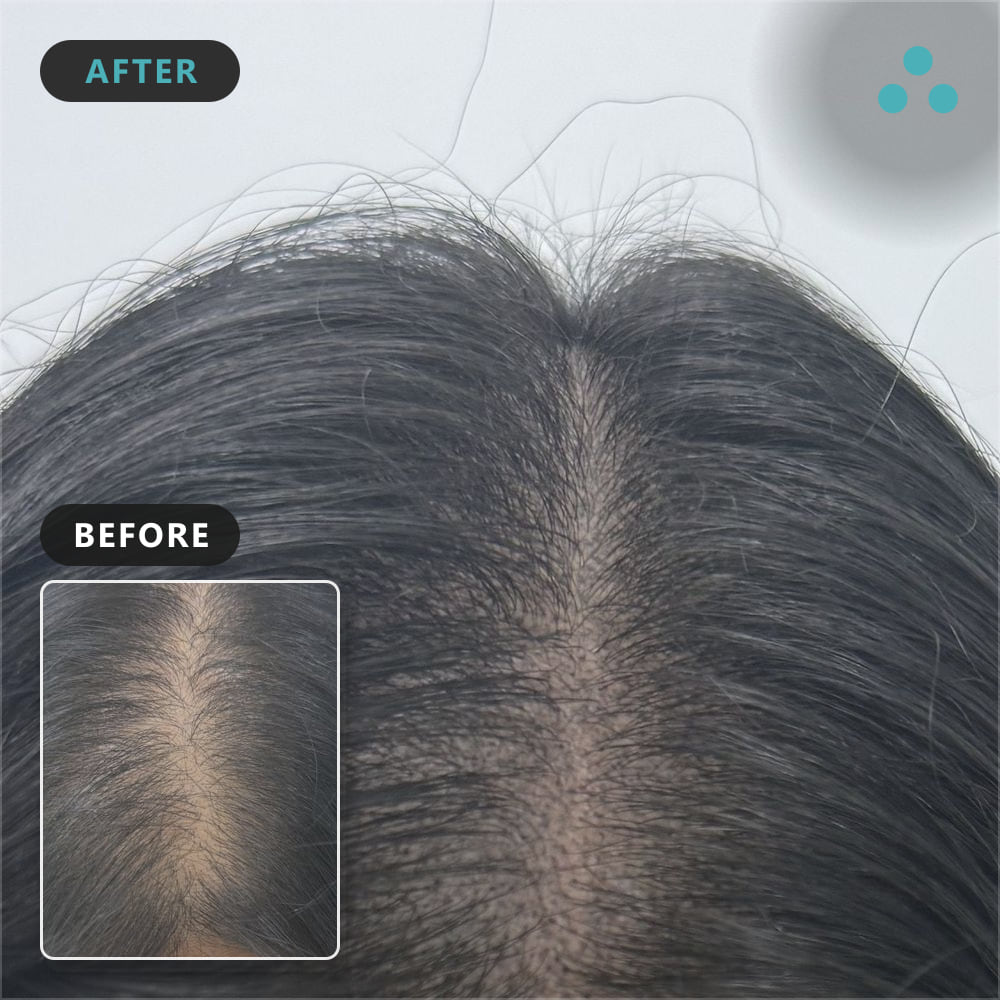
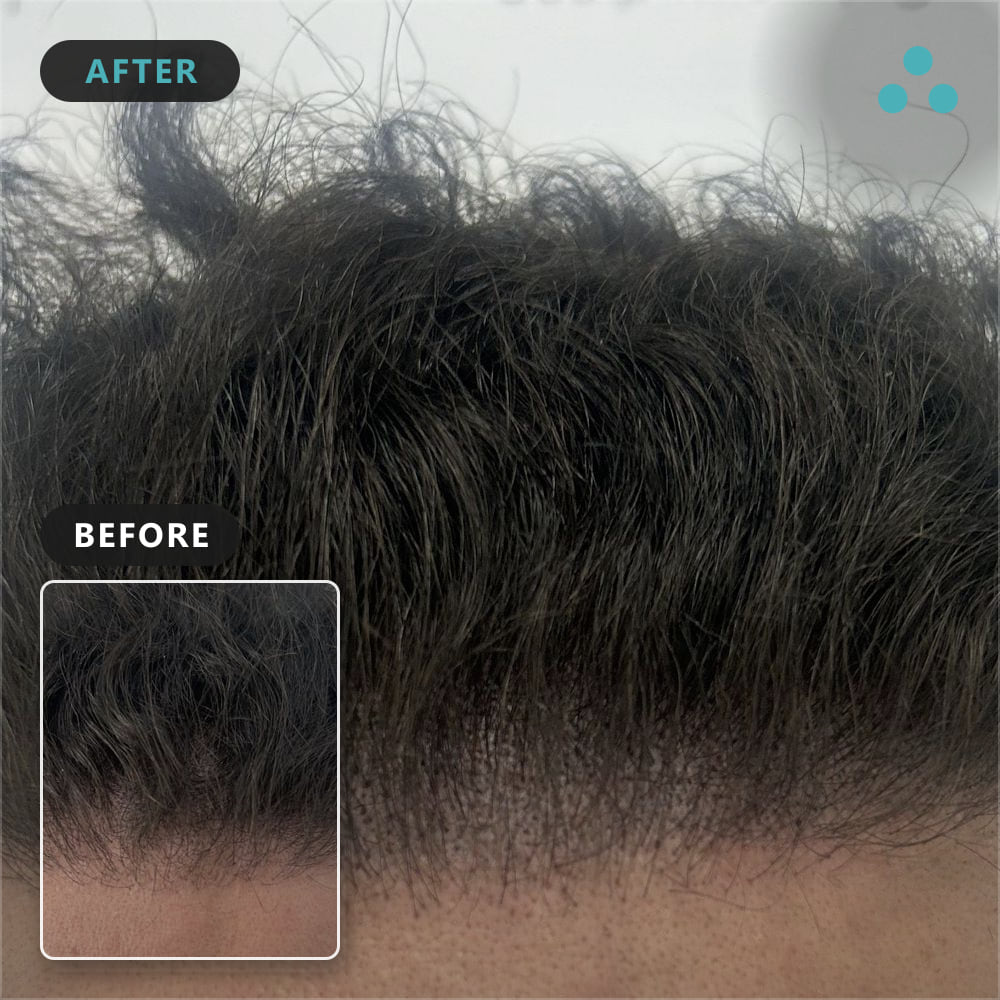
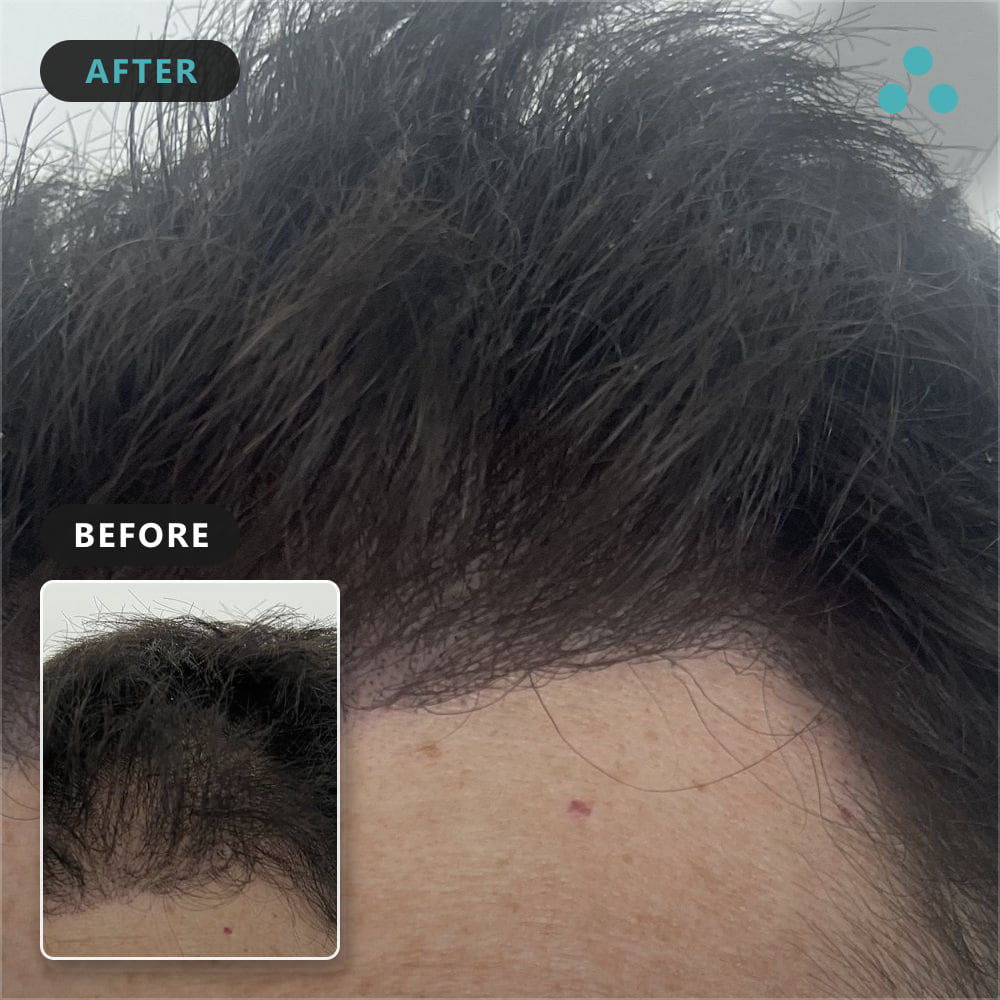
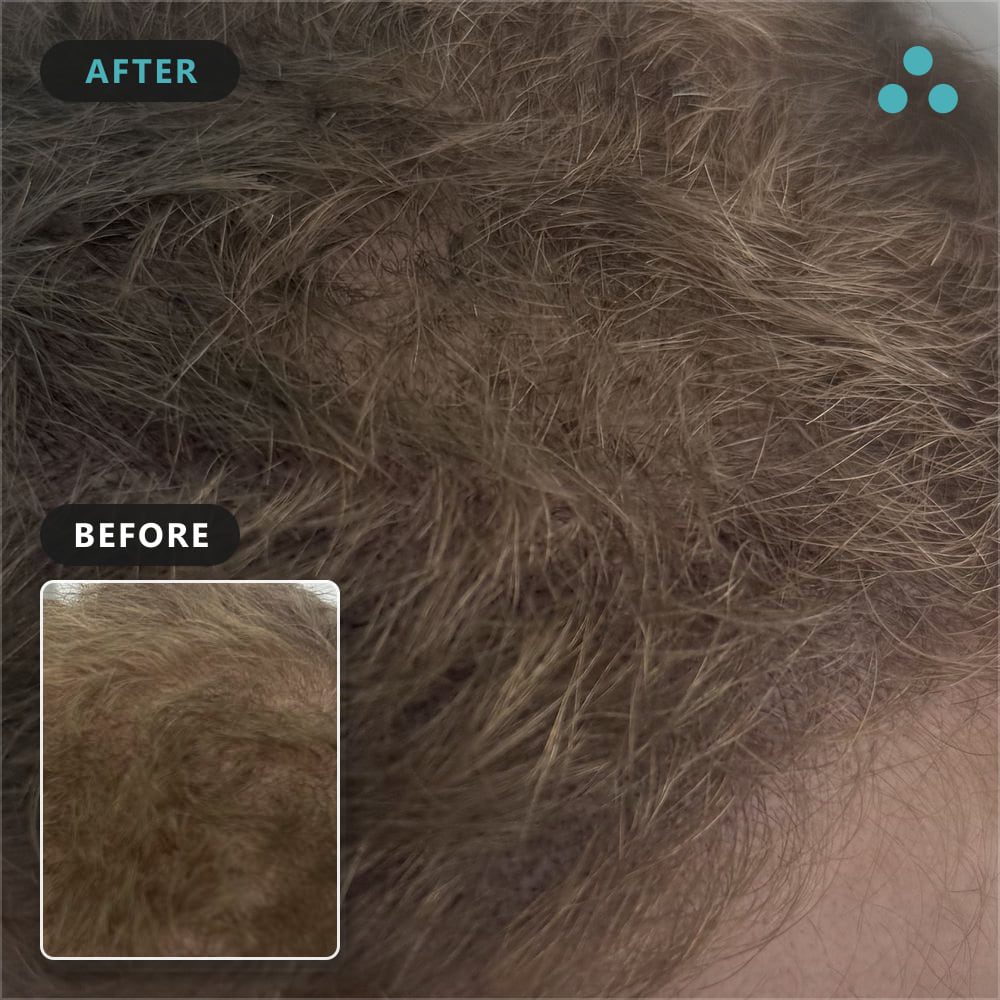
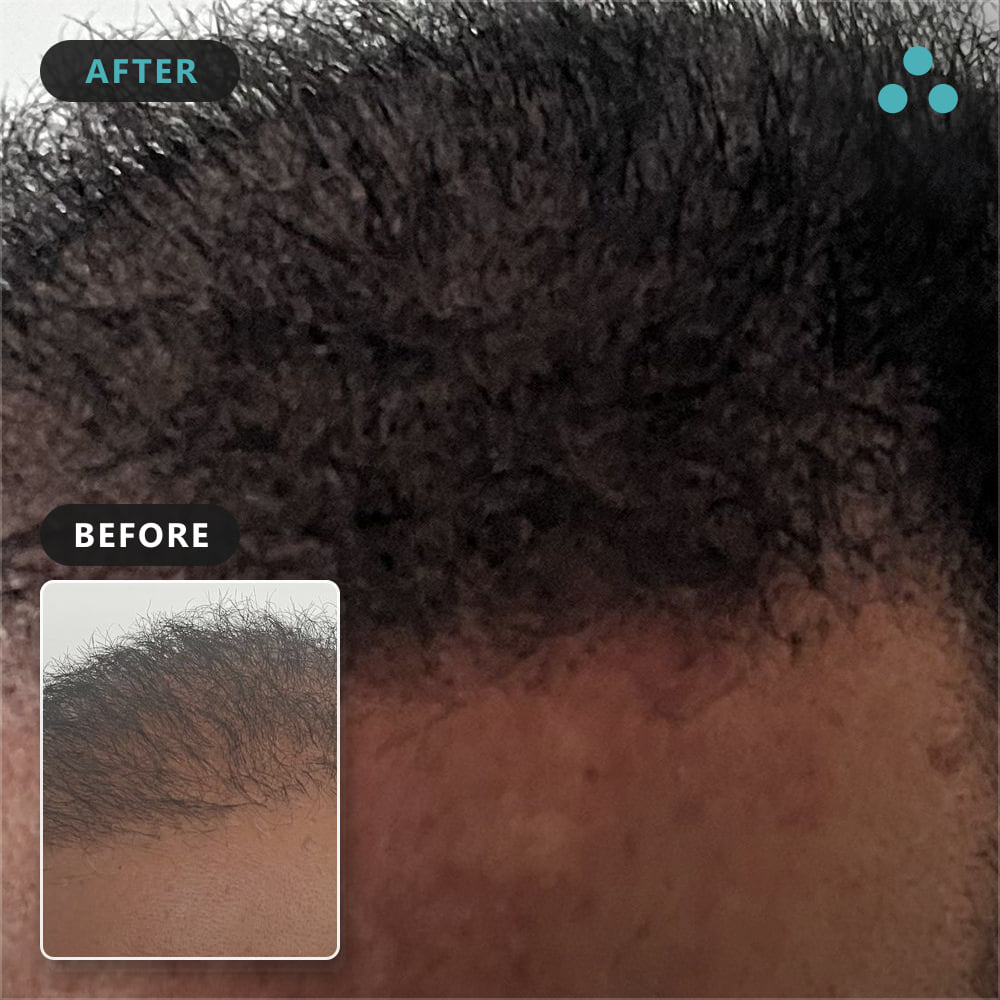
SMP can be used to add extra density to an existing hairline, giving the appearance of a natural looking thicker, more luscious hairstyle. Adding density is a great way to combat a thinning head of hair and the best part is, should you experience further hair loss in the future, your SMP artist can always increase the coverage when required.
Before
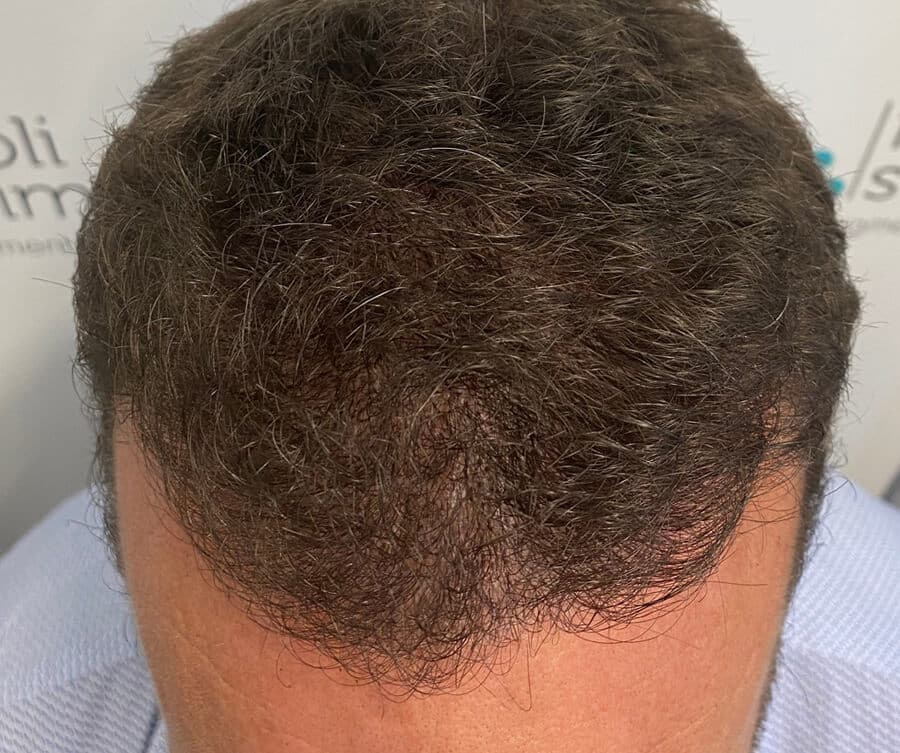
After
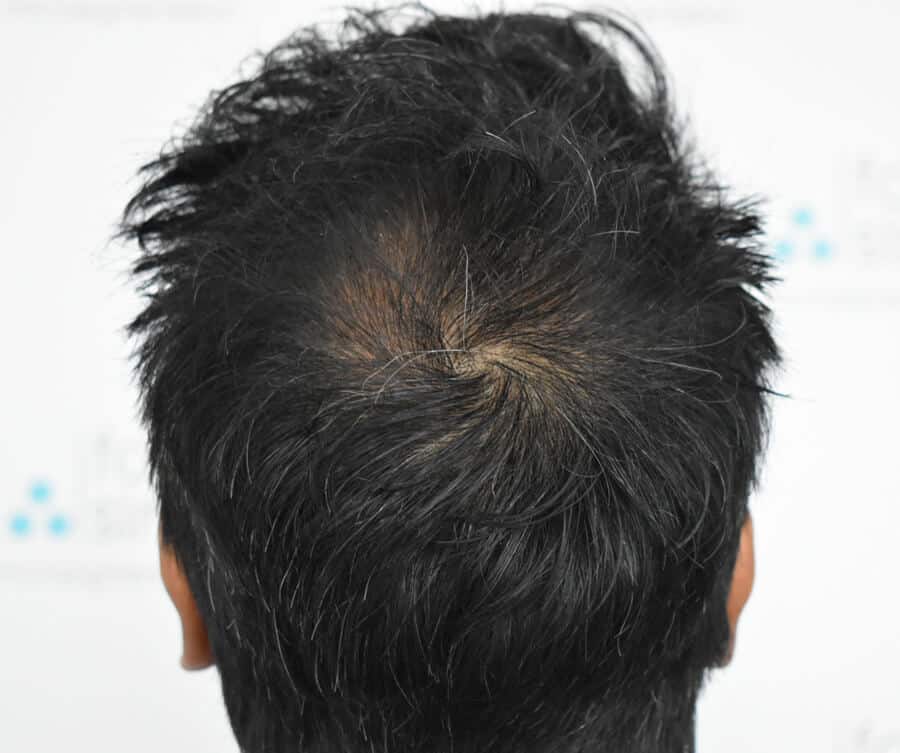
Before
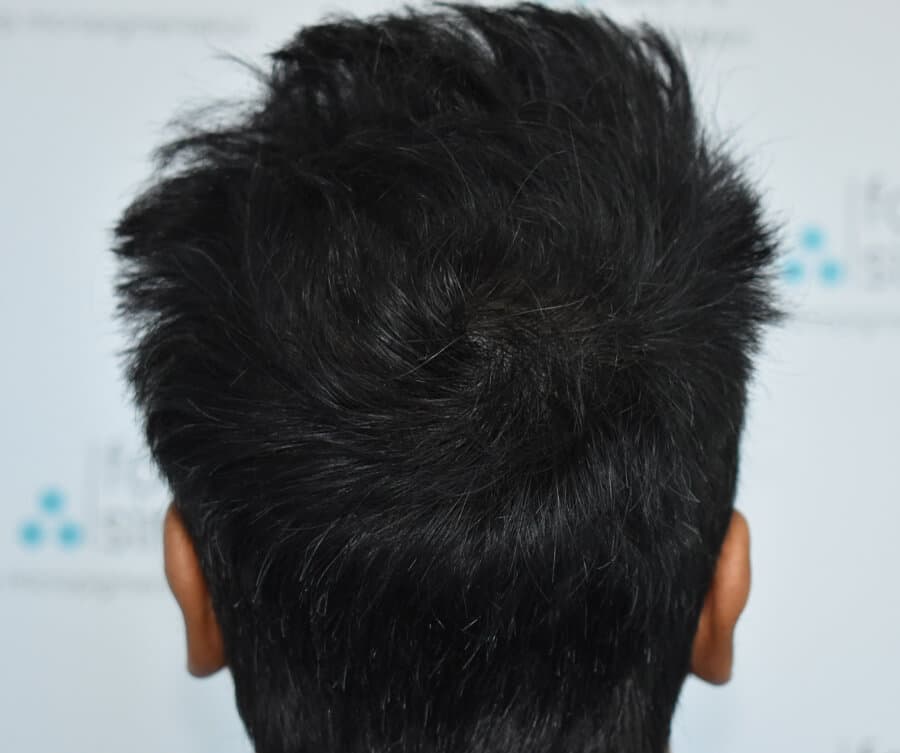
After
SMP for Scar Treatments Before and After
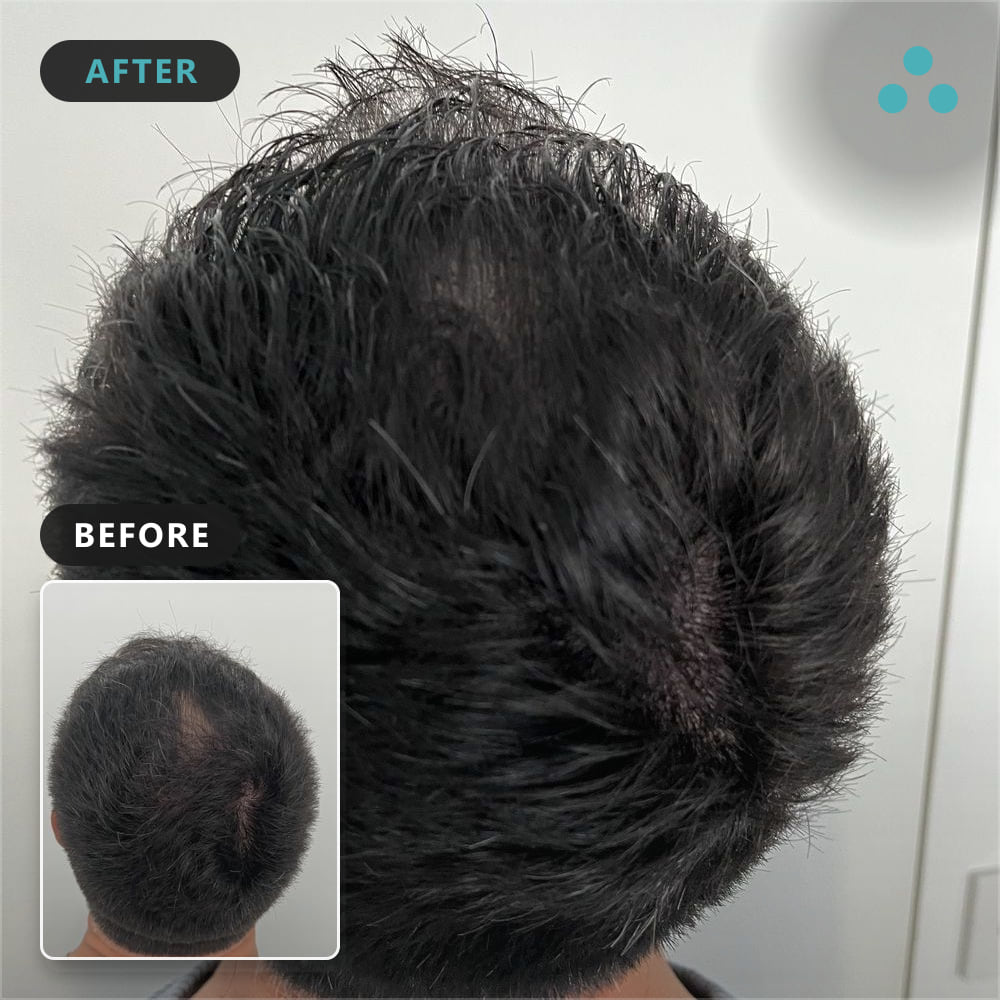
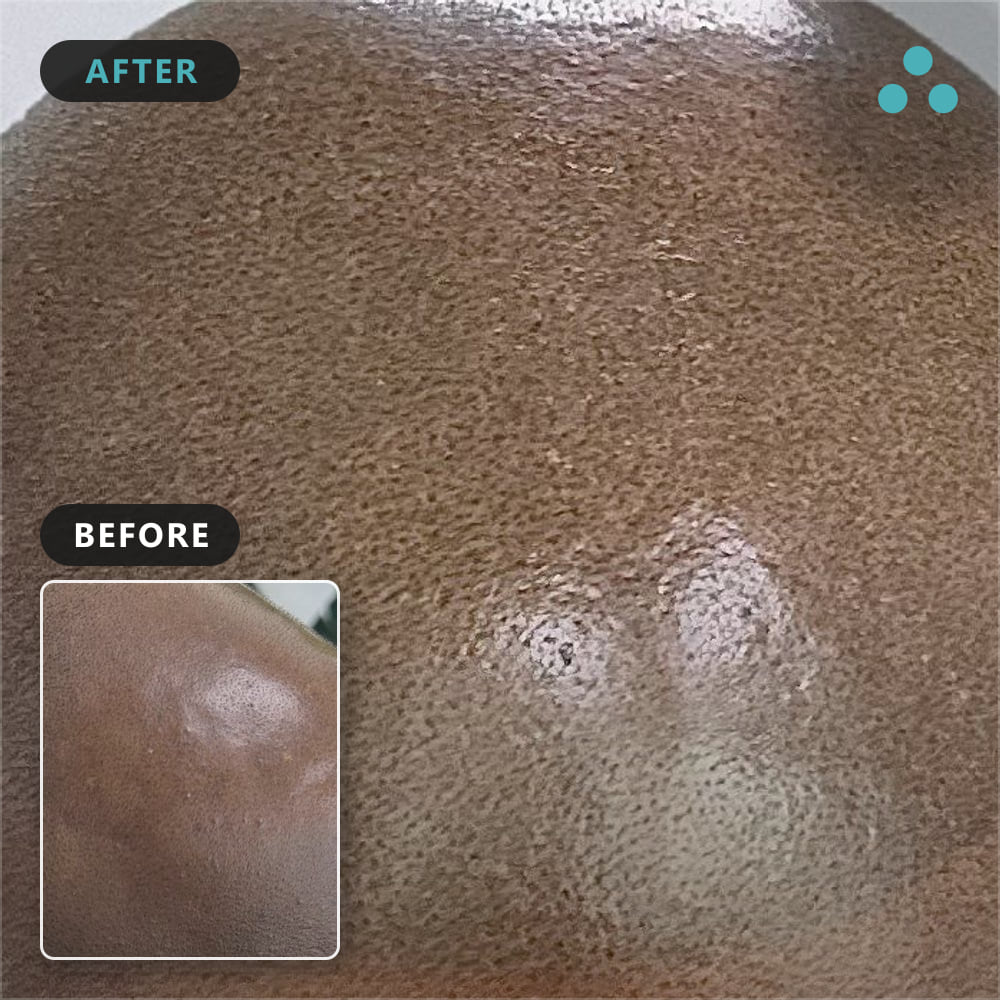
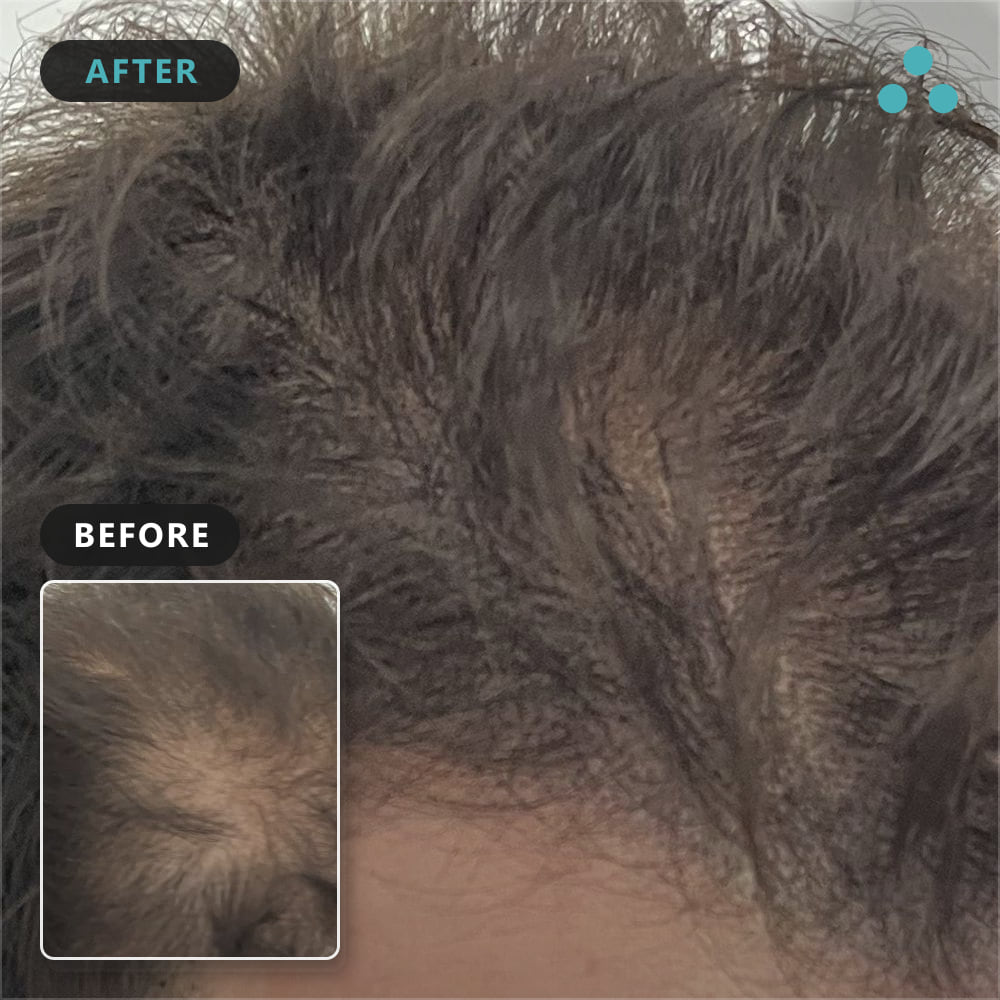
Concealing scars on the scalp with SMP is a common procedure that can reduce the visual appearance of the scar and restore your confidence and self-esteem.
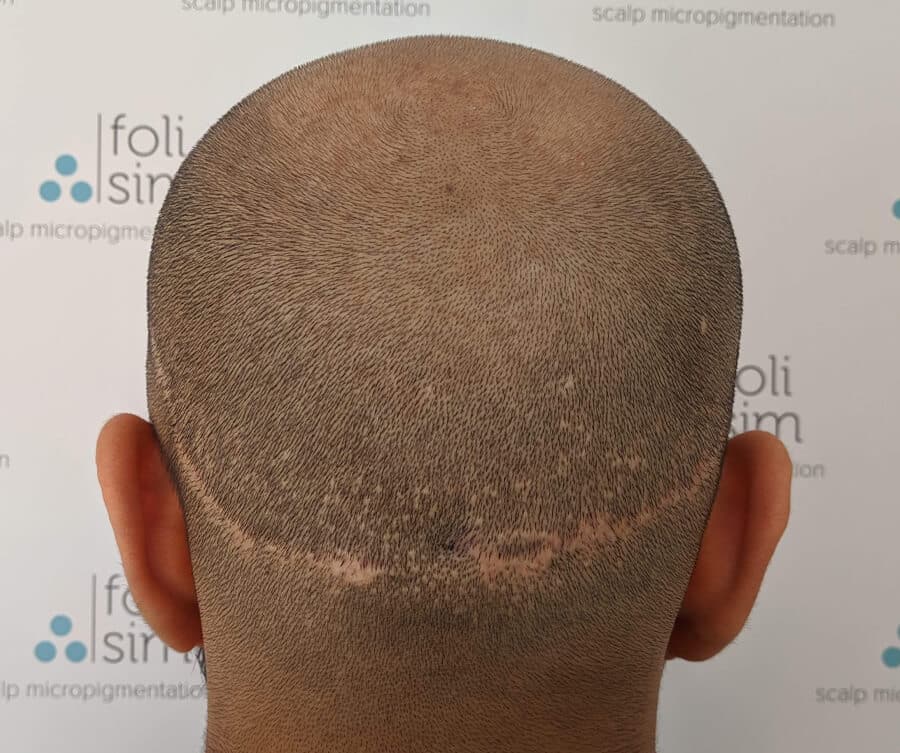
Before
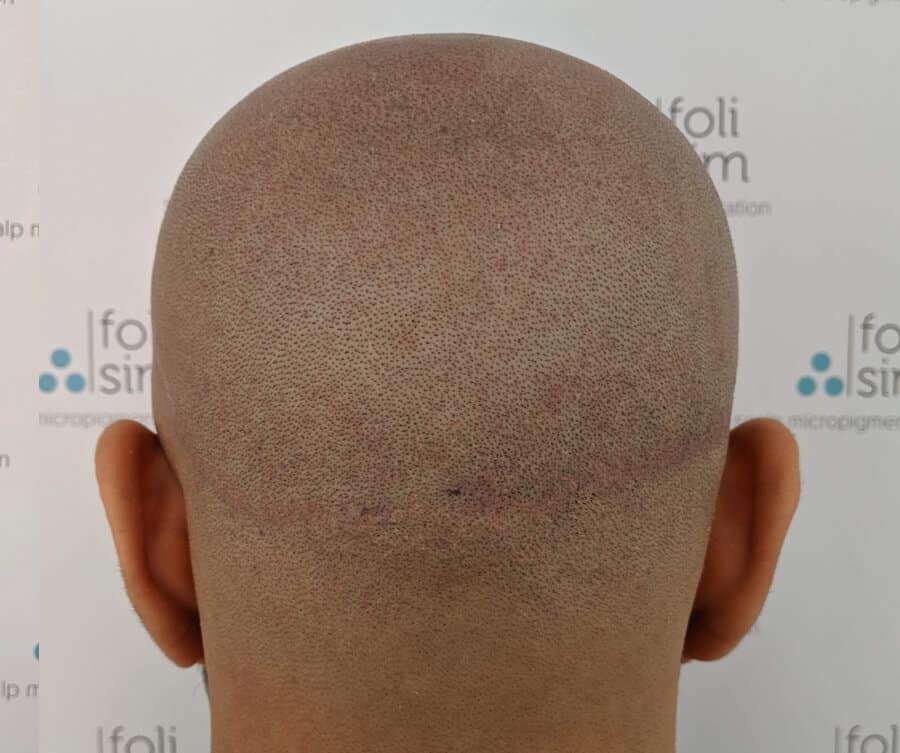
After
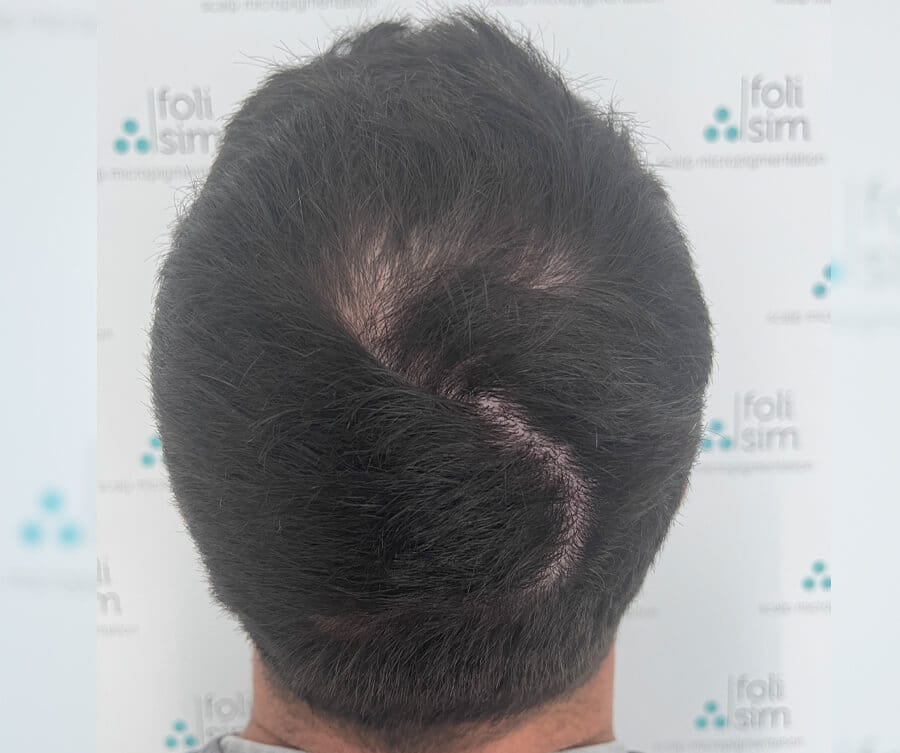
Before
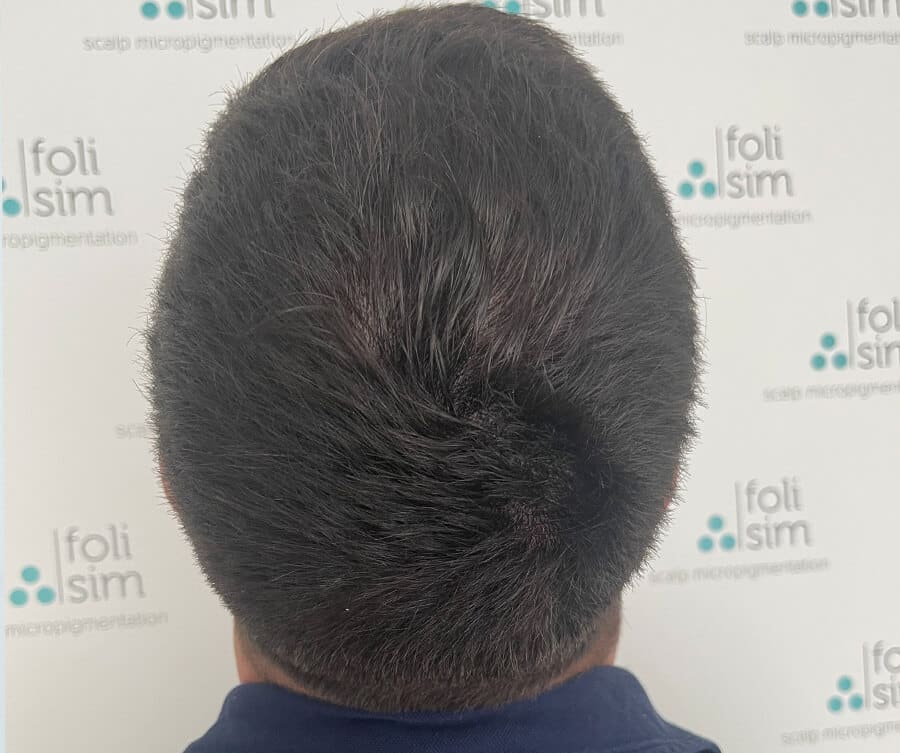
After
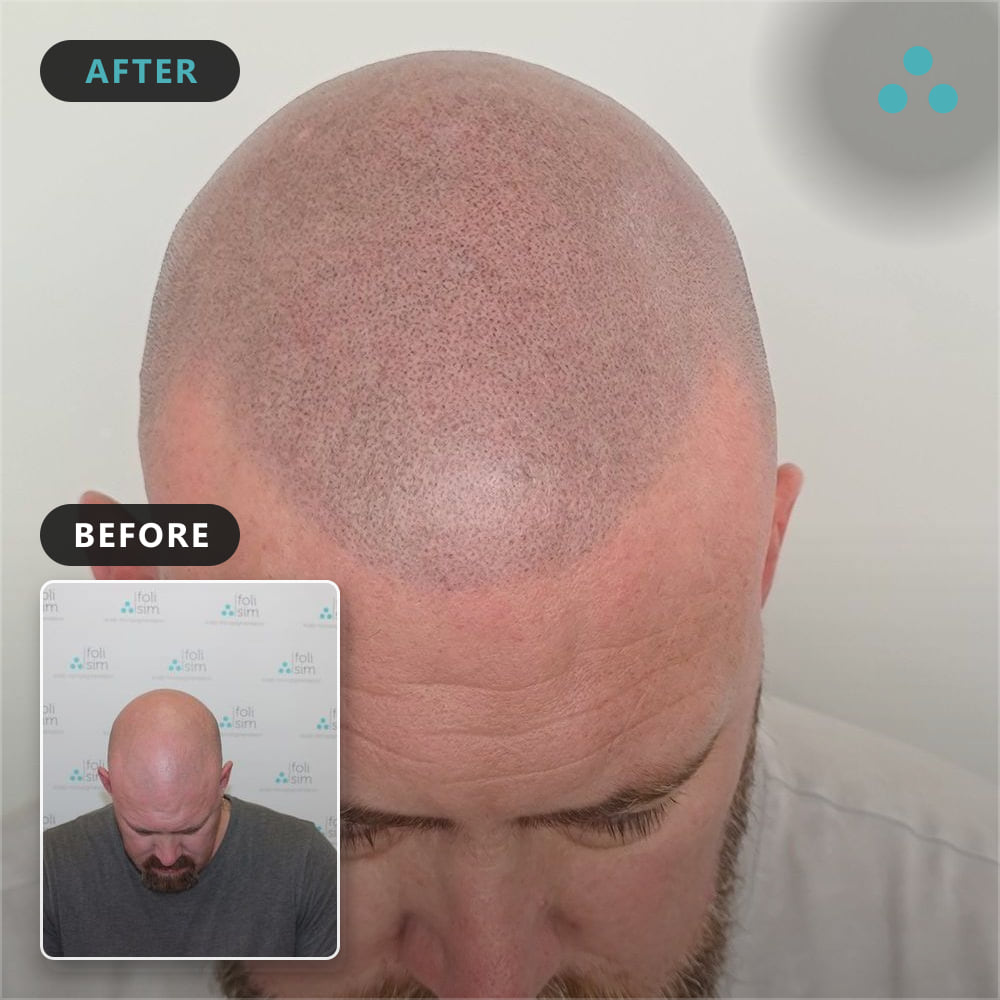
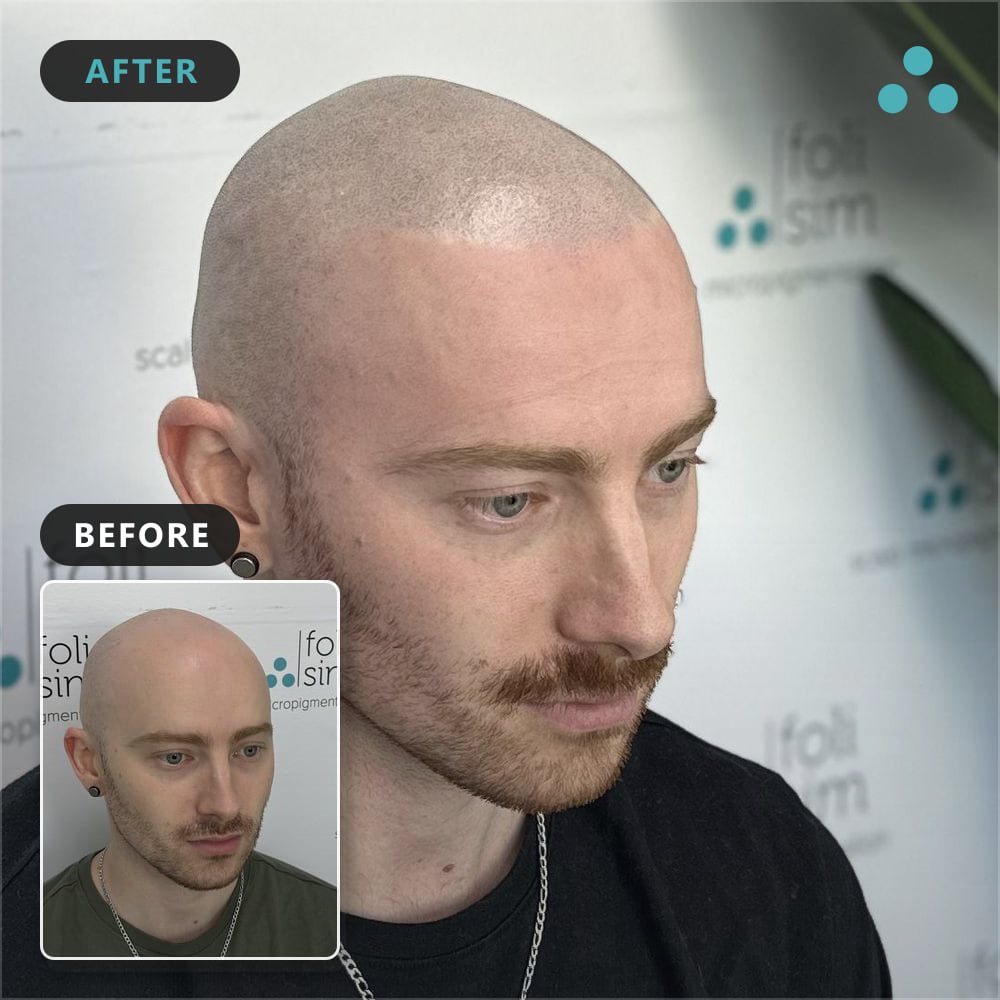
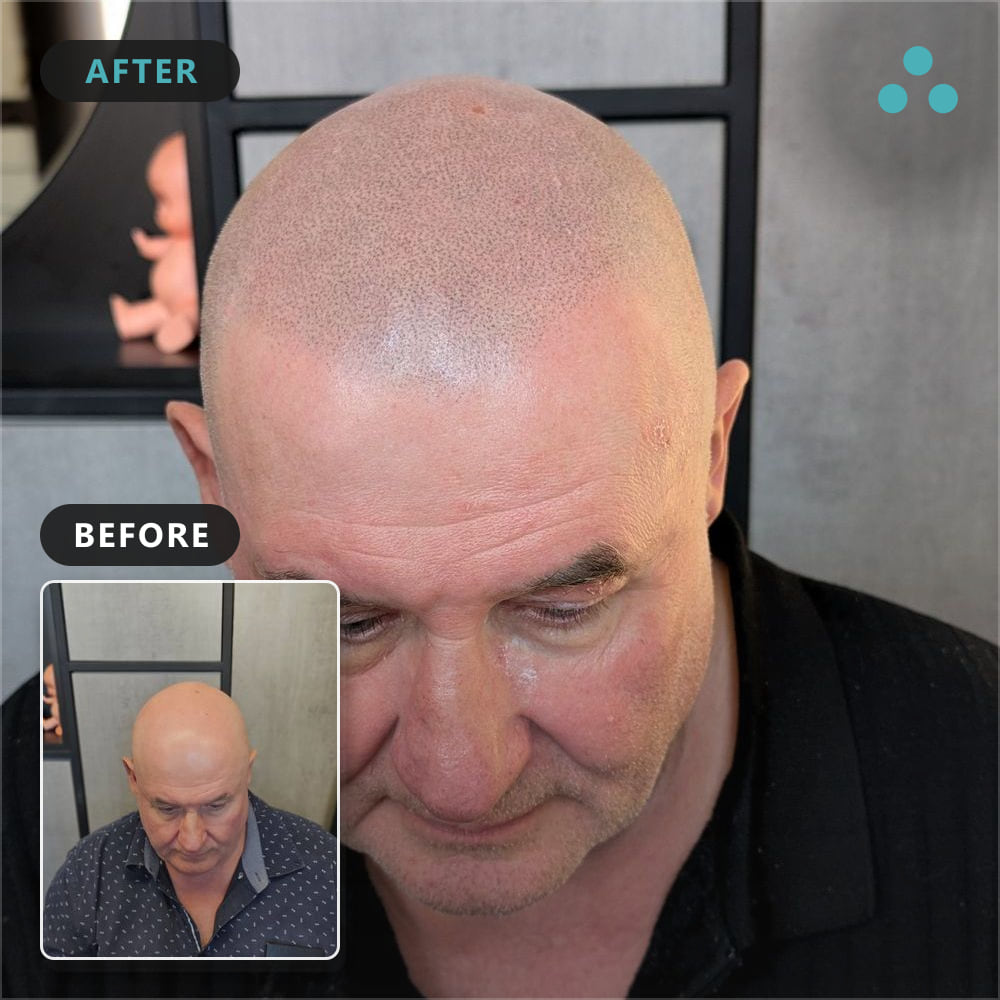
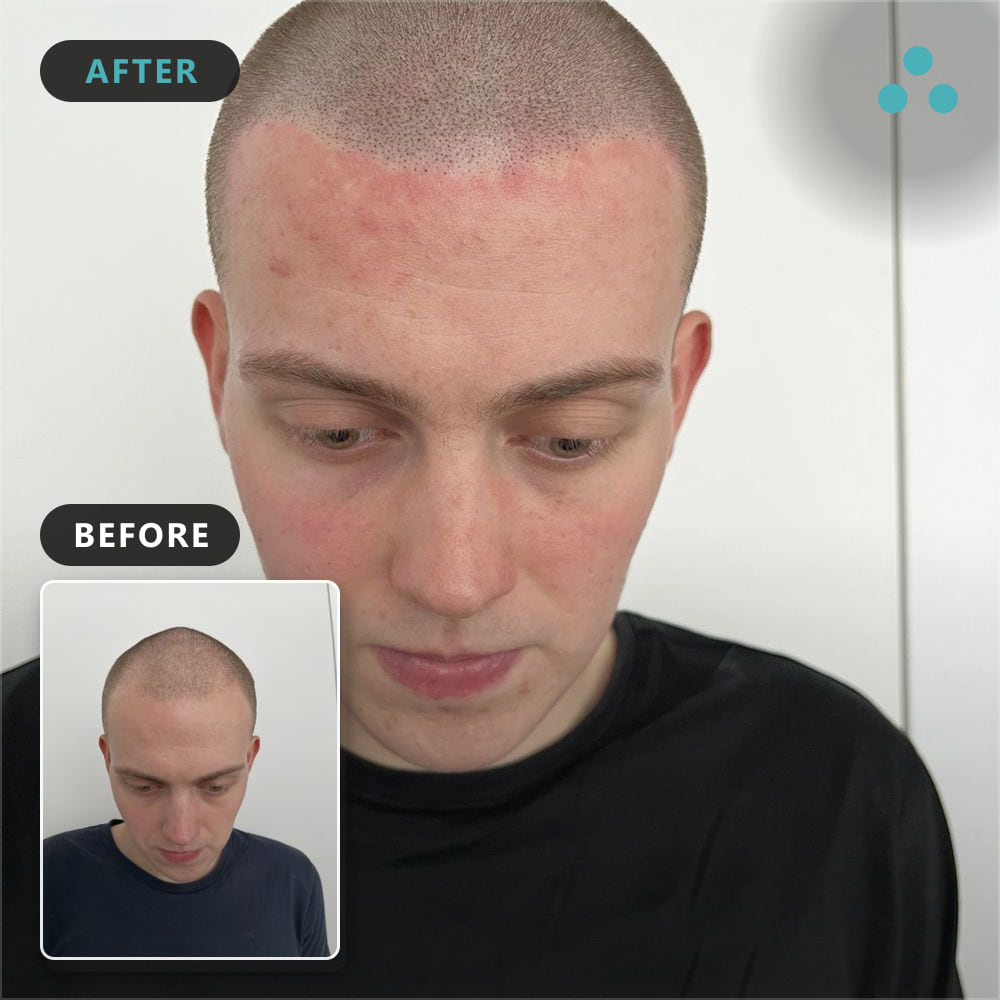
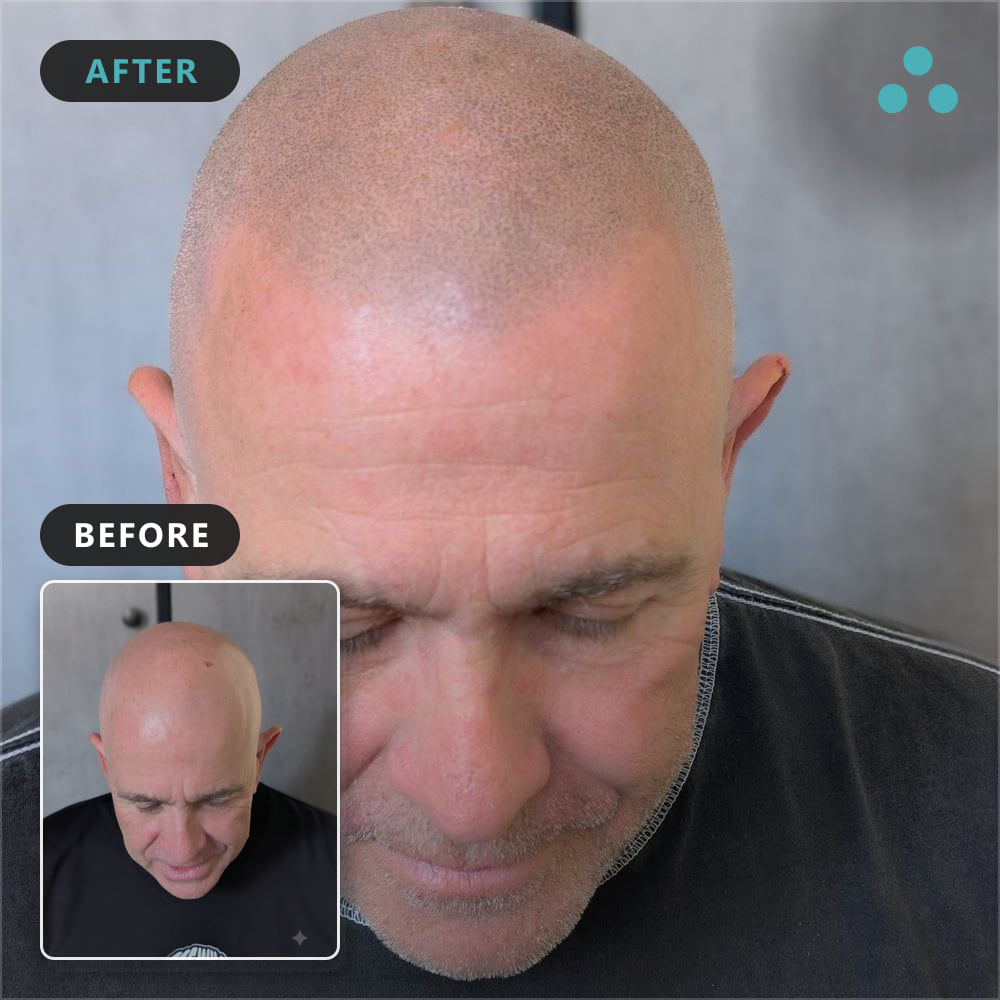
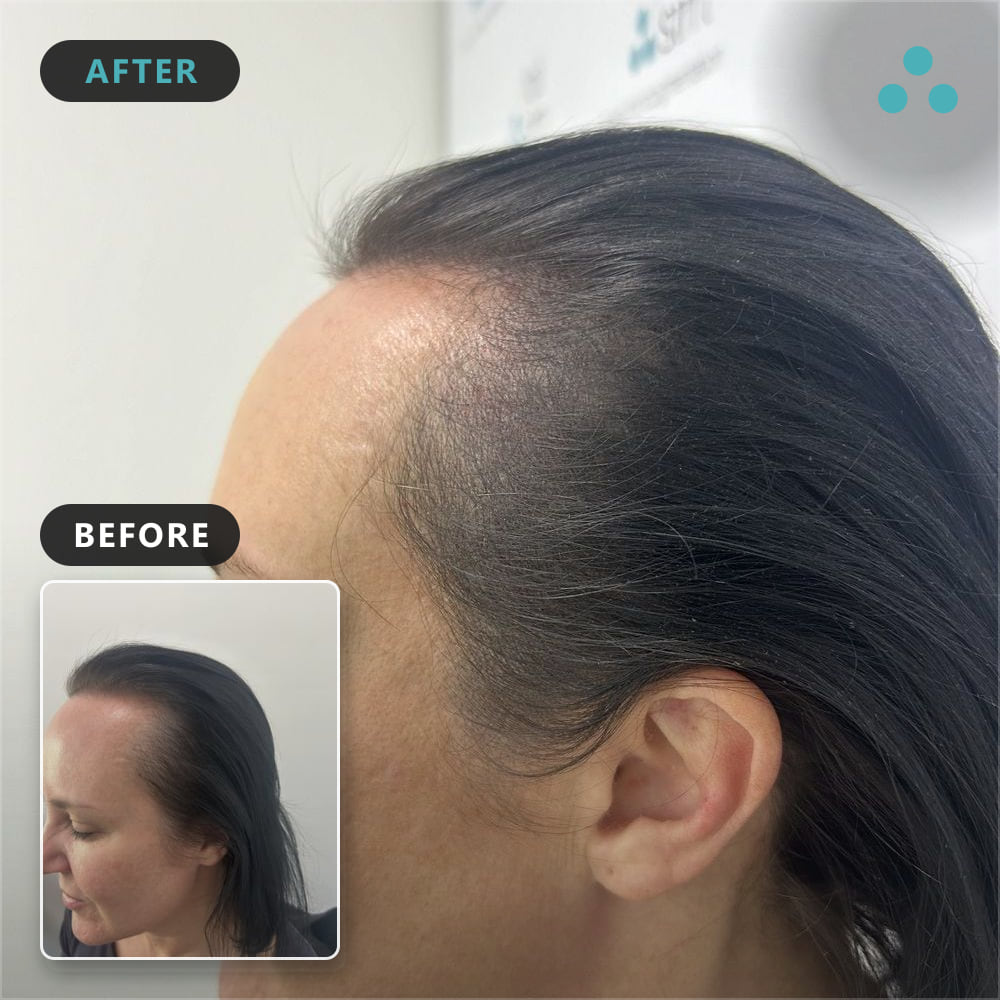
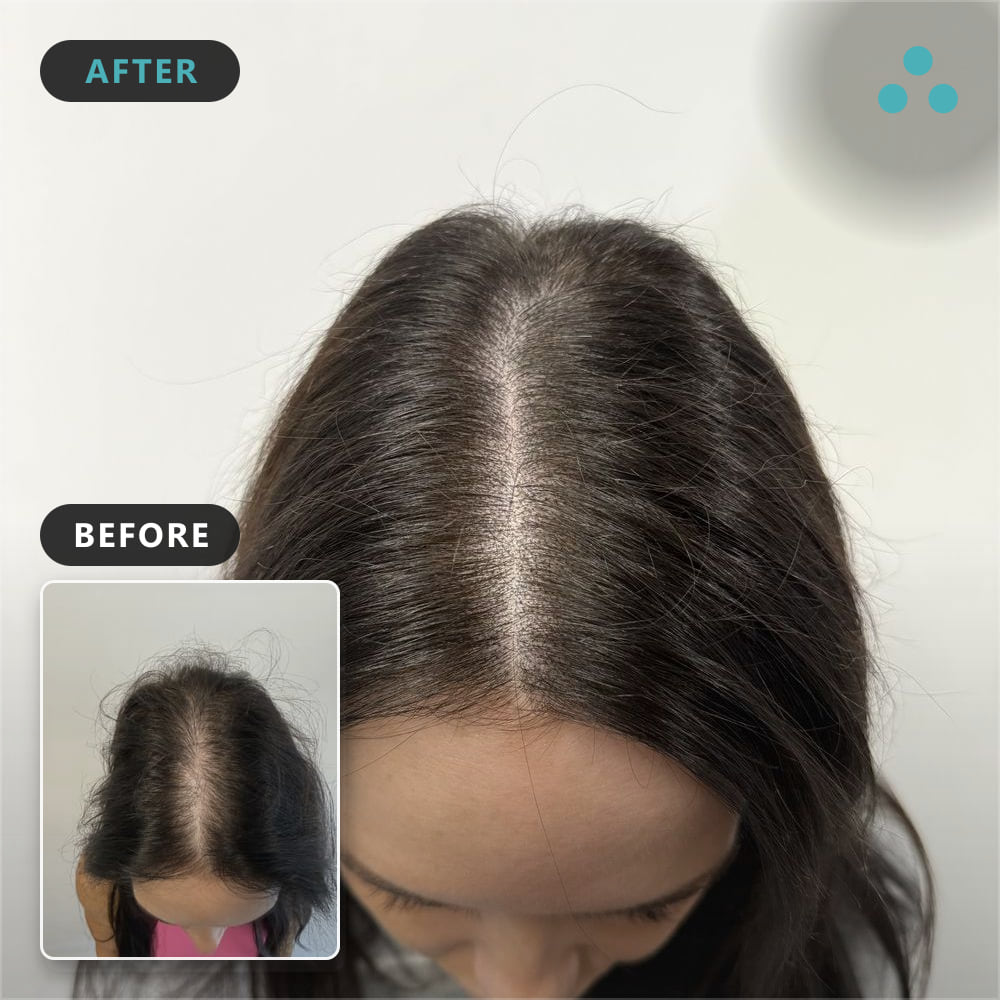
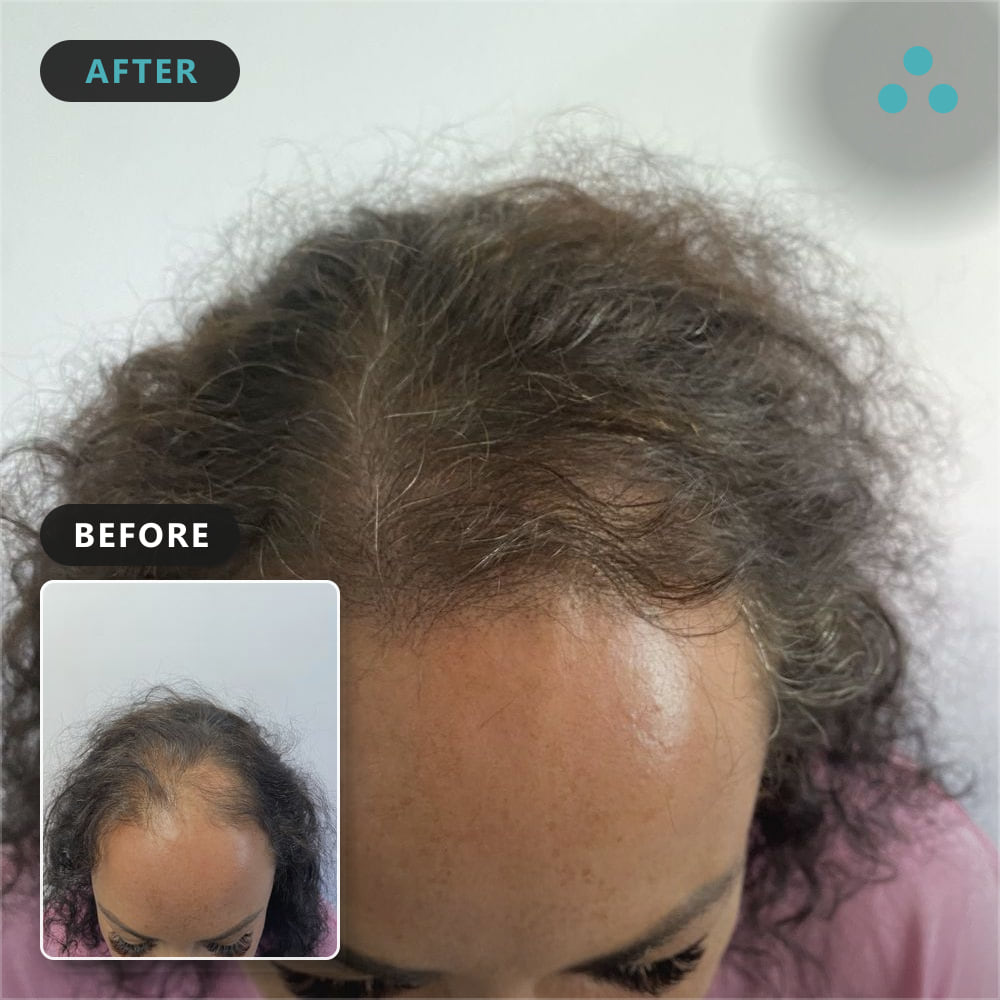
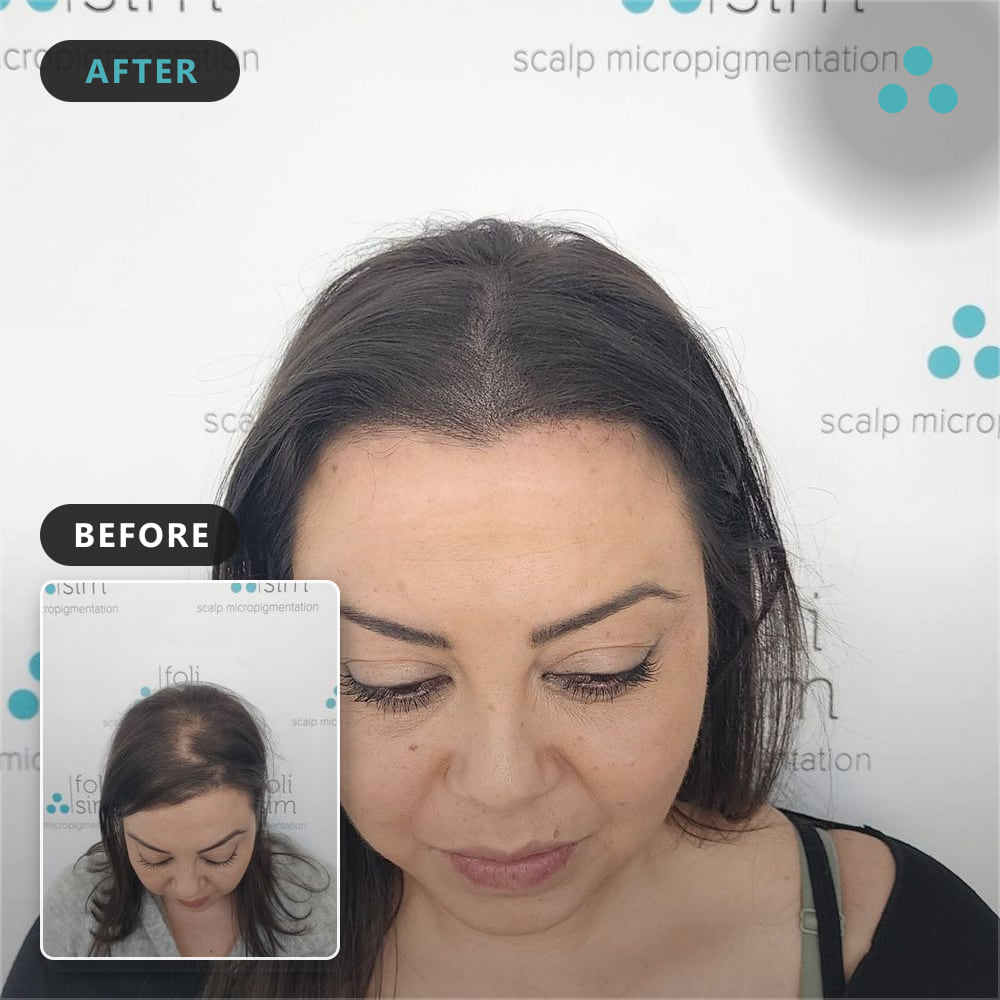
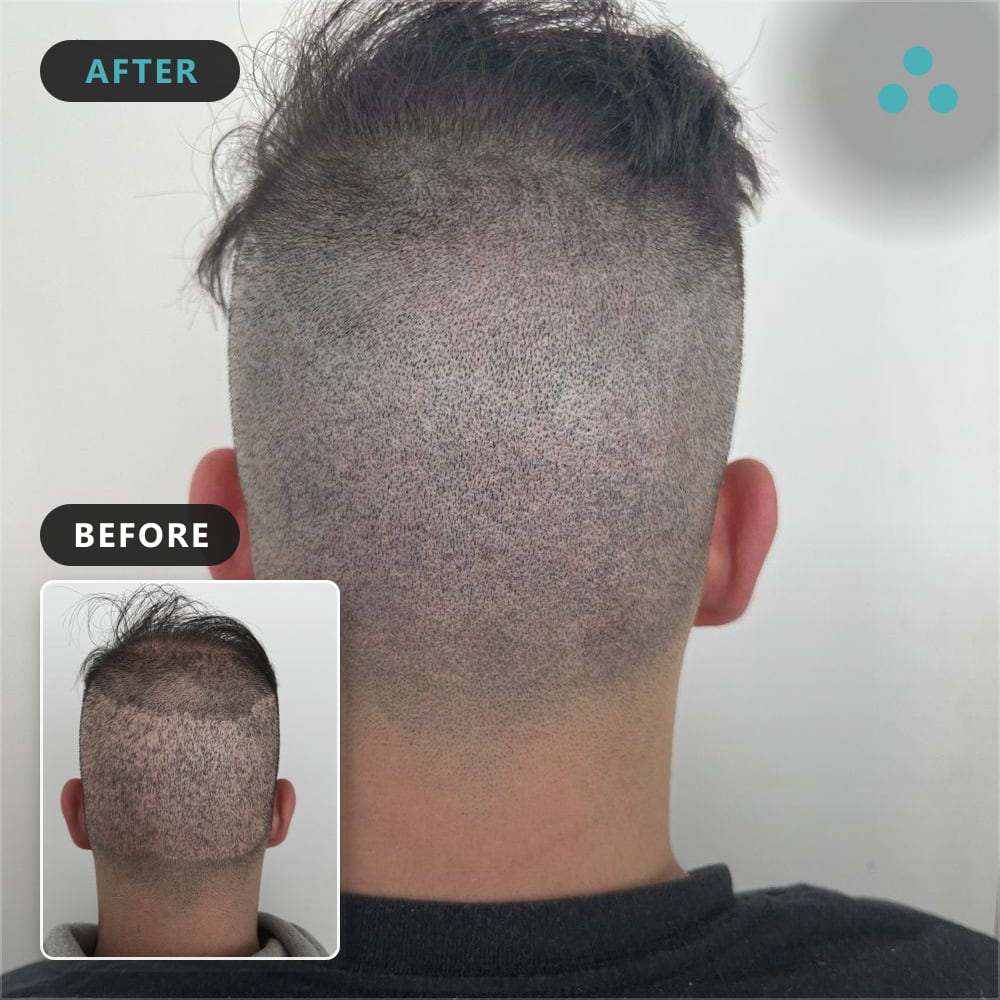
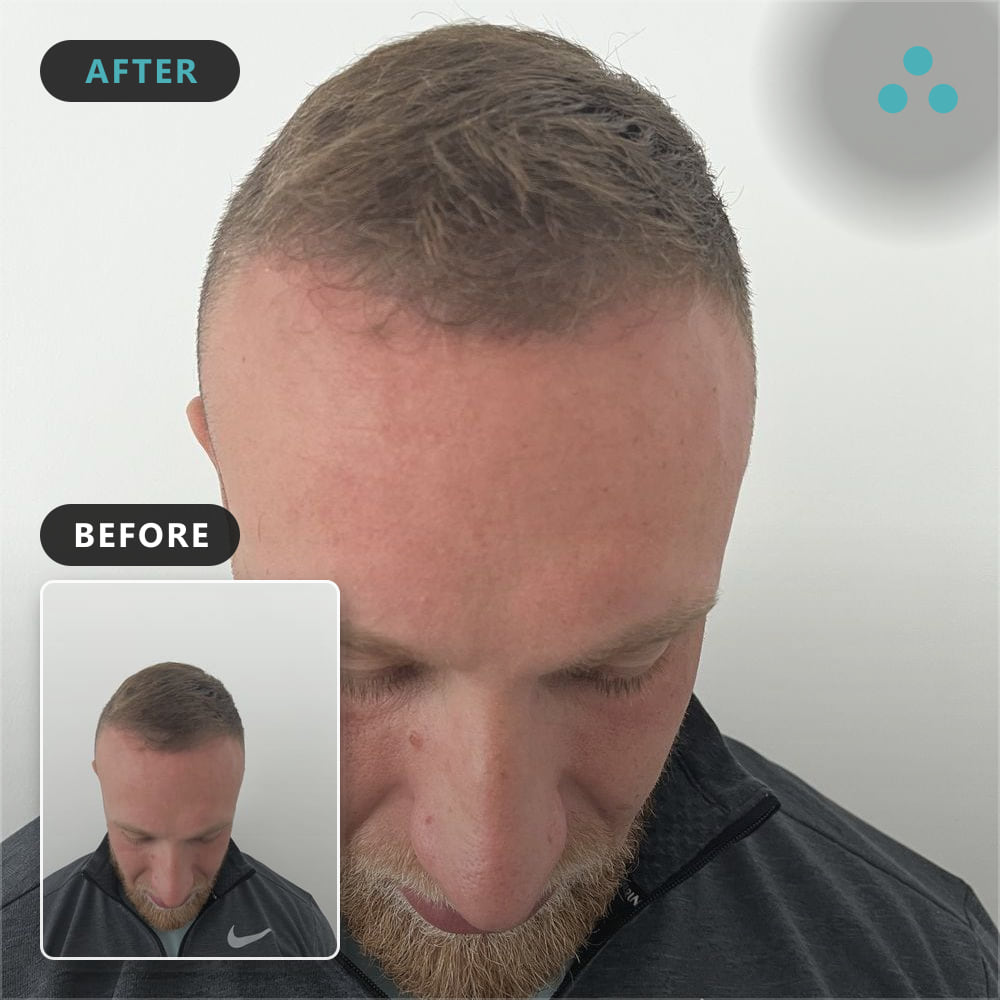
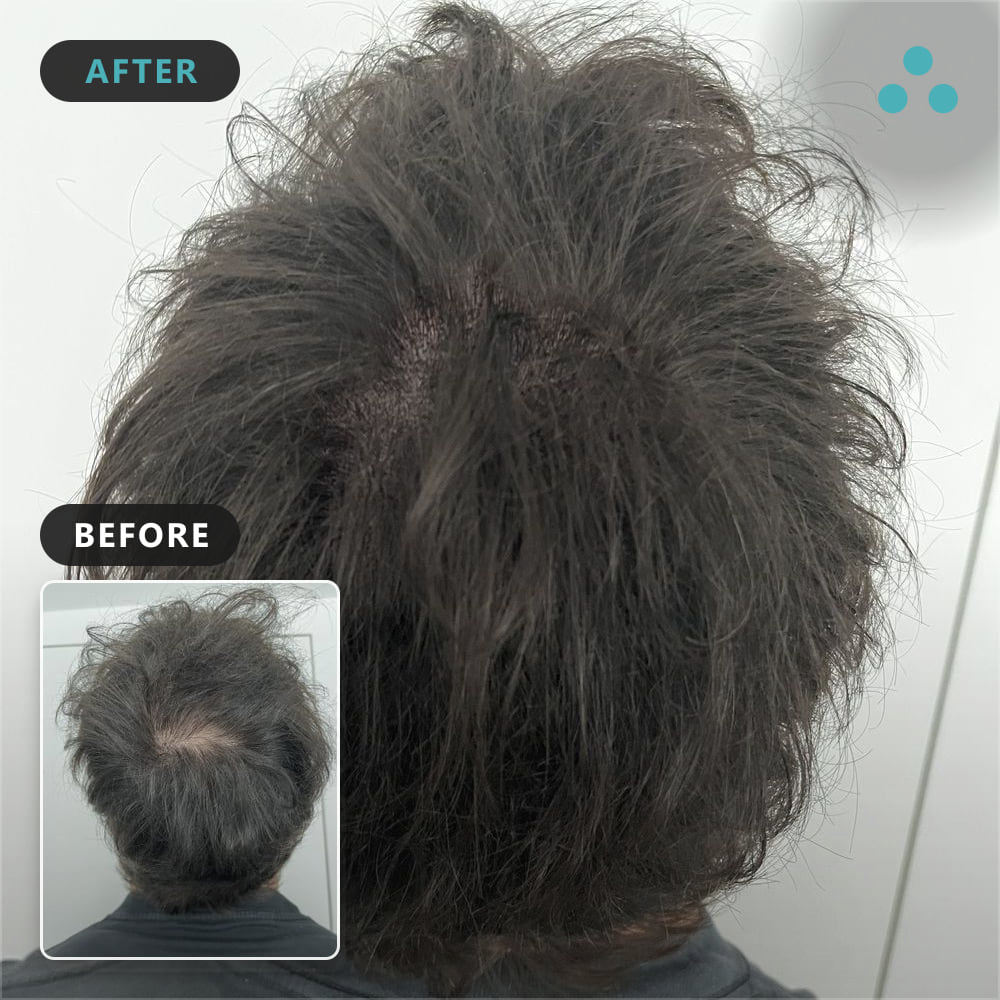
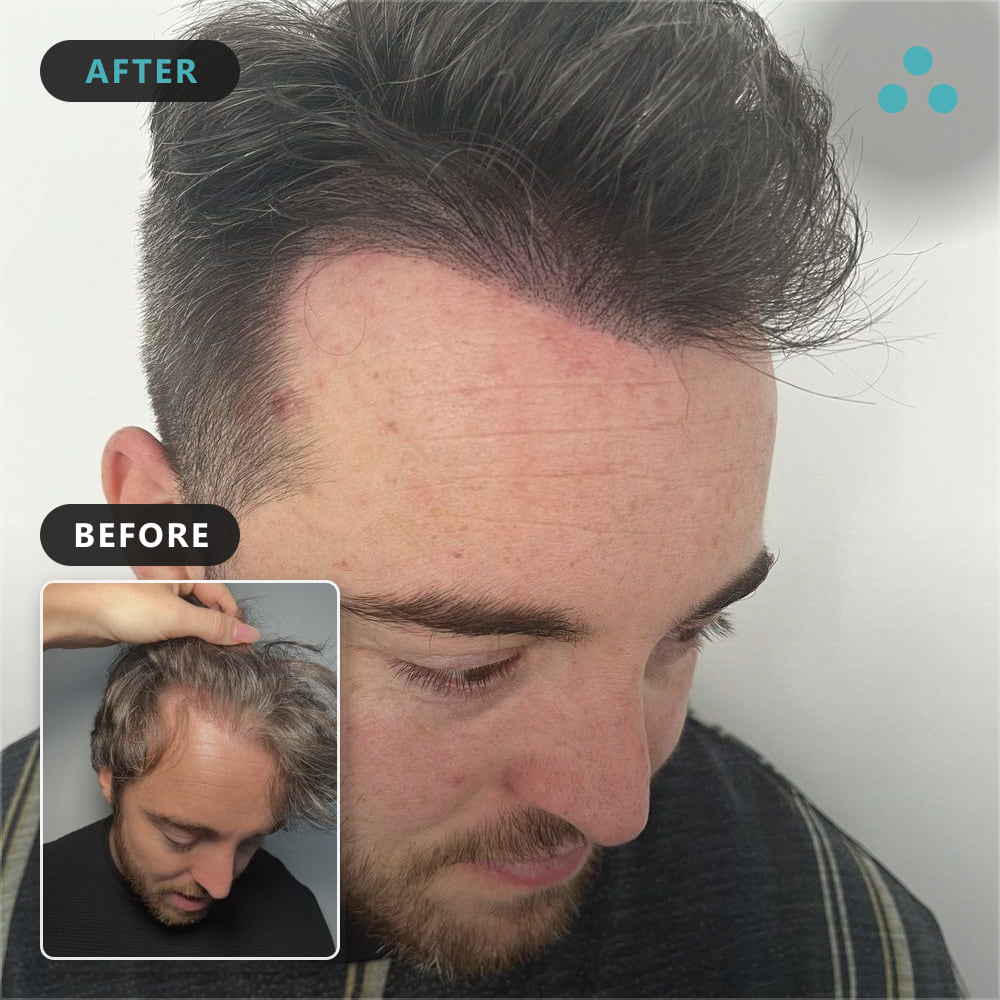
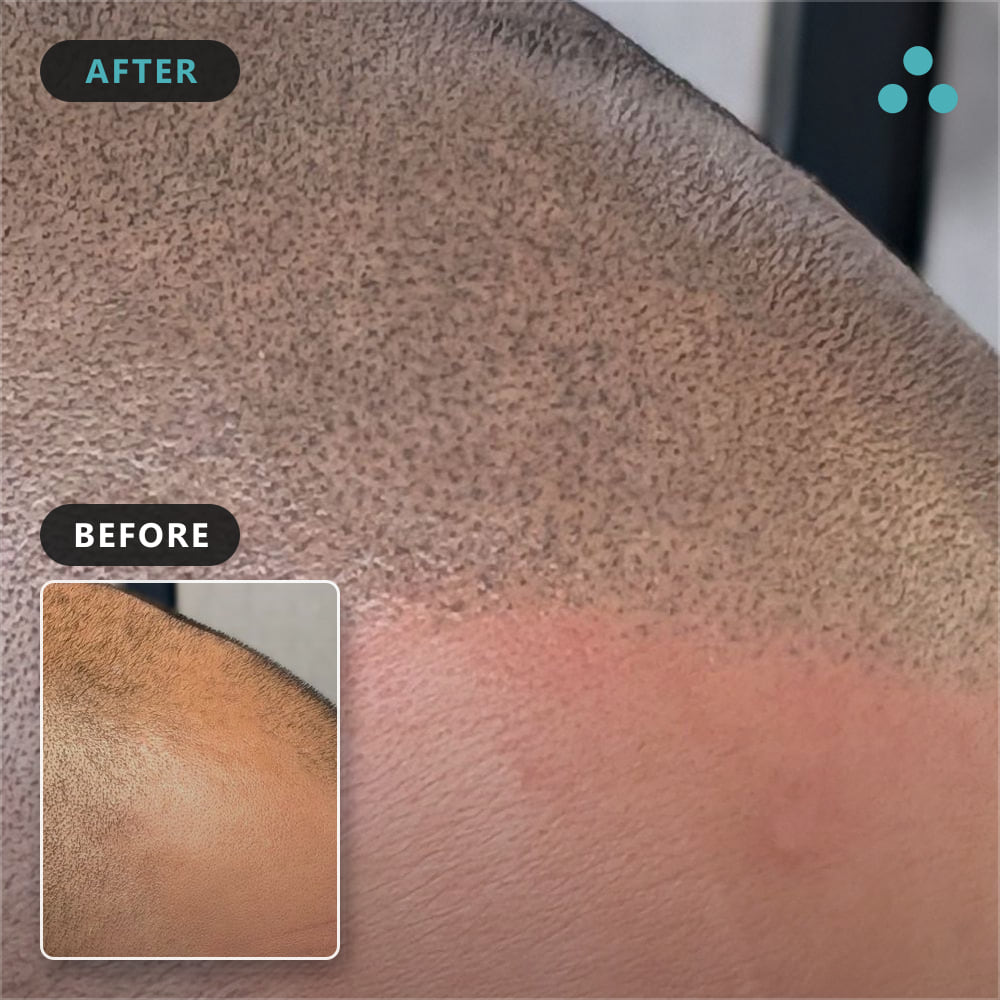
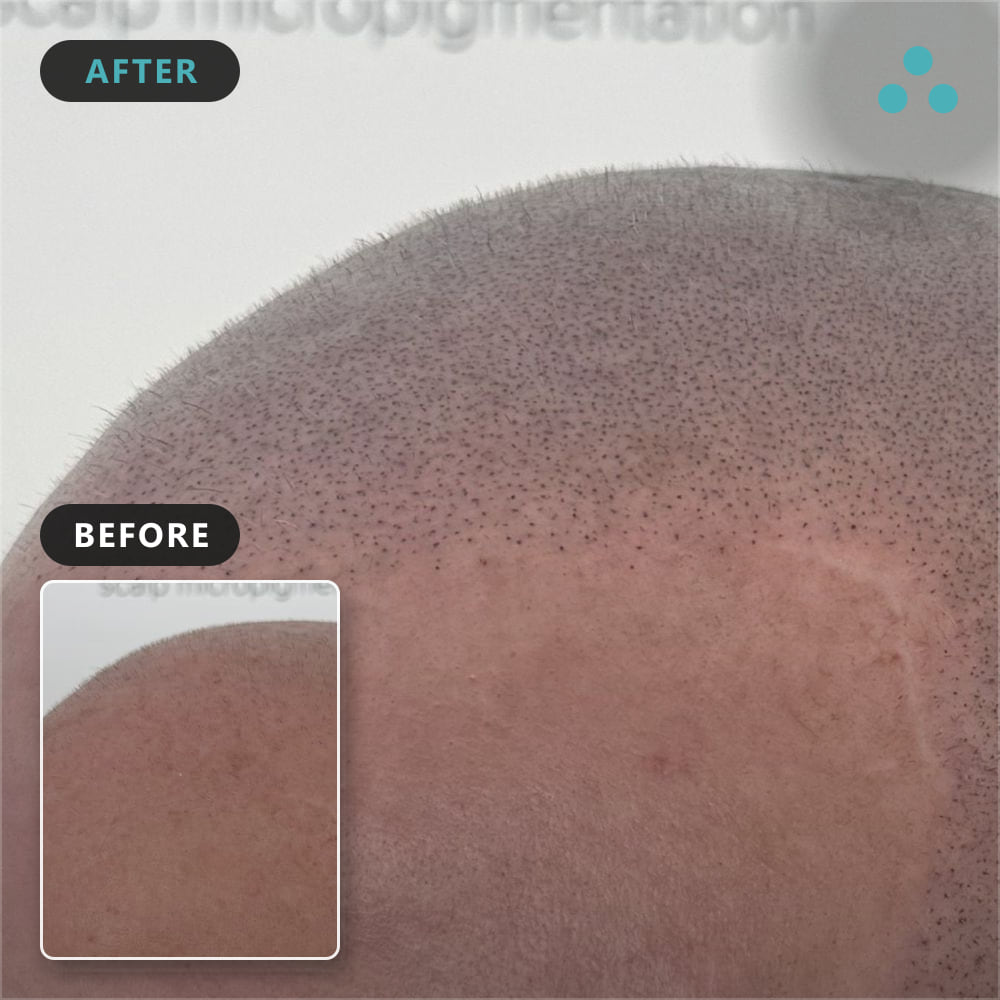
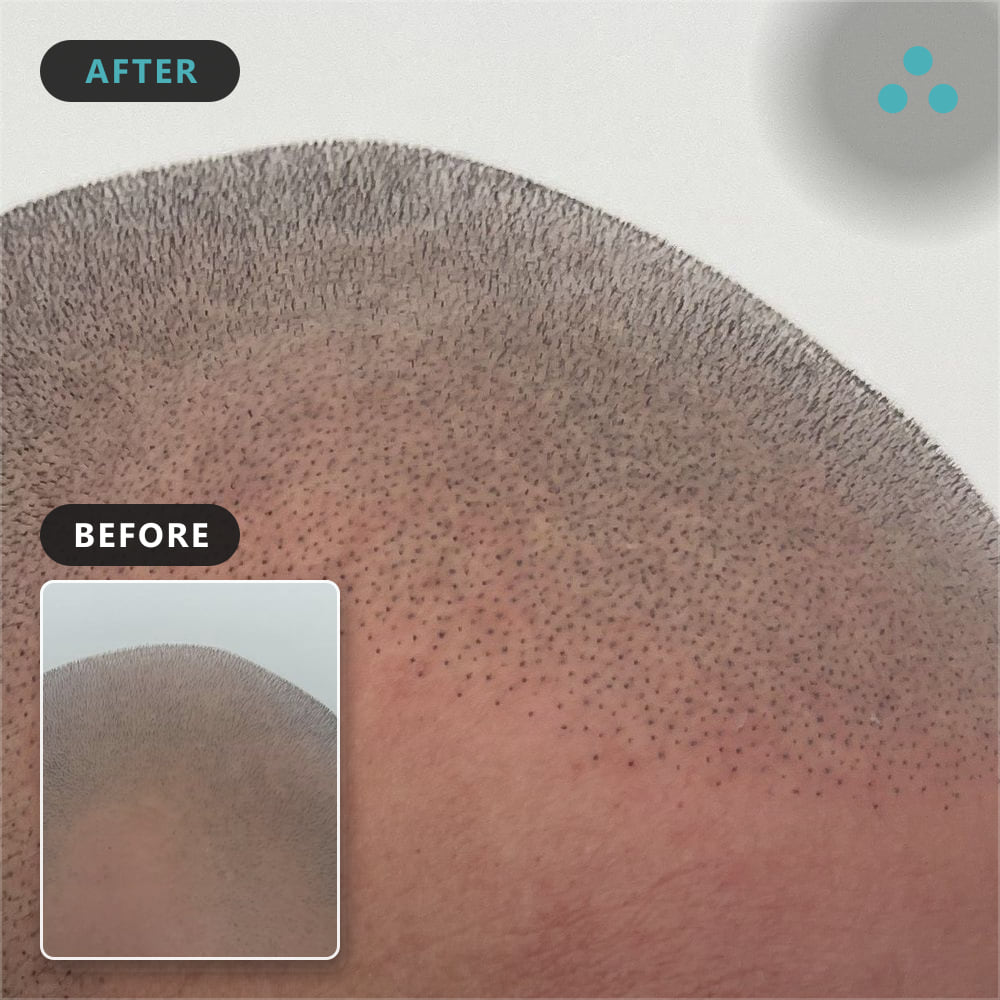
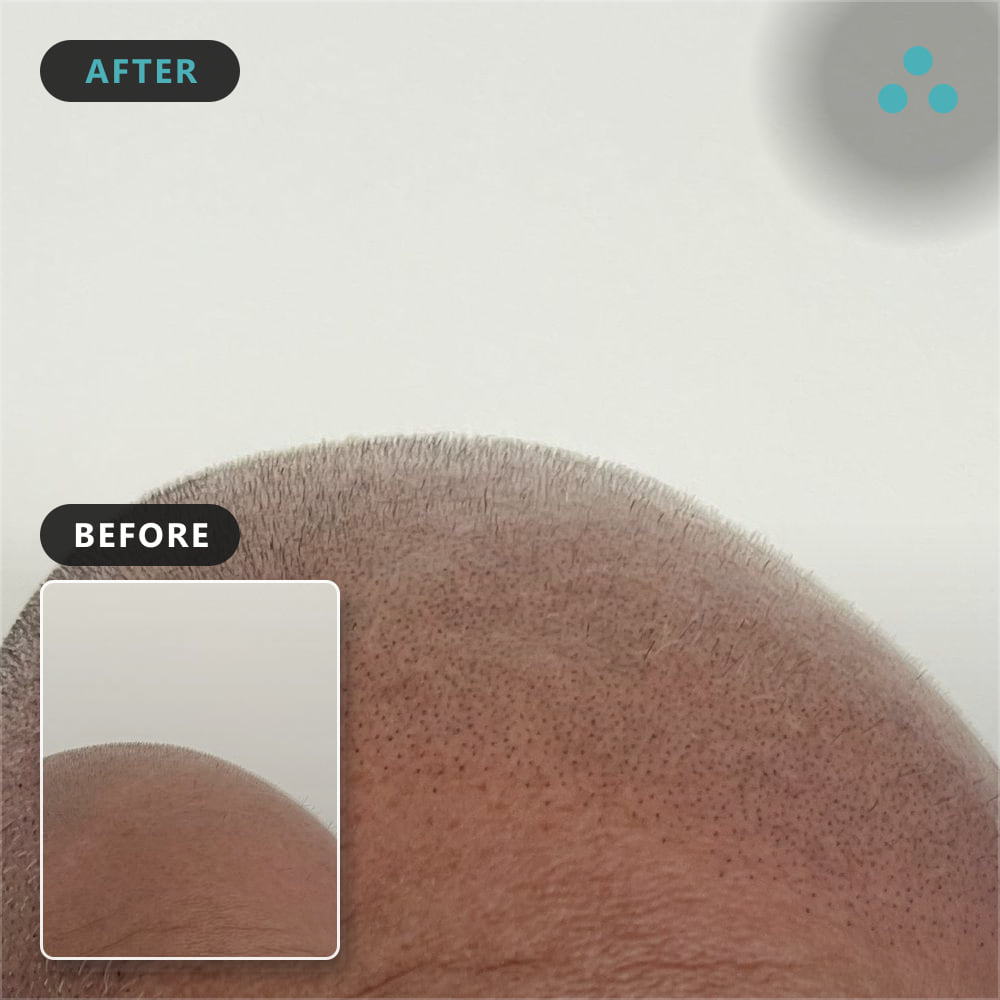
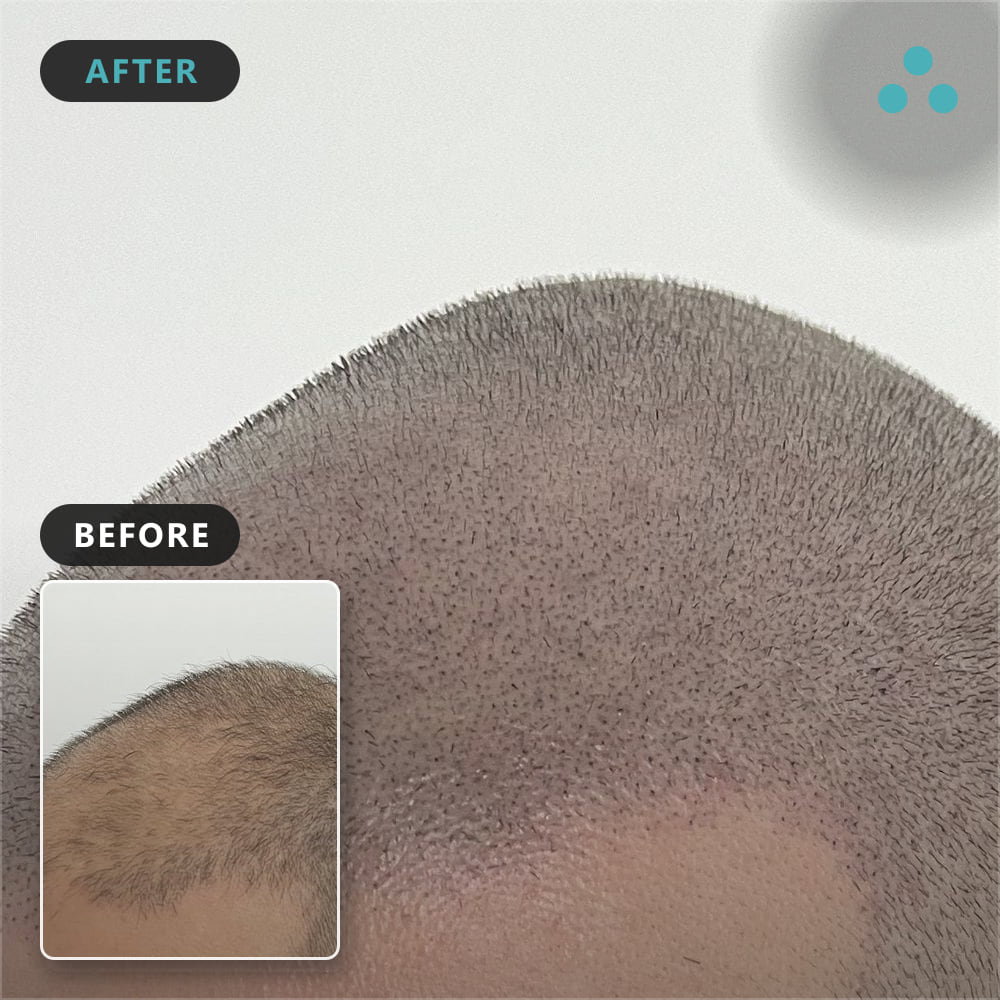
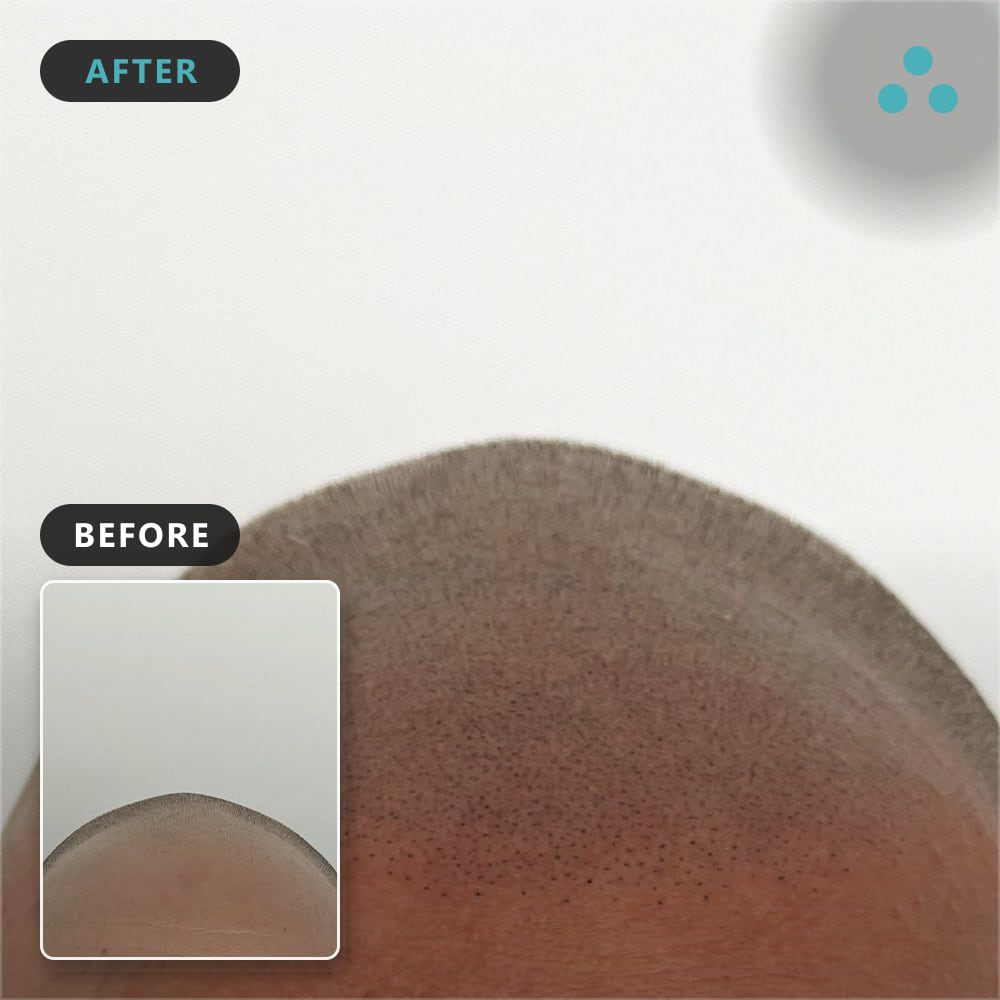
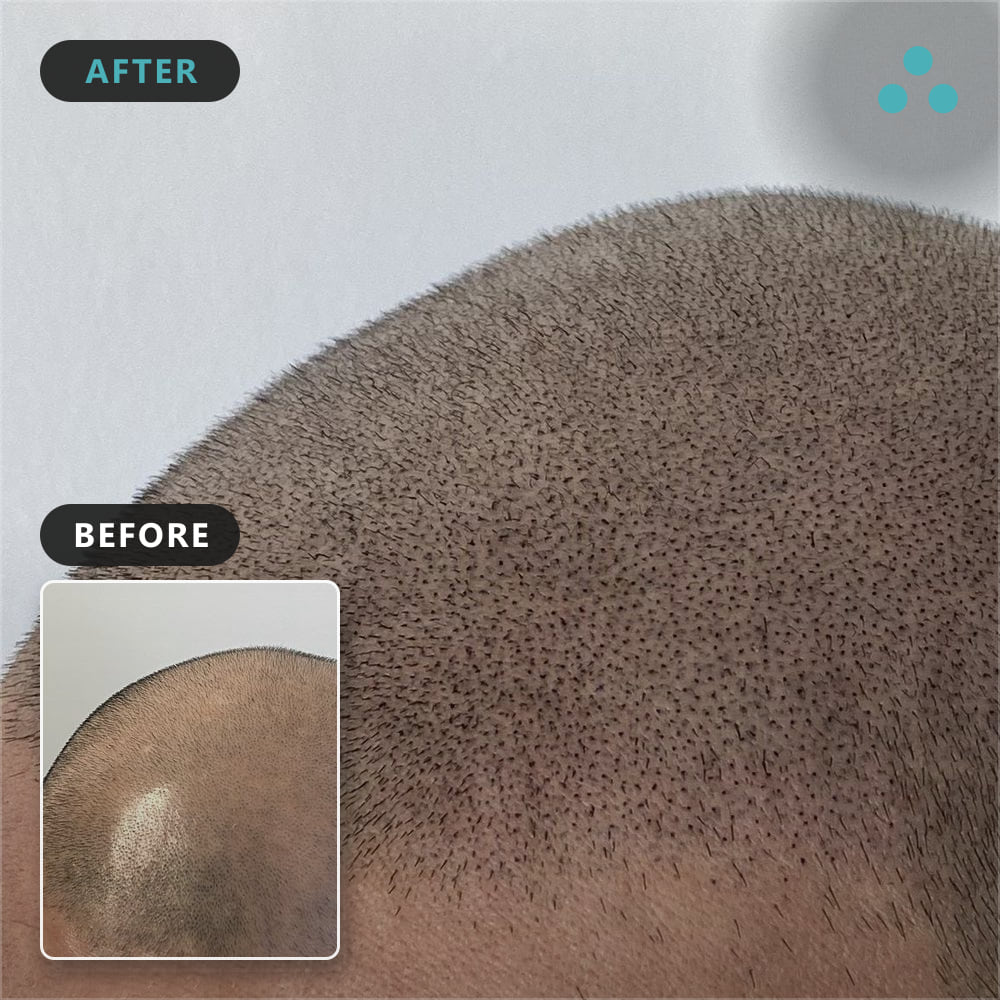
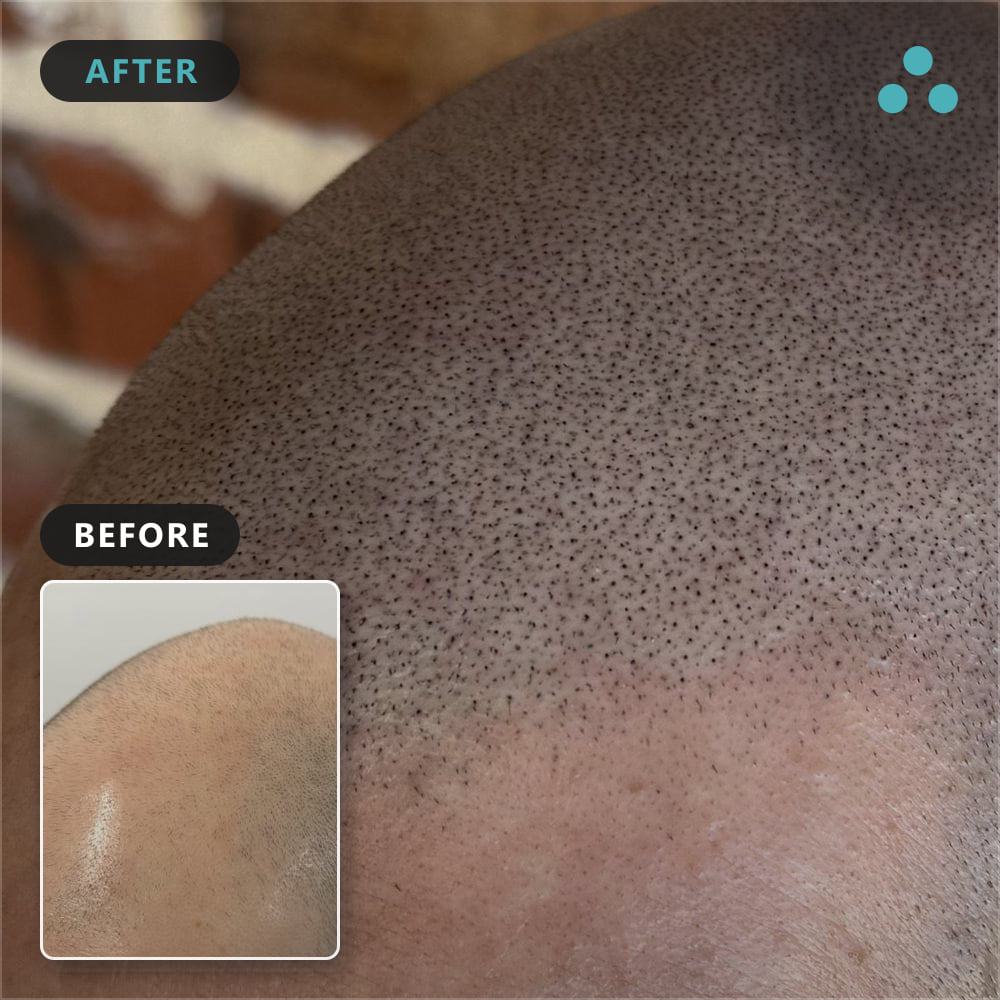
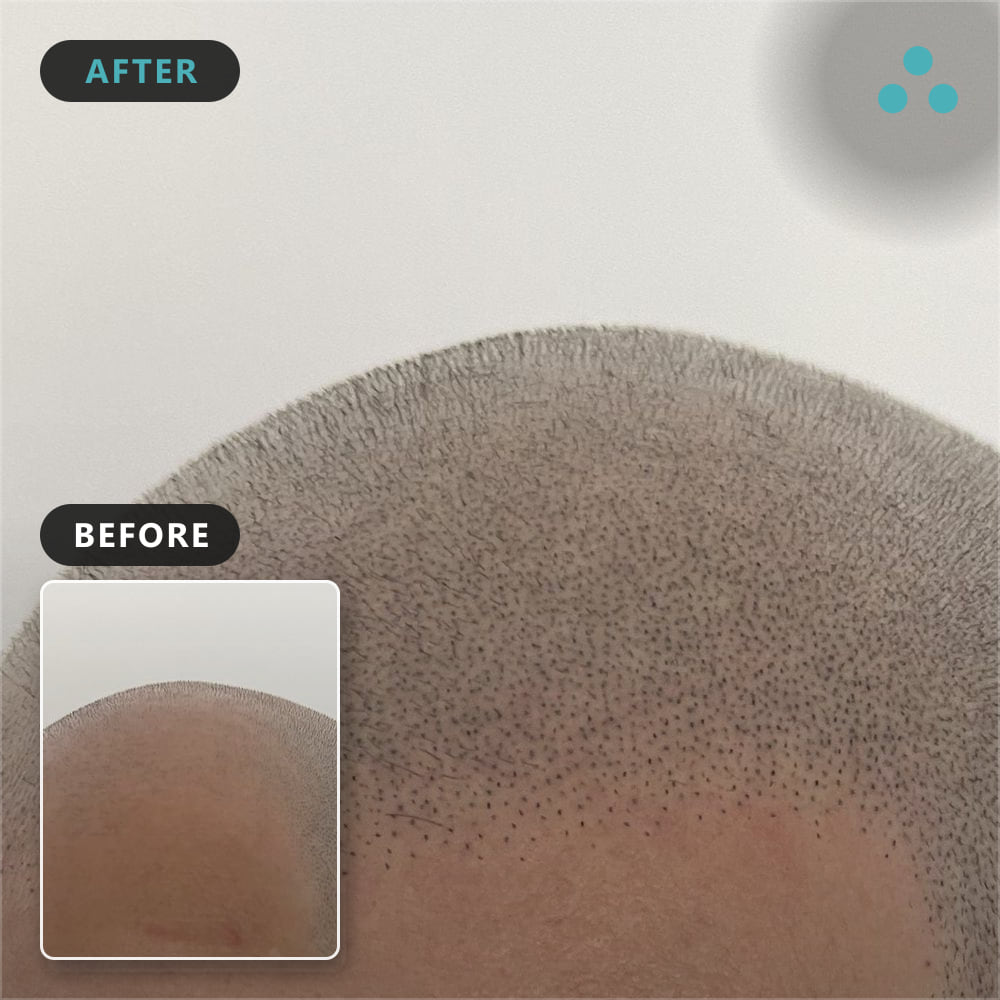
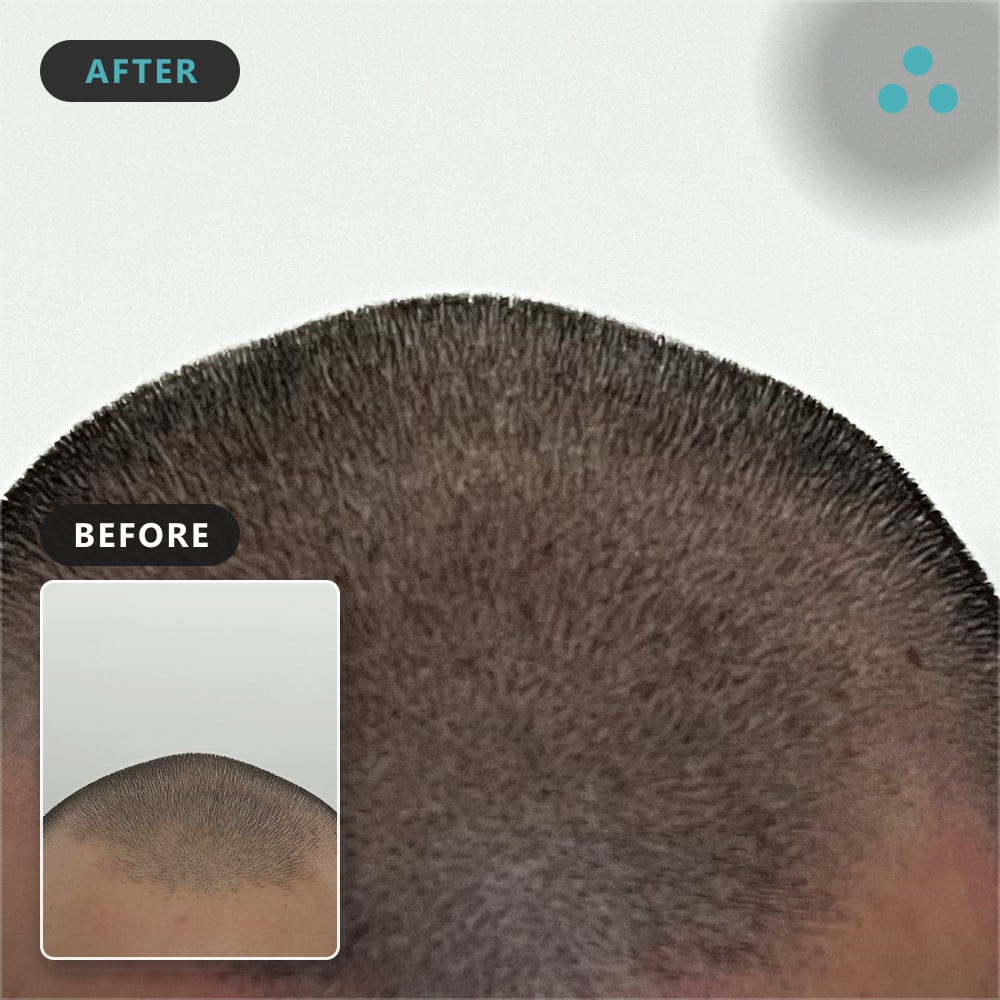
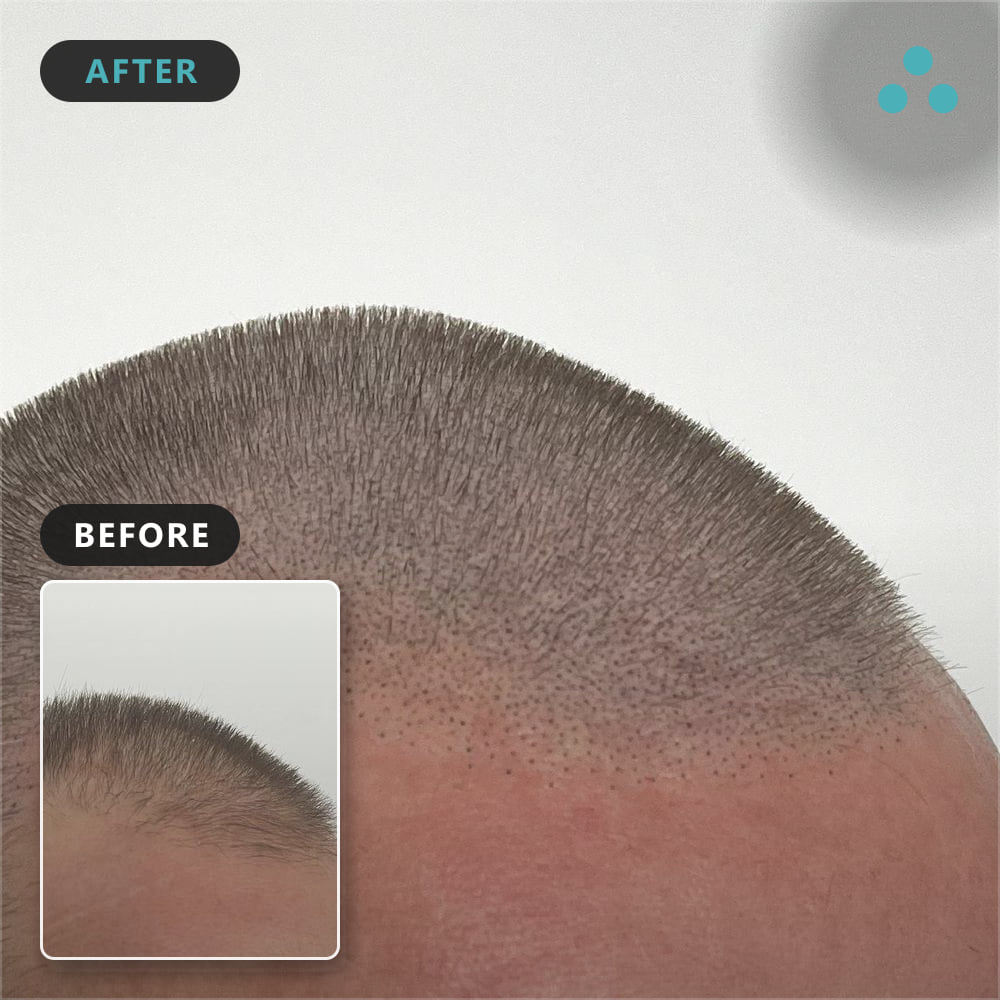
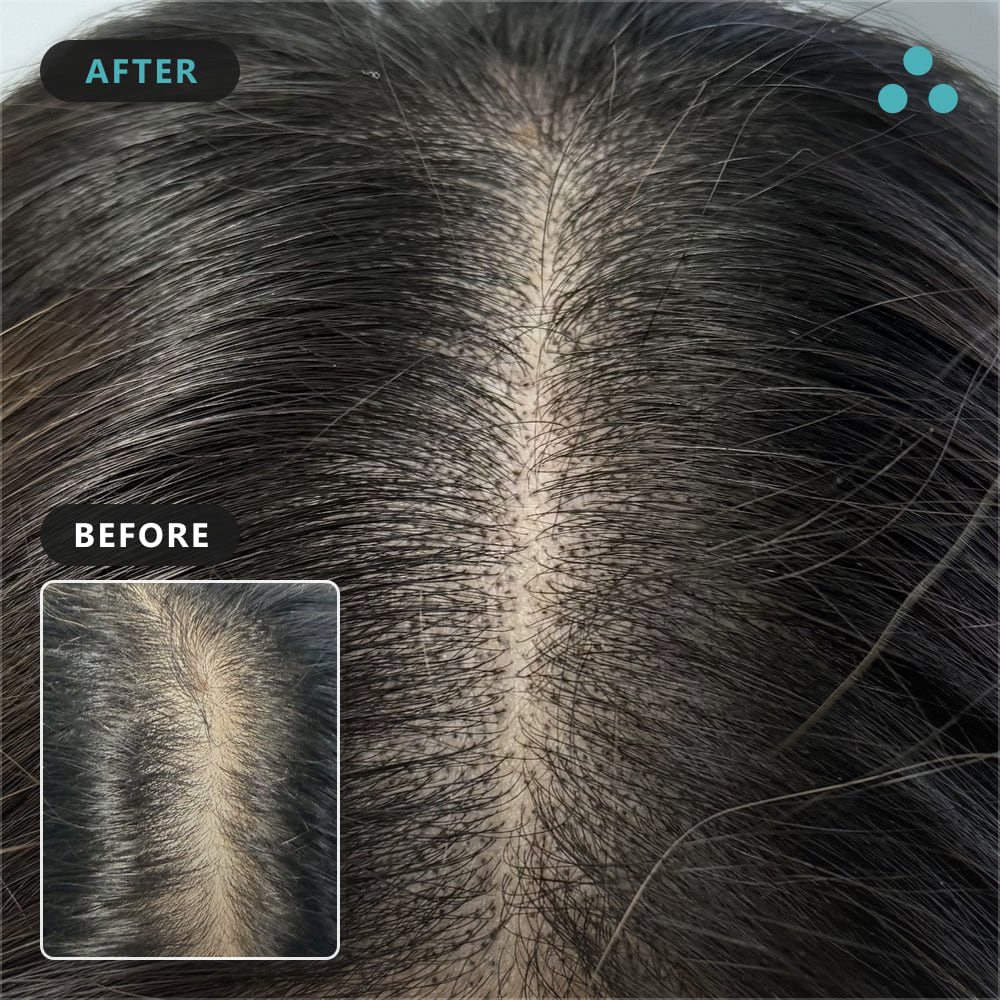
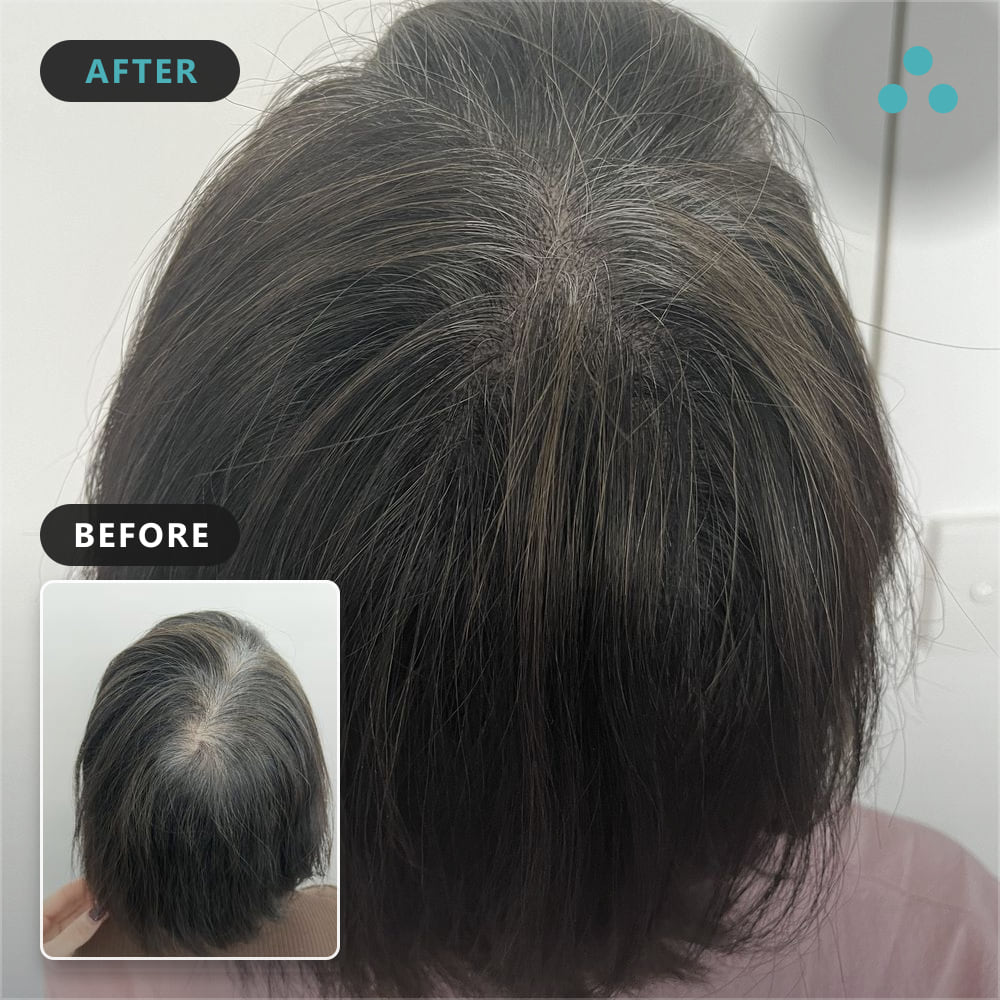
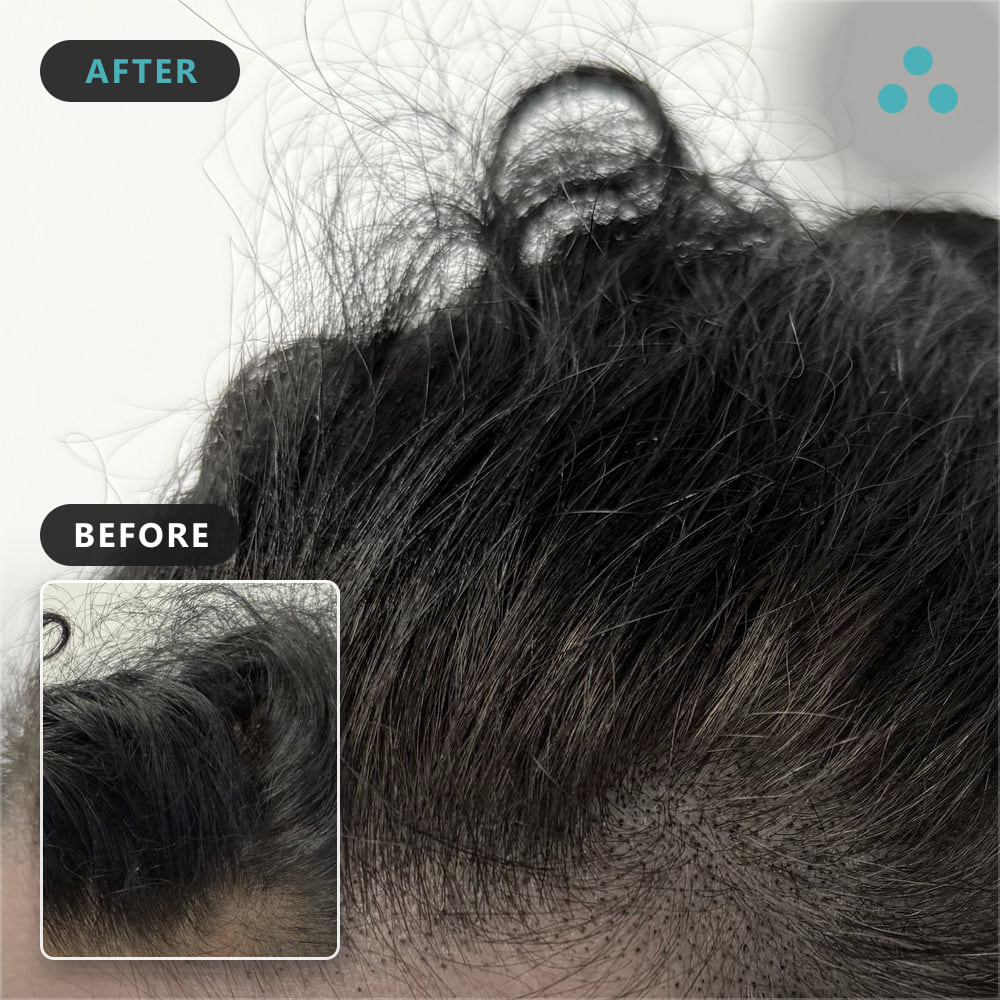
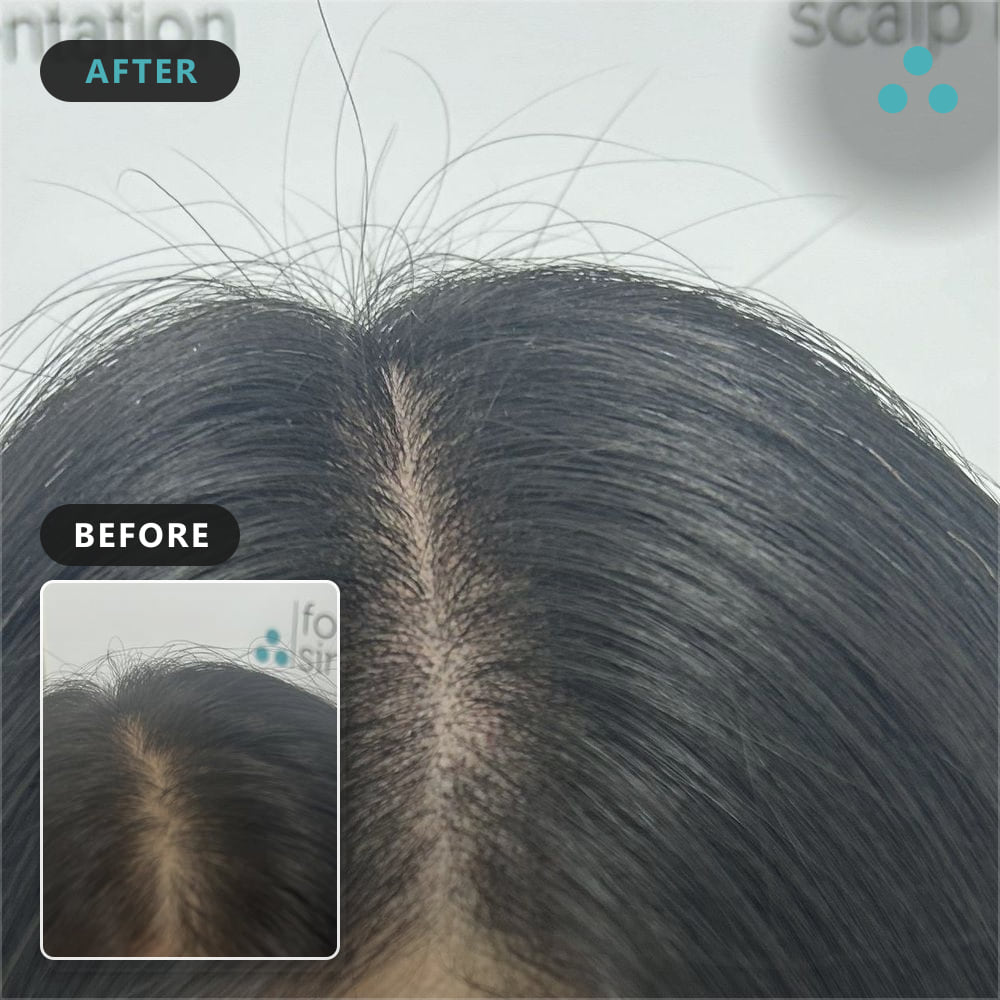
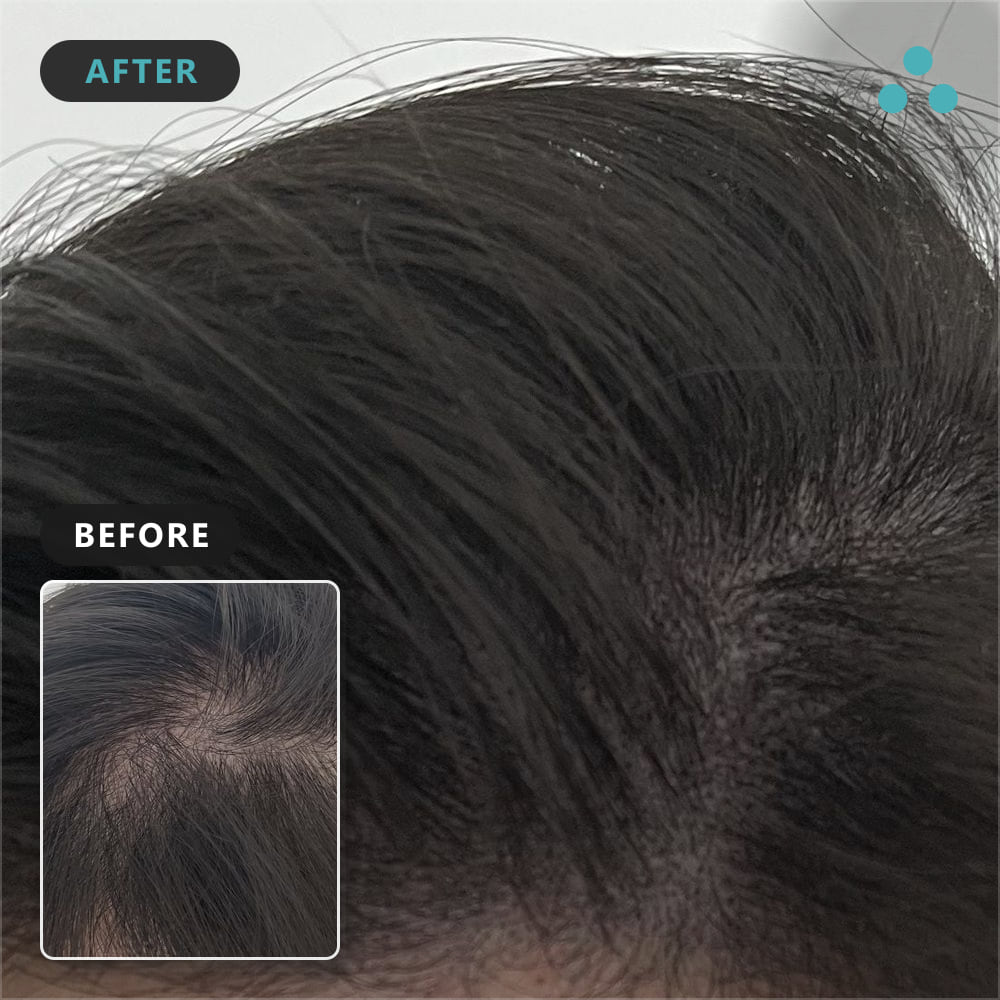
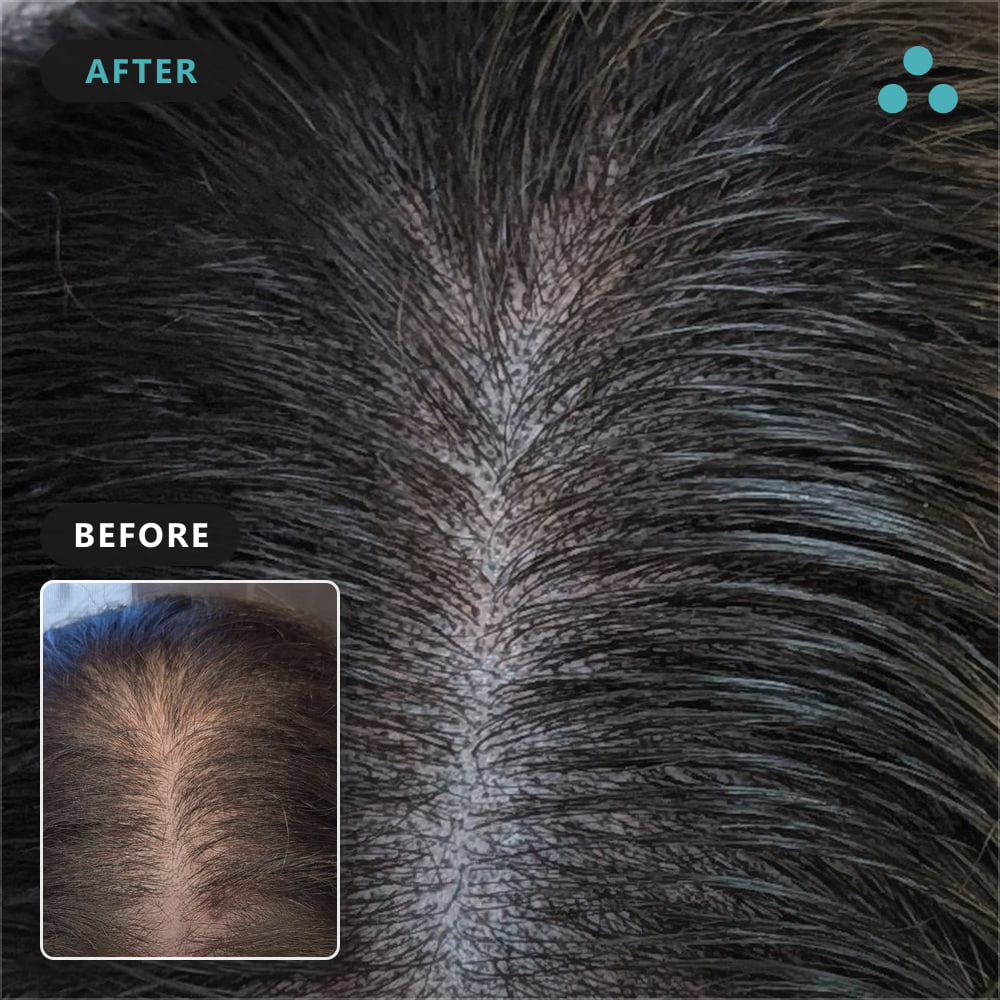
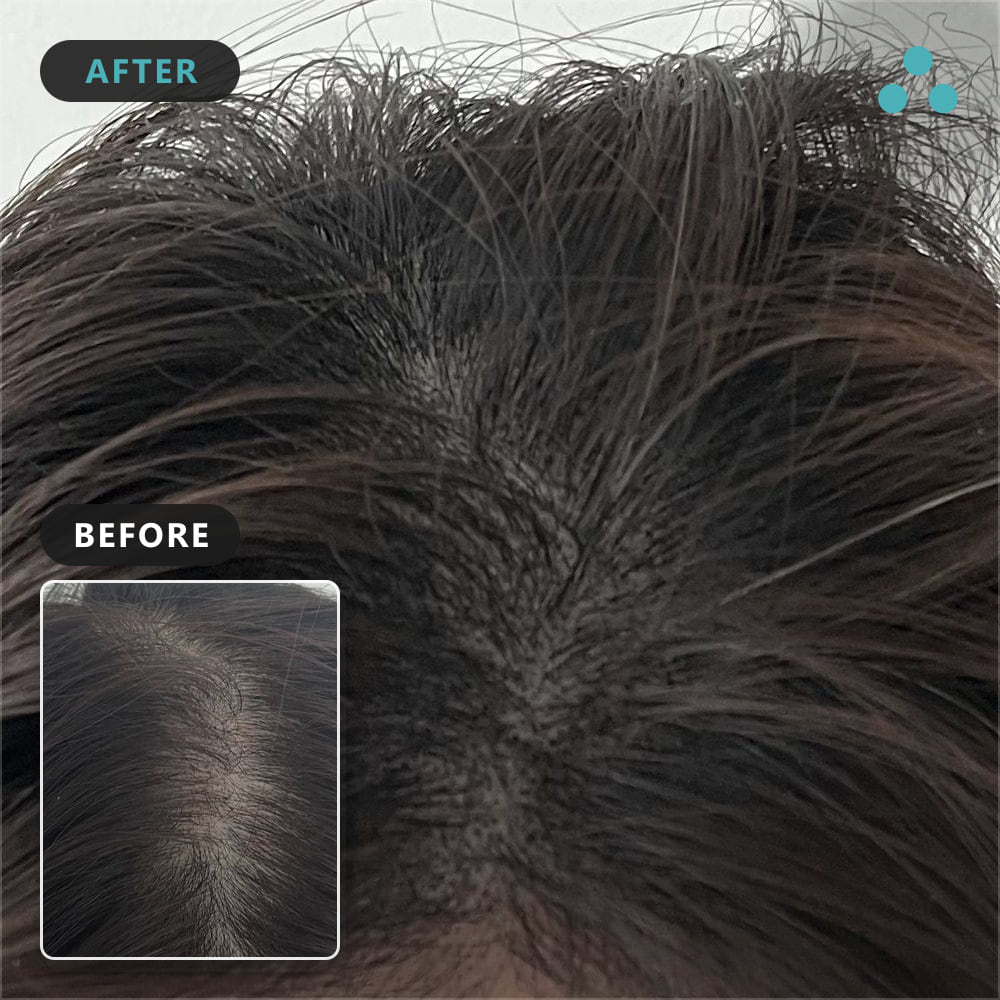
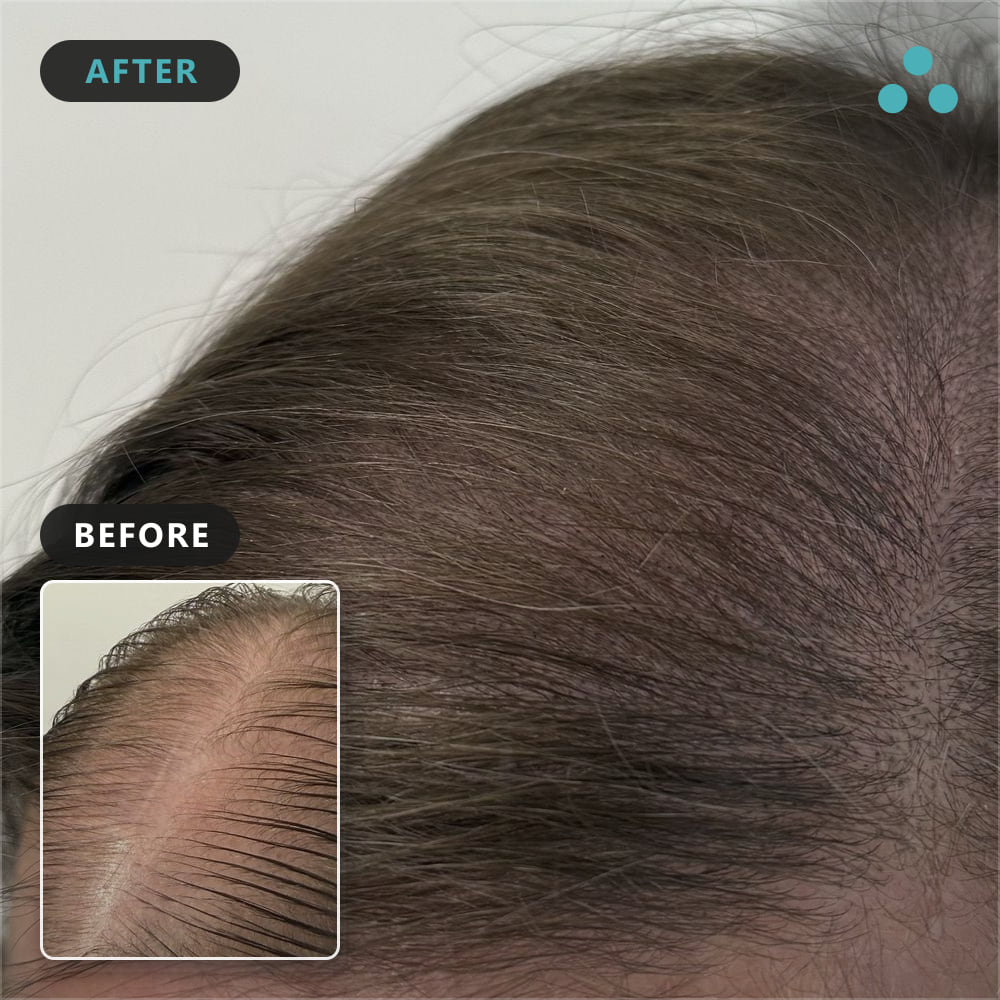
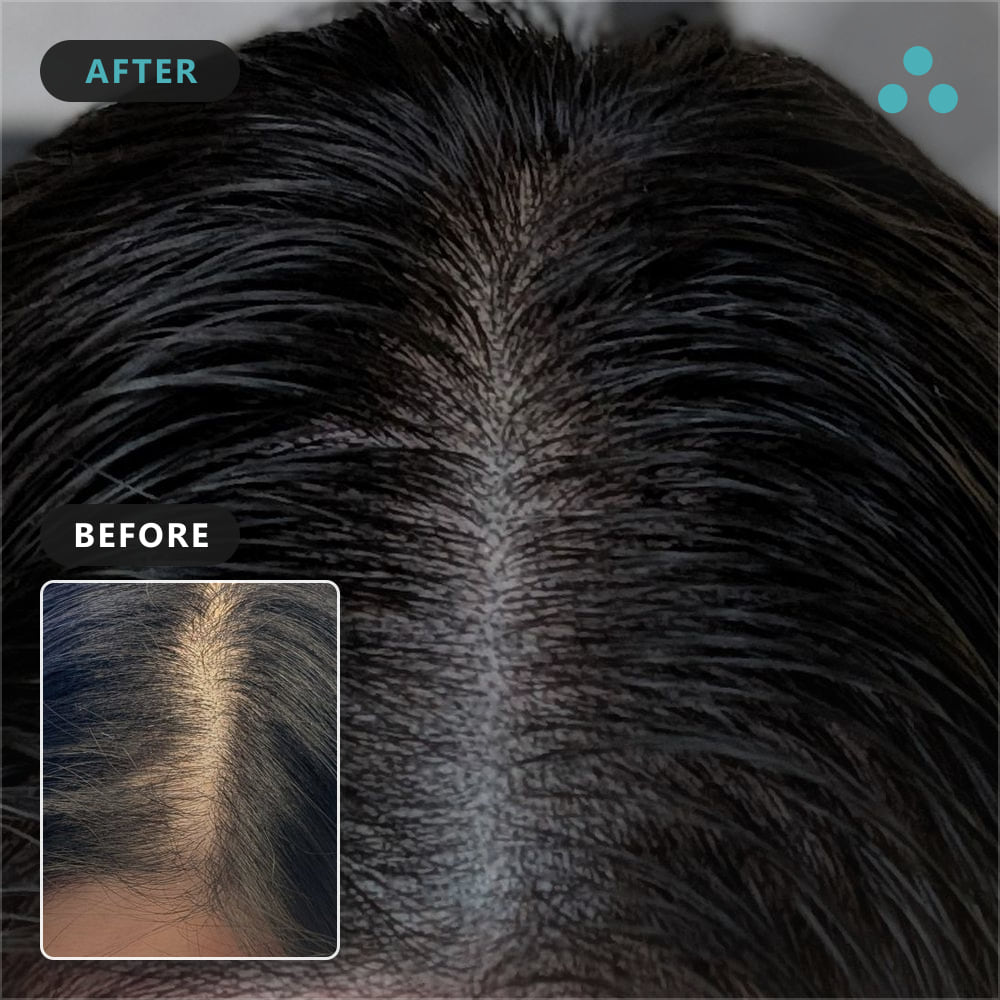
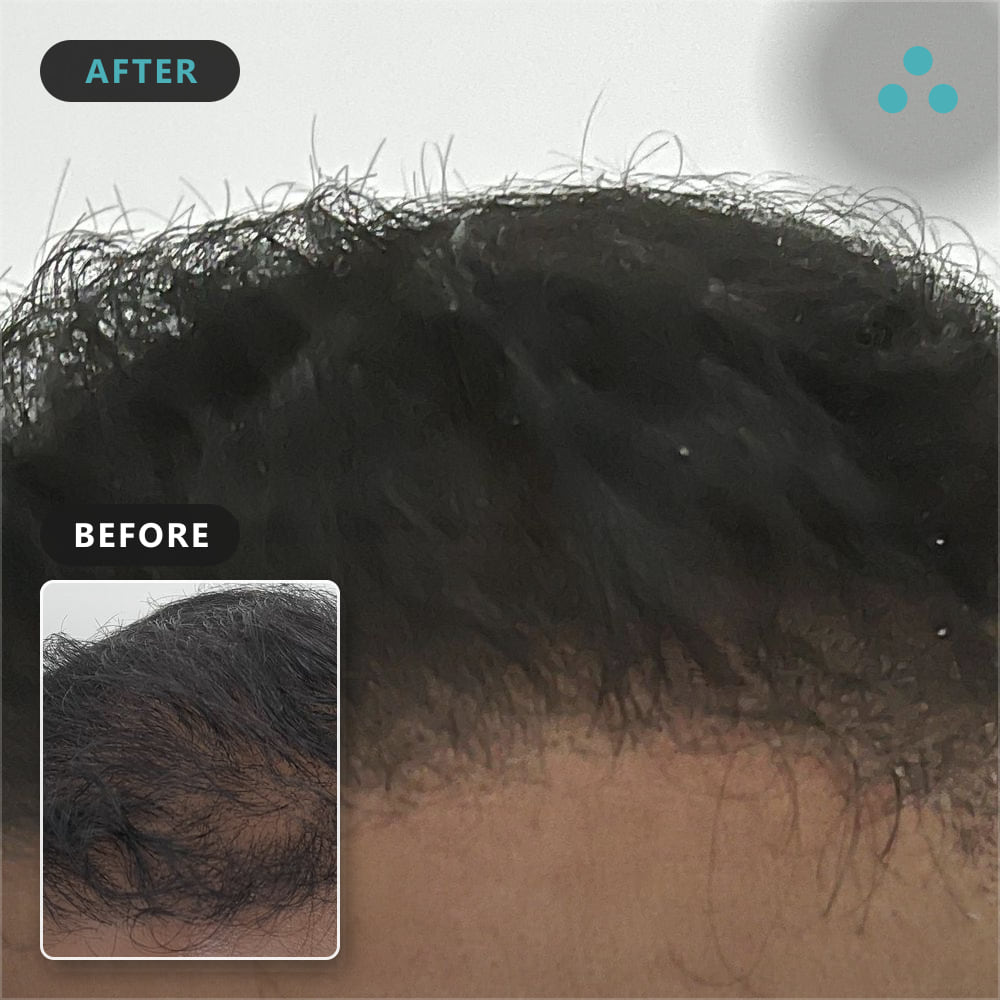
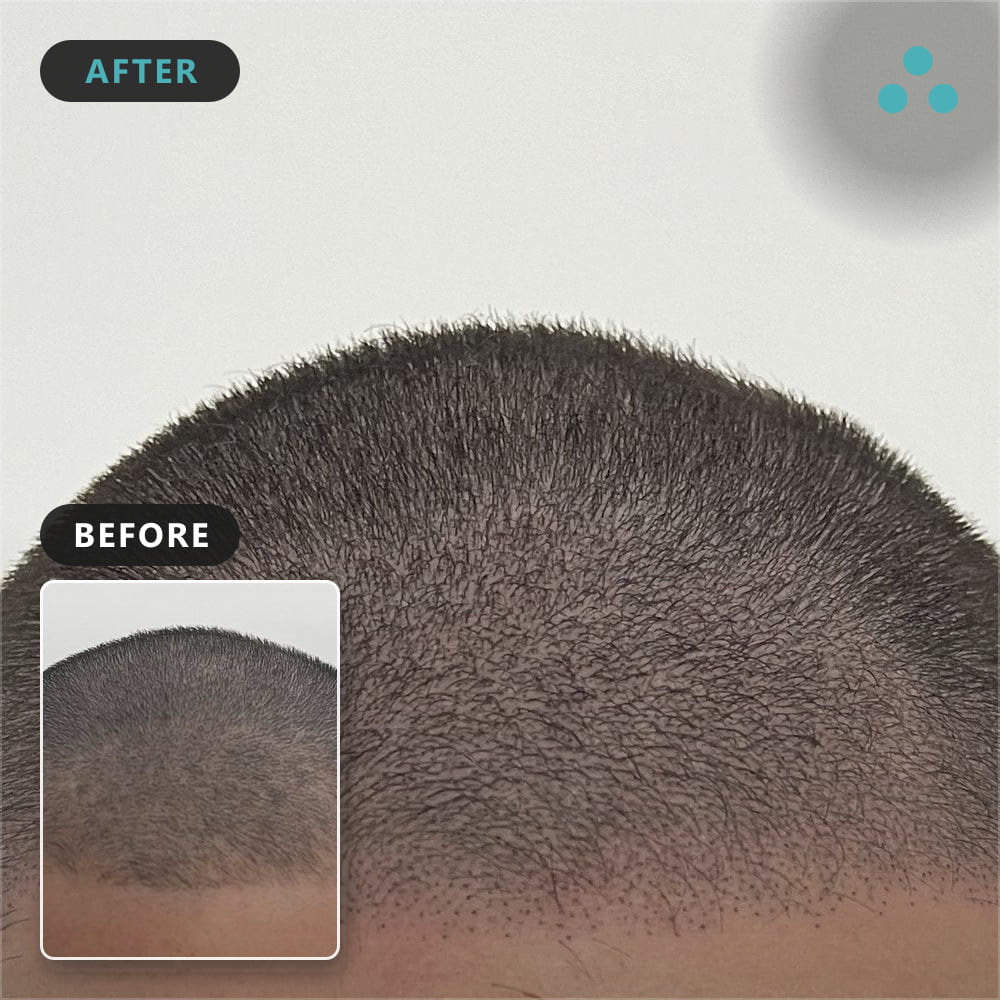
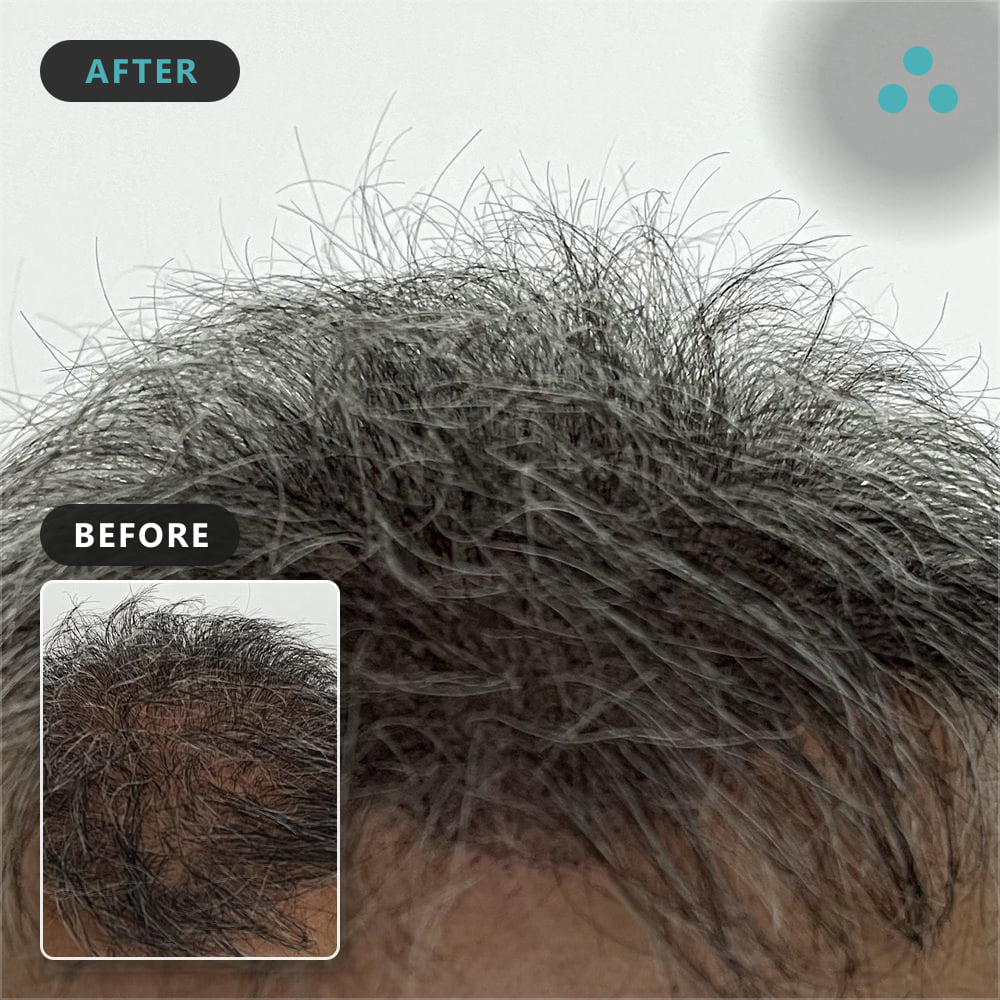
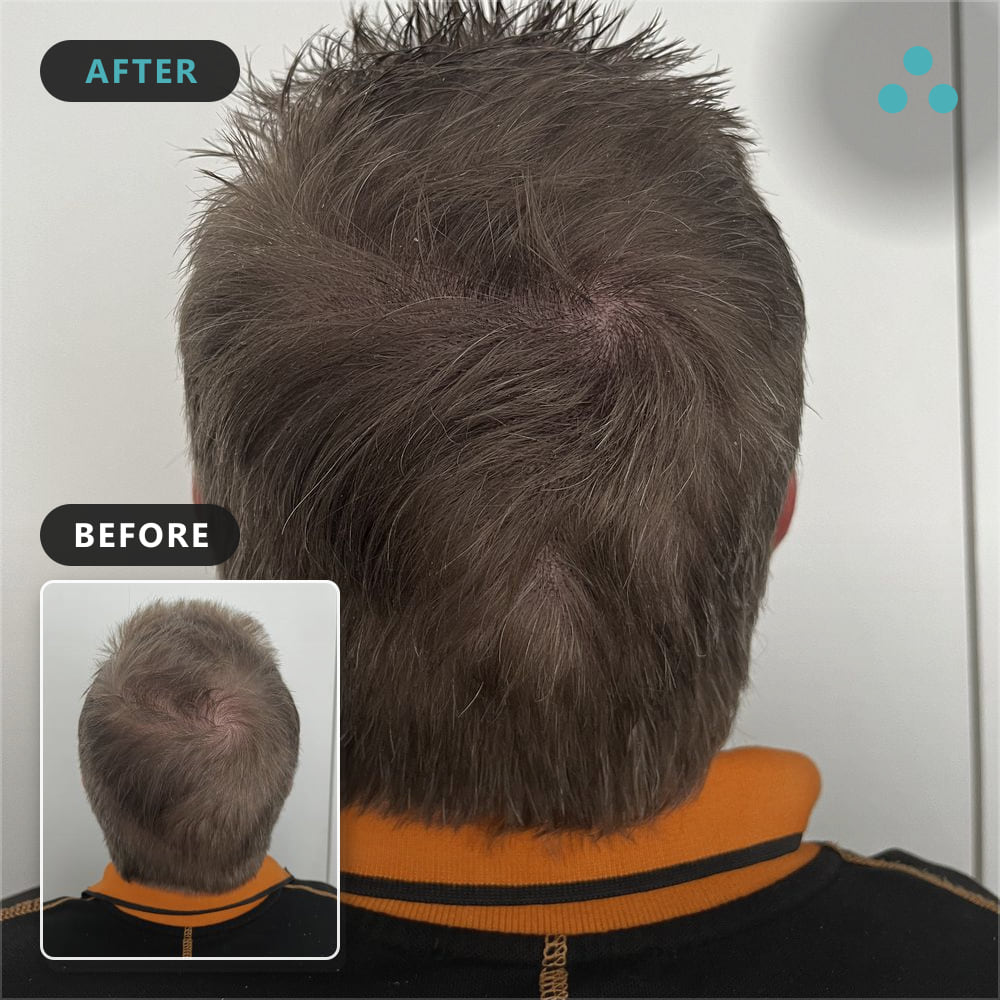
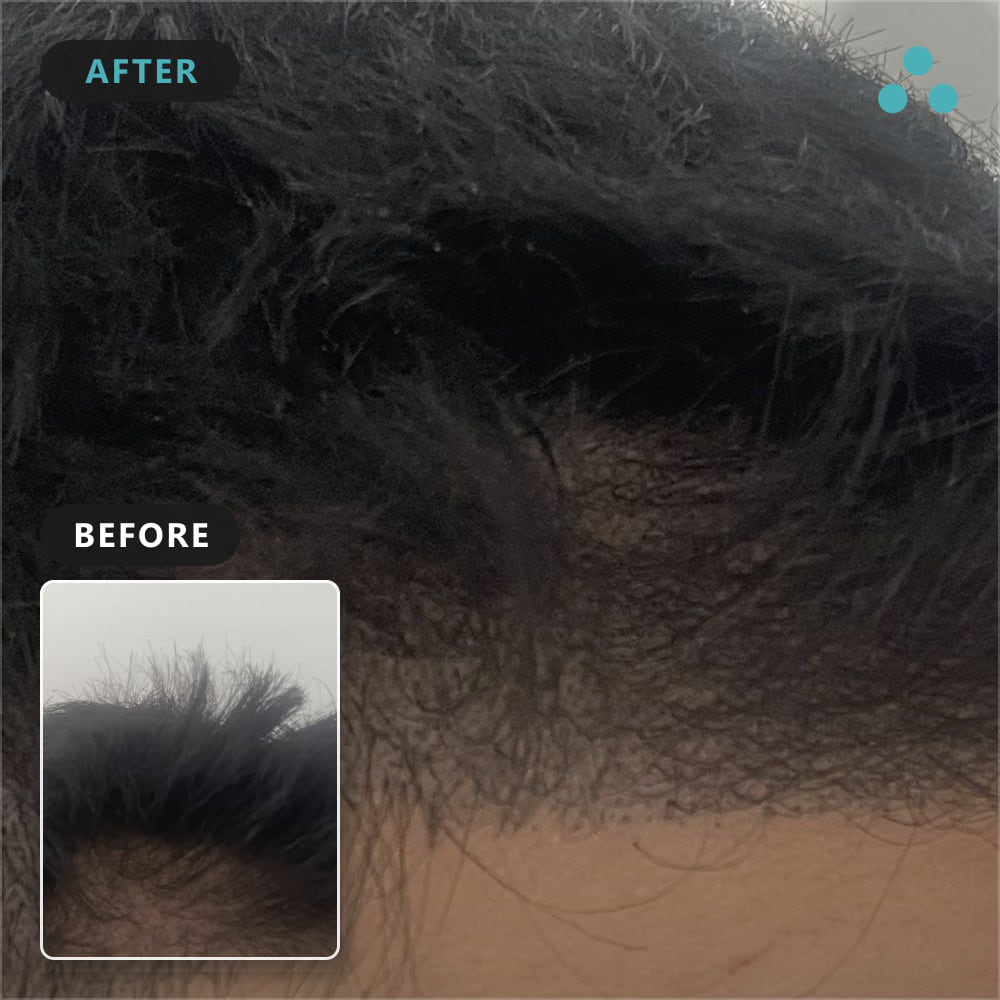
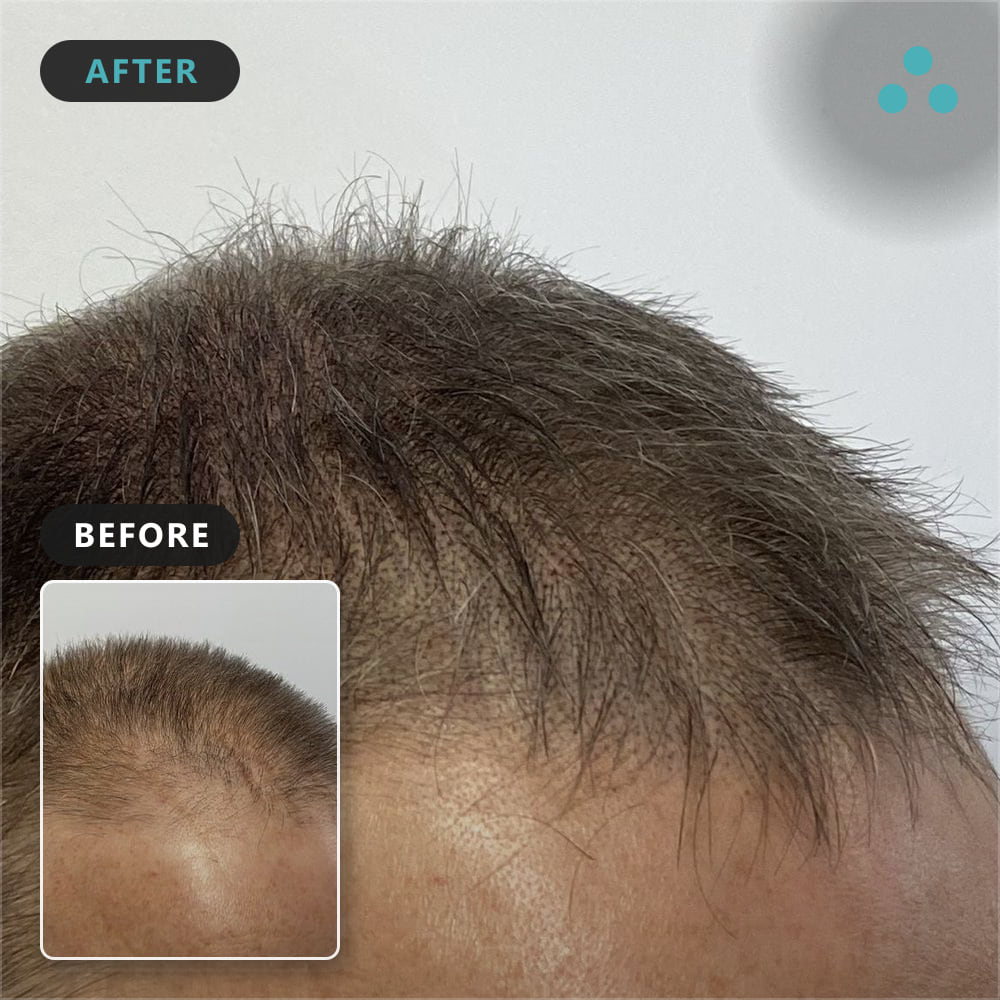
How do you read a scalp micropigmentation before and after honestly?
Lighting and healing stage are covered in the questions below, so start with what a photo rarely labels: which session the after belongs to. A course of SMP is built up over several sittings, and a photograph taken after the first shows a lighter, more open result than the finished work. Neither is wrong, but a gallery should say which one you are looking at.
- Session number. First sitting, completed course, or a refresh some years on.
- Distance and angle. Both frames should be shot from the same spot. A closer camera or a tilted head hides more than lighting does.
- Hair length. A before with some length left on and a freshly shaved after exaggerates the change.
- Skin condition. A wet or oily scalp reflects light and reads darker than it is. Dry and matte is the honest baseline.
None of this is about catching anyone out. It is about giving a scalp micropigmentation before and after the same scrutiny you would give any decision that lasts years, so that what you expect on the day is what you get.
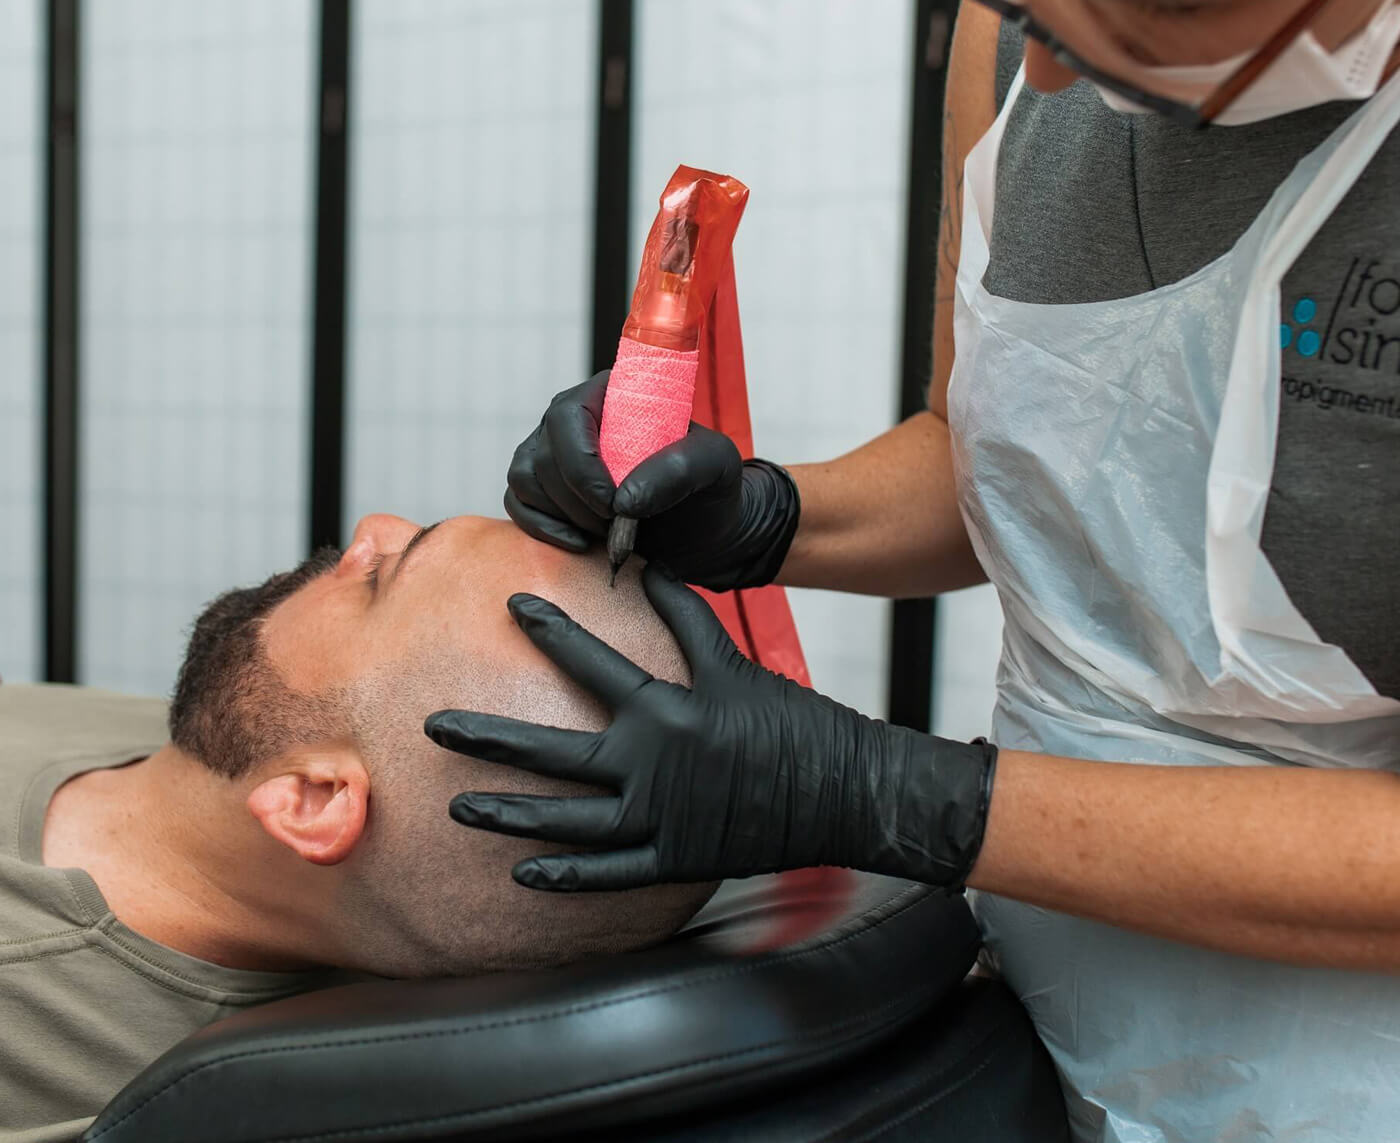
What do SMP results look like across different hair loss patterns?
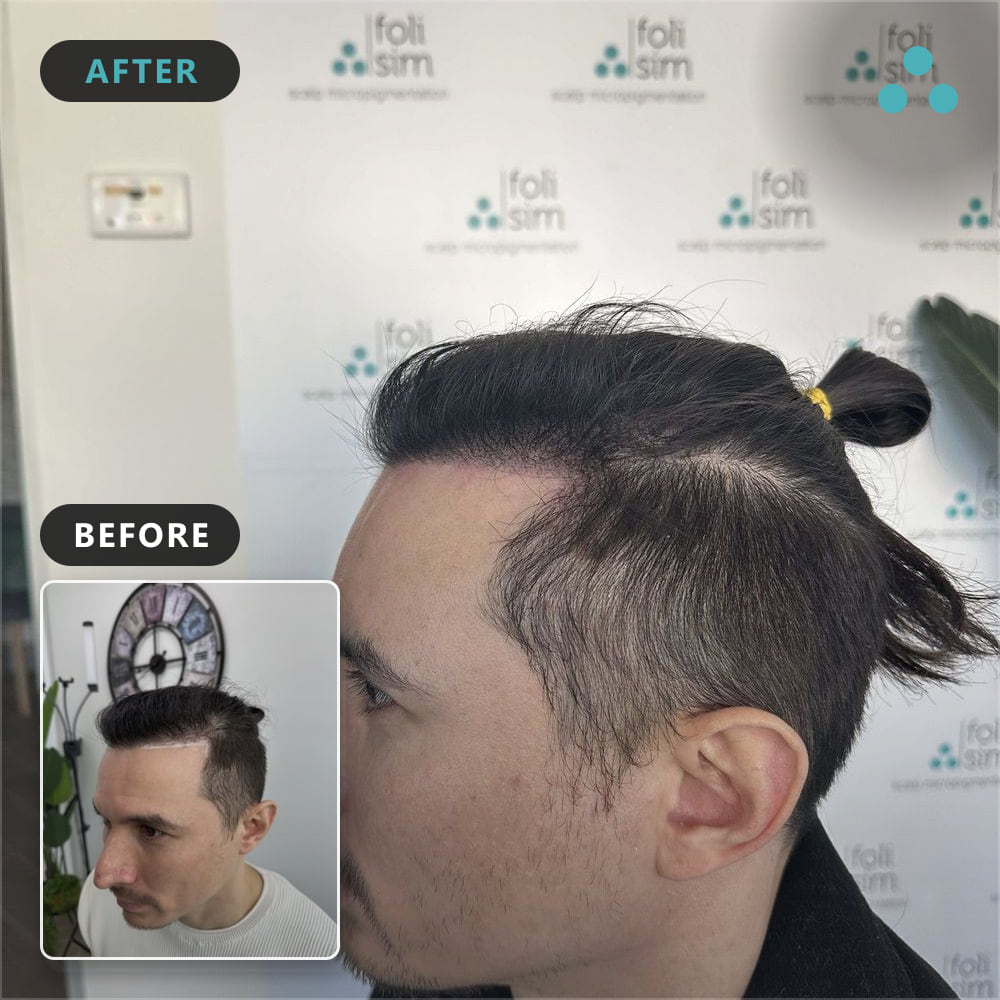
The three categories on this page are broad, and most men arrive with something more specific. In a scalp micropigmentation before and after of a receded hairline with the crown intact, the drawing does nearly all the work: where the new line sits, how soft its edge is, how the temples turn the corner. Judge those afters at the temple, not the centre of the forehead.
Crown thinning is the reverse. The hairline is left alone and the work is about grading pigment into hair that is still there, so the crown stops showing through. Diffuse thinning across the whole top sits between the two, and is where density work, described on our hair tattoo for men page, earns its keep.
Patchy loss from alopecia and the line left by a strip transplant are camouflage jobs rather than design jobs; scalp micropigmentation for scars explains how pigment is matched to the skin around it. When you compare SMP results, find the pattern closest to yours first and judge the artistry second.
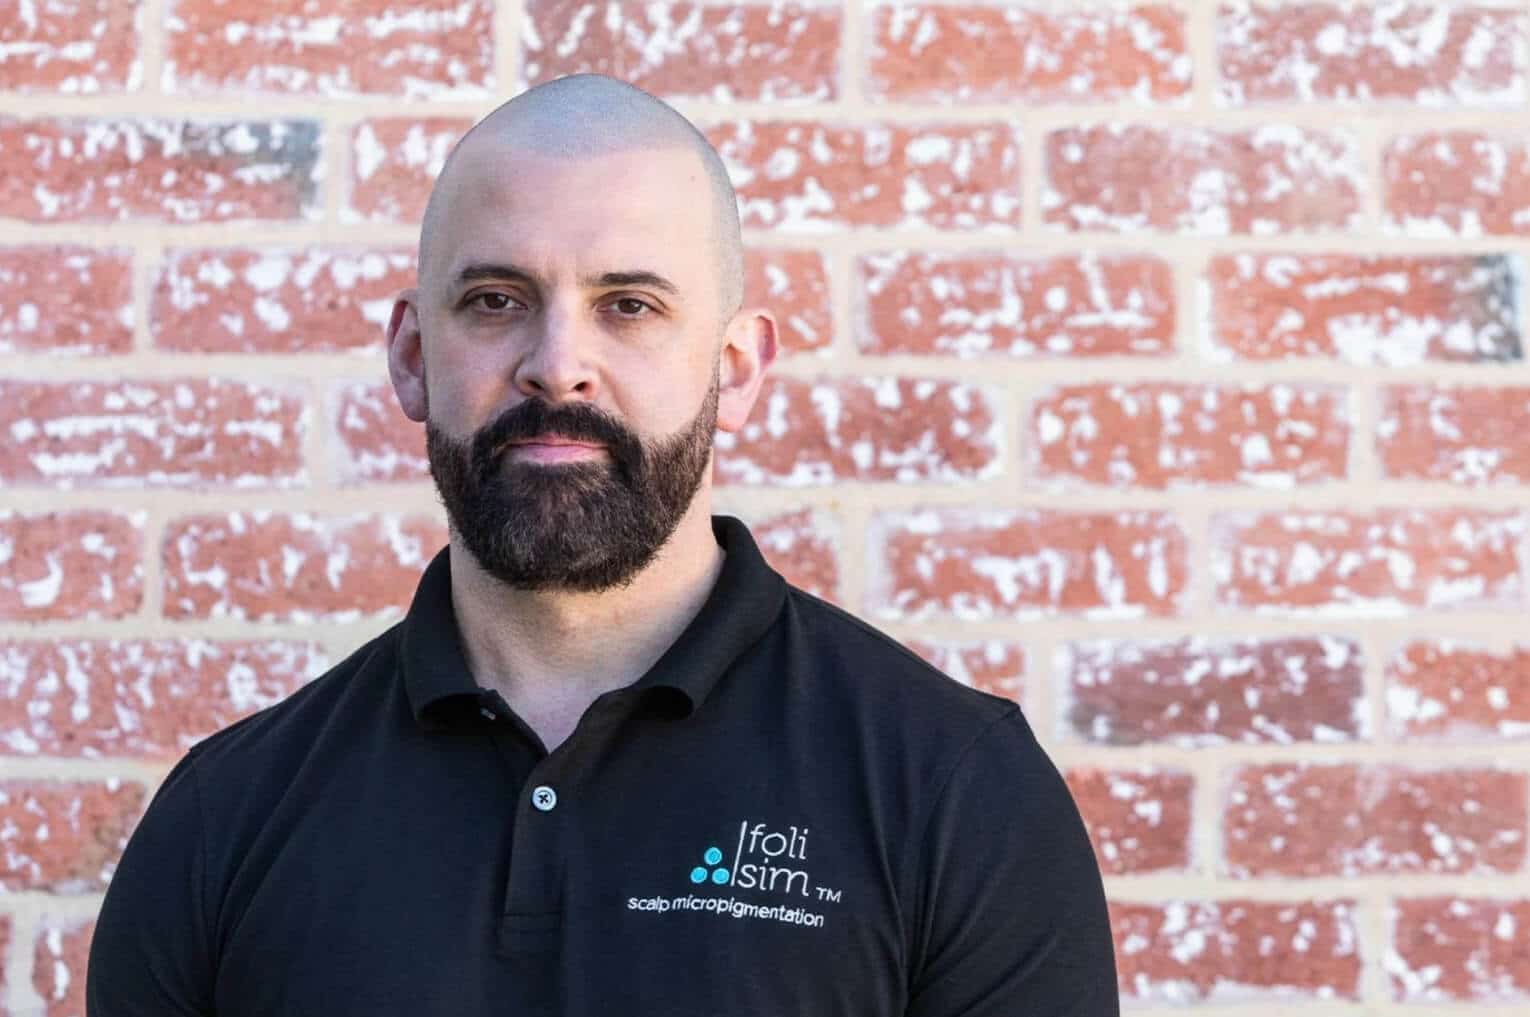
Why ask to see an older hair tattoo before and after as well?
A result is long-lasting, not fixed. Pigment softens over the years and the hair around it keeps changing, so an after taken a fortnight past the final session is only half the story. Ask to see work that is a few years old; our page on SMP touch-ups covers how it is refreshed. Ask for pairs in your own skin tone and hair colour too, greying hair included; the shade chosen for one man says nothing about what suits you.
Frequently asked questions
Yes. Every pair shown is work carried out by Foli Sim artists at our Perth, Sydney or Melbourne studios, published with the client's permission. We do not use stock imagery or supplier marketing photos. If a particular result interests you, ask at your consultation which artist did it and what the treatment plan involved: that context is more useful than the photo alone.
Lighting is the single biggest variable in SMP photography. Hard overhead light exaggerates contrast and can make density look heavier than it is; flat, diffuse light can make good work look faint. When comparing any clinic's gallery, look for pairs shot in similar conditions, and be sceptical of afters that are noticeably brighter or more flattering than the corresponding before.
After images are taken once the work has settled, not immediately post-session. Freshly applied SMP looks darker and slightly raised for a few days before the scalp heals and the pigment softens to its intended tone. Photographing at that early stage would misrepresent the result, so our afters reflect what the work looks like once healed.
Extensive hair loss is one of the situations SMP handles most convincingly, because a fully shaven look is uniform by design: there is no partial coverage to blend. What SMP will not do is create the appearance of long hair on a bald scalp. The realistic outcome is a sharp, natural-looking shaven or closely buzzed head, which the buzz-cut section of this gallery illustrates.
Start with the three categories on this page (buzz cut, thinning hair and scar treatments), then look for a before image with a similar hairline recession, crown size and hair colour to yours. Matching the before image matters far more than liking the after. If nothing matches closely, send us photos and we can point you to comparable cases.
They should, and that is worth checking in any gallery. A result photographed only from the front may be hiding an unresolved crown or a hard edge at the temples. Good SMP is planned in three dimensions, with density graded across the crown and the hairline softened so it reads naturally in profile as well as head-on.
Density SMP works by darkening the scalp showing through thinning hair, so the contrast between hair and skin drops and the hair reads as thicker. Up close you can see individual pigment impressions between the existing follicles: that is expected. At normal conversational distance, which is how anyone actually sees you, the effect is simply a fuller-looking head of hair.
Reduction, not erasure, is the honest framing. Pigment can bring a pale scar much closer to the tone of the surrounding scalp so it stops catching the eye. How far it can go depends on the scar's texture, width, age and whether it holds pigment evenly: raised or shiny scar tissue behaves differently from flat scarring. Our artists assess this in person before promising anything.
Your result will be built for your head, not copied from someone else's. Hairline shape is dictated by your facial proportions, existing hair pattern and age; density is limited by your skin tone and how much hair you still have. Bringing a reference photo to your consultation is genuinely useful, but treat it as a description of the style you like rather than a target to be matched.
Because SMP is used for two distinct goals. Shaved-head images are buzz-cut work, where SMP replaces the appearance of hair across the whole scalp. Images with visible hair are density work, where pigment sits underneath your existing hairstyle to reduce see-through areas. Neither is more advanced than the other: they simply answer different hair loss situations.
Yes. Foli Sim offers free digital SMP simulations: send through a few clear photos of your hair loss and our team produces a mock-up showing how a proposed hairline and density would look on you. It is the closest thing to a preview and costs nothing. Call 1300 668 490 or email info@folisim.com.au to request one.
Yes, and that is normal. Immediately after a session the pigment looks darker and more defined; over the following days the scalp heals and the tone softens noticeably. This is why sessions are spaced roughly 7 to 14 days apart: your artist needs to see the settled result before building the next layer of density on top of it.
Explore next
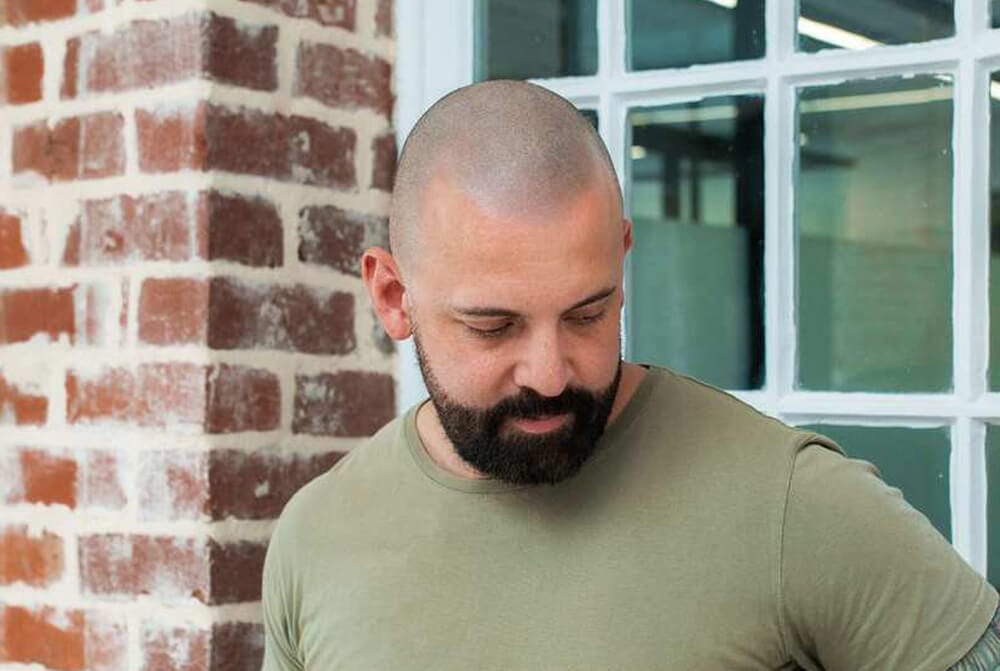
Hair tattoo for men
A hair tattoo for men restores hairlines and density without surgery.
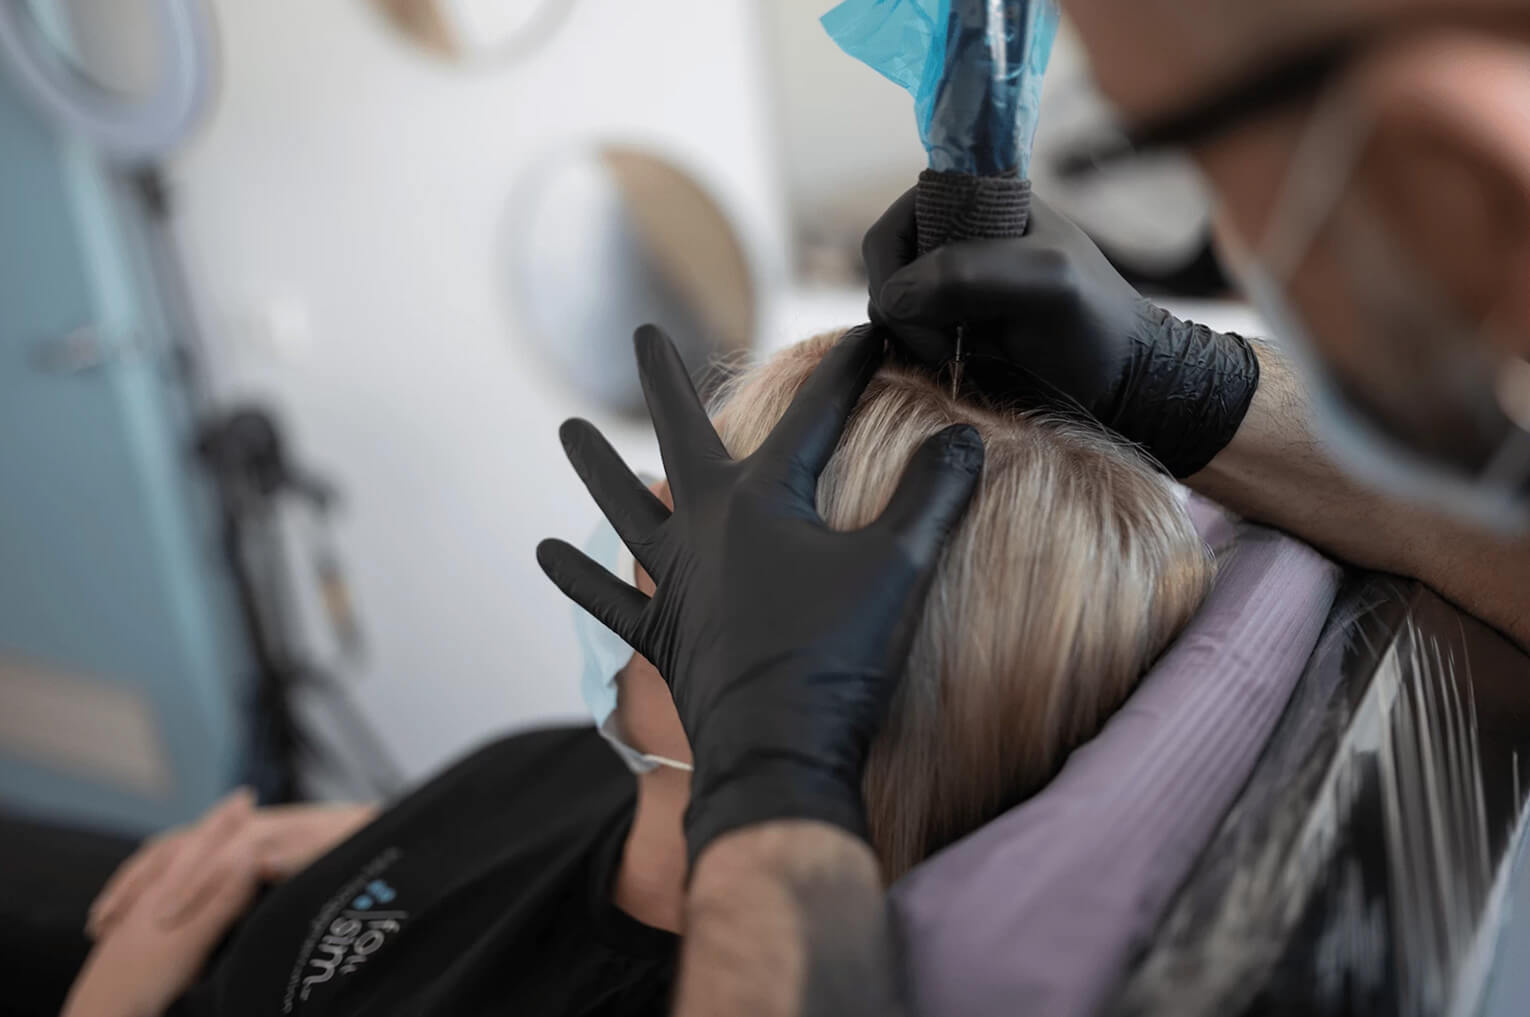
Scalp micropigmentation for women
Scalp micropigmentation for women creates the look of fuller density through thinning hair, with no…
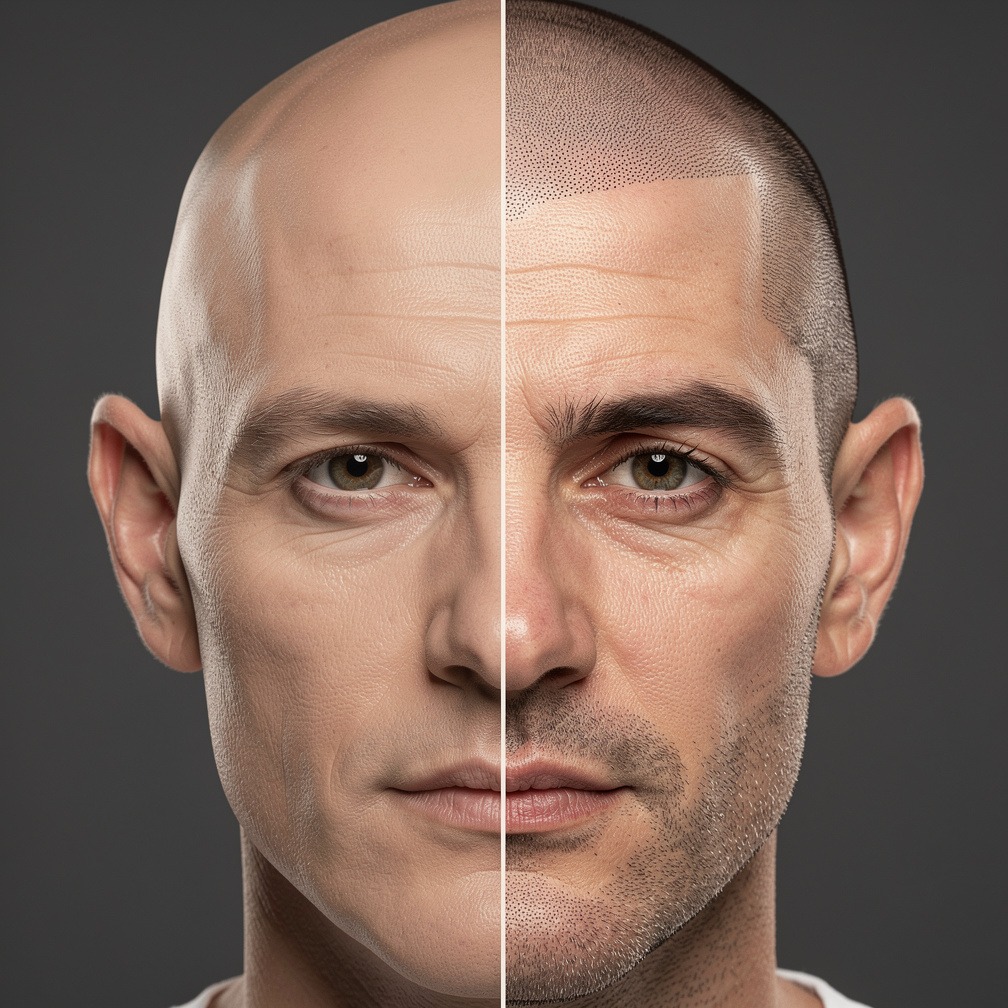
Free SMP simulation
Get a free SMP simulation from your own photos and see how scalp micropigmentation could look before you…
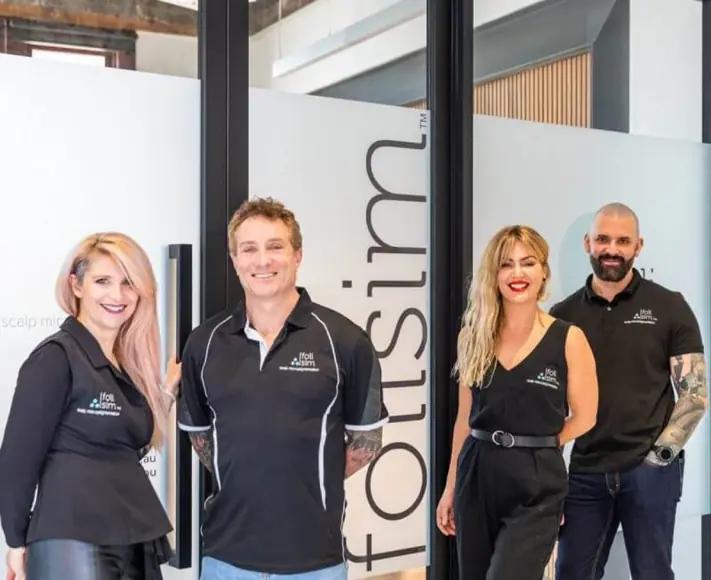
Scalp micropigmentation reviews
Read the latest scalp micropigmentation reviews for Foli Sim: rated 5.0 from 700+ independent Google…
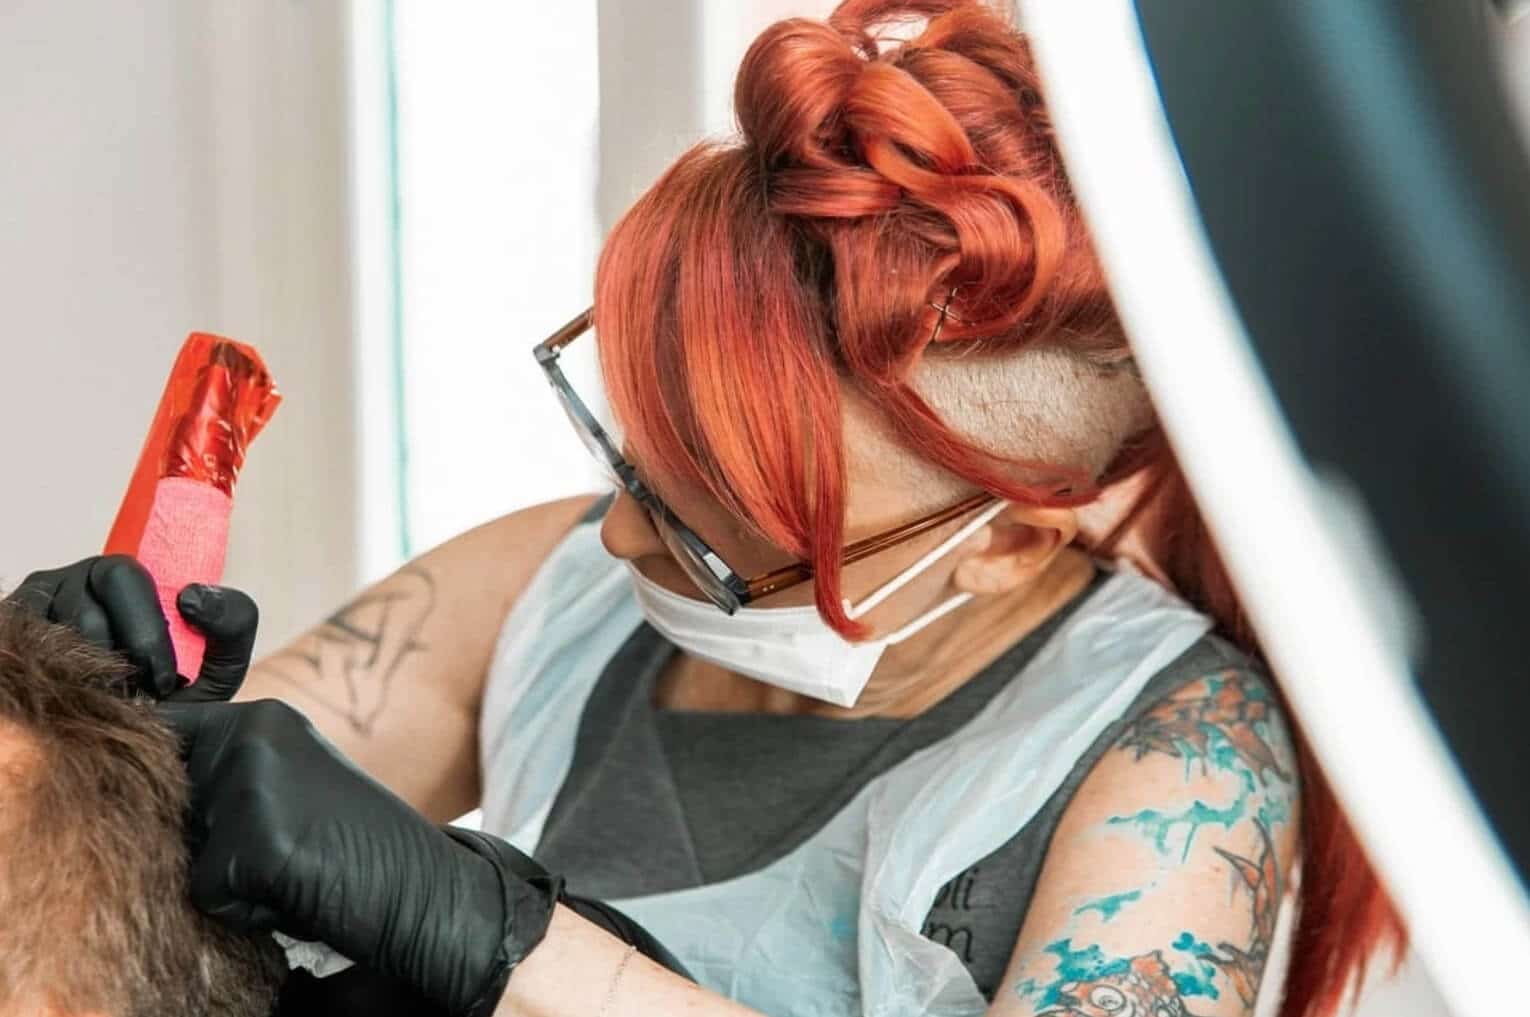
Scalp micropigmentation for scars
Scalp micropigmentation for scars camouflages FUT strip scars, FUE dots and injury scarring by blending…

Scalp micropigmentation cost
What drives scalp micropigmentation cost in Australia: coverage area, number of sessions and scarring.

Book a free consultation
Tell us what you are dealing with and we will talk you through whether SMP is right for you, in person at Perth, Sydney or Melbourne, or by phone or video. No obligation, and no pressure.
Call us
1300 668 490Text or WhatsApp
0425 869 926Book online
Request a consultation